Loading...
Searching...
No Matches
Tutorial: Implement the OSC protocol in your app

Learn how to harness the Open Sound Control protocol to connect several applications together over a network. Send and receive interaction data between applications.

Level: Intermediate

Platforms: Windows, macOS, Linux, iOS, Android

Classes: OSCSender, OSCReceiver, OSCReceiver::Listener, OSCReceiver::ListenerWithOSCAddress, OSCMessage, OSCBundle

Getting started

There are several demo projects to accompany this tutorial. Download links to these projects are provided in the relevant sections of the tutorial.

If you need help with this step in each of these sections, see Tutorial: Projucer Part 1: Getting started with the Projucer.

The demo projects

The demo projects provided with this tutorial present different applications necessary for OSC interactions. In summary, these applications are:

  • OSC Sender: The sender application contains a rotary knob and sends information out to other instances.
  • OSC Receiver: The receiver application connects to the sender instance and receives the information to process and display.
  • OSC Monitor: The monitor application also connects to the sender instance but monitors and logs the interactions more precisely.
Note
Only one sender and one receiver/monitor application should be open at the same time for this tutorial to function properly.
The code presented here is broadly similar to the OSC demo apps from the JUCE Examples.

OSC Sender

Download the demo project for this section here: PIP | ZIP. Unzip the project and open the first header file in the Projucer.

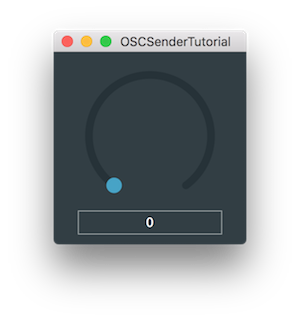
When completed, the OSC sender application will display a single rotary knob that we can interact with when launched:

OSC sender app window

OSC Sender Implementation

Let's start by implementing the sender application.

In the MainContentComponent class, start by declaring private member variables for this application like so:

juce::Slider rotaryKnob; // [1]
juce::OSCSender sender; // [2]
};

Add a Slider object to capture user interactions [1] and an OSCSender object to connect to a receiver later on [2].

In the class constructor, set the slider parameters and attempt to connect to the network like follows:

MainContentComponent()
{
rotaryKnob.setRange (0.0, 1.0);
rotaryKnob.setSliderStyle (juce::Slider::RotaryVerticalDrag);
rotaryKnob.setTextBoxStyle (juce::Slider::TextBoxBelow, true, 150, 25);
rotaryKnob.setBounds (10, 10, 180, 180);
addAndMakeVisible (rotaryKnob); // [3]
// specify here where to send OSC messages to: host URL and UDP port number
if (! sender.connect ("127.0.0.1", 9001)) // [4]
showConnectionErrorMessage ("Error: could not connect to UDP port 9001.");
setSize (200, 200);
}
  • [3]: Set the range, style and bounds of the slider and add the Component to this class.
  • [4]: Here we attempt to connect to the localhost or IP address "127.0.0.1" on UDP port number 9001 by calling the connect() function on the OSCSender object. If the connection fails, we call the private function showConnectionErrorMessage() declared later to display the error message to the user.
Note
For the purpose of this tutorial, we connect to the local network of our development machine on an arbitrary port number that we specify later on in the receiver.

Next, implement the Slider::onValueChange callback for the Slider object to send the OSC message to the receiver application like this:

rotaryKnob.onValueChange = [this]
{
// create and send an OSC message with an address and a float value:
if (! sender.send ("/juce/rotaryknob", (float) rotaryKnob.getValue()))
showConnectionErrorMessage ("Error: could not send OSC message.");
};

In the lambda function, send the OSC message using the send() function on the OSCSender object with the address and the rotary knob value [5]. The address provided here as "/juce/rotaryknob" allows us to classify messages in the receiver later on. If the message fails to send, we call the same helper function showConnectionErrorMessage() to display the error.

We implement this function by displaying the error text in a dialog box asynchronously using the function AlertWindow::showMessageBoxAsync():

void showConnectionErrorMessage (const juce::String& messageText)
{
juce::AlertWindow::showMessageBoxAsync (juce::AlertWindow::WarningIcon,
"Connection error",
messageText,
"OK");
}

The sender implementation is now complete.

Note
The source code for this modified version of the code can be found in the OSCSenderTutorial_02.h file of the demo project.

OSC Receiver

Download the demo project for this section here: PIP | ZIP. Unzip the project and open the first header file in the Projucer.

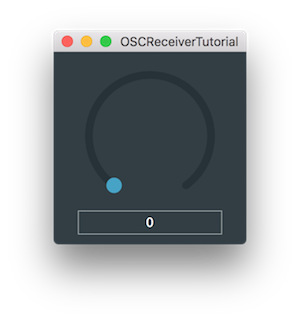
When completed, the OSC receiver application will display a single rotary knob that we cannot interact with when launched:

OSC receiver app window

OSC Receiver Implementation

To implement the receiver, simply declare a Slider object in MainContentComponent class to reflect the changes made with the sender rotary knob:

//==============================================================================
juce::Slider rotaryKnob;
};

Instead of declaring an OSCSender object as a member like in the sender application, we inherit this time from OSCReceiver to implement the MainContentComponent as a subclass [1]:

class MainContentComponent : public juce::Component,
private juce::OSCReceiver, // [1]
private juce::OSCReceiver::ListenerWithOSCAddress<juce::OSCReceiver::MessageLoopCallback> // [2]
{
public:

Also we need to inherit from OSCReceiver::ListenerWithOSCAddress<OSCReceiver::MessageLoopCallback> in order to receive callbacks when messages are received [2].

In the class constructor, set the same parameters for the Slider object as in the sender application:

MainContentComponent()
{
rotaryKnob.setRange (0.0, 1.0);
rotaryKnob.setSliderStyle (juce::Slider::RotaryVerticalDrag);
rotaryKnob.setTextBoxStyle (juce::Slider::TextBoxBelow, true, 150, 25);
rotaryKnob.setBounds (10, 10, 180, 180);
rotaryKnob.setInterceptsMouseClicks (false, false);
addAndMakeVisible (rotaryKnob);
// specify here on which UDP port number to receive incoming OSC messages
if (! connect (9001)) // [3]
showConnectionErrorMessage ("Error: could not connect to UDP port 9001.");
// tell the component to listen for OSC messages matching this address:
addListener (this, "/juce/rotaryknob"); // [4]
setSize (200, 200);
}

As a subclass to OSCReceiver, directly connect to the correct port number to receive messages [3] and register this class as a listener to itself by providing the address to listen to [4].

Warning
Make sure that the port number and the OSC address match with the sender application.

When an OSCMessage object is received, the oscMessageReceived() callback function is called:

void oscMessageReceived (const juce::OSCMessage& message) override
{
if (message.size() == 1 && message[0].isFloat32()) // [5]
rotaryKnob.setValue (juce::jlimit (0.0f, 10.0f, message[0].getFloat32())); // [6]
}

Override this function by first checking the size of the message and the value type [5]. Then set the value of the rotary knob by making sure that the range conforms to the Slider range [6].

Implement the same error logging function as the sender application in case the connection fails:

void showConnectionErrorMessage (const juce::String& messageText)
{
juce::AlertWindow::showMessageBoxAsync (juce::AlertWindow::WarningIcon,
"Connection error",
messageText,
"OK");
}

You should now be able to control the receiver knob by moving the sender knob when both applications are launched.

Note
The source code for this modified version of the code can be found in the OSCReceiverTutorial_02.h file of the demo project.

OSC Monitor

Download the demo project for this section here: PIP | ZIP. Unzip the project and open the first header file in the Projucer.

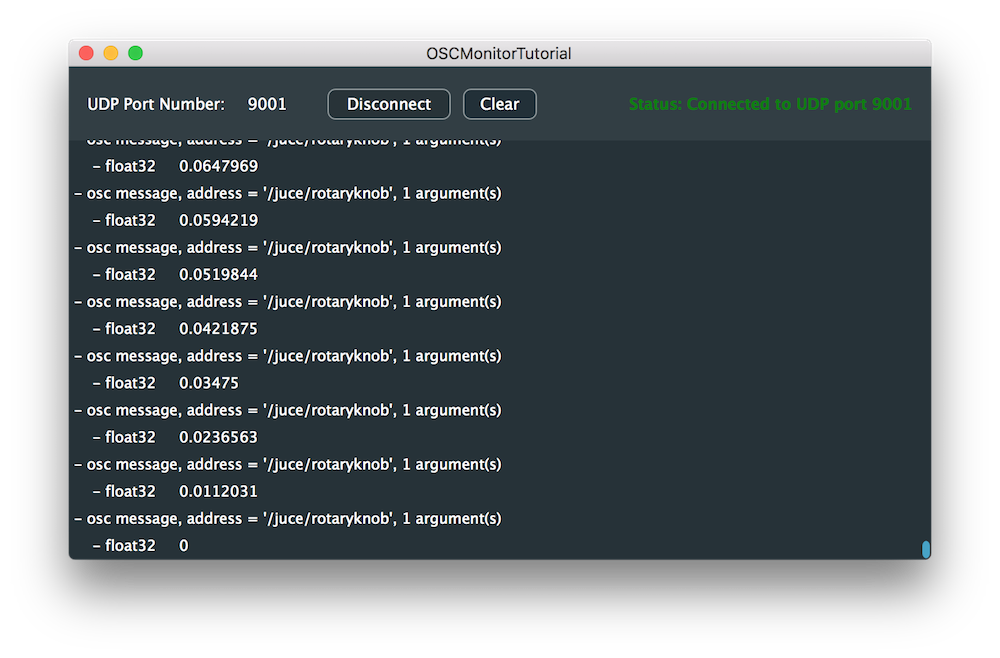
When completed, the OSC monitor application will display a window that logs the interactions. When first launched without a sender instance, the monitor application cannot connect and the window should look something like this:

OSC monitor app window

If launched while a sender instance is running, the monitor application will be able to connect to it and the window should look something like this:

OSC monitor app window

OSC Monitor Implementation

Let's implement a different type of receiver that displays the OSCMessage objects as text.

In the MainContentComponent class, we can see that the class inherits from the OSCReceiver::Listener class [1]. Notice that we do not inherit from OSCReceiver::ListenerWithOSCAddress as we want to receive all the messages sent regardless of the address:

class MainContentComponent : public juce::Component,
private juce::OSCReceiver::Listener<juce::OSCReceiver::MessageLoopCallback> // [1]
{
public:

Declare OSCLogListBox and OSCReceiver objects as private member variables [2] and define a temporary int variable to store the port number [3] as shown below:

OSCLogListBox oscLogListBox; // [2]
juce::OSCReceiver oscReceiver;
int currentPortNumber = -1; // [3]

In the constructor, set corresponding parameters as follows:

MainContentComponent()
{
oscLogListBox.setBounds (0, 60, 700, 340); // [4]
addAndMakeVisible (oscLogListBox);
oscReceiver.addListener (this); // [5]
oscReceiver.registerFormatErrorHandler ([this] (const char* data, int dataSize) // [6]
{
oscLogListBox.addInvalidOSCPacket (data, dataSize);
});
setSize (700, 400);
}
  • [4]: Set the bounds to the OSCLogListBox and make the Component visible.
  • [5]: Add this class as a listener to the OSCReceiver object to receive callbacks.
  • [6]: Install a custom error handler format on the OSCReceiver by using a lambda function. Here we provide a pointer to the data that failed to parse and its size to the OSCLogListBox object.

When a button is clicked on the user interface of the monitor application, we call the corresponding function that we implement in the next step.

If the user clicks on the "connect" button, it should connect/disconnect depending on the application state [7]. In addition, every time the "connect" button is pressed, we call the updateConnectionStatusLabel() helper function [8] as shown here:

void connectButtonClicked()
{
if (! isConnected()) // [7]
connect();
else
disconnect();
updateConnectionStatusLabel(); // [8]
}

To update the status label, simply change the text and colour depending on the connection state as described below:

void updateConnectionStatusLabel()
{
juce::String text = "Status: ";
if (isConnected())
text += "Connected to UDP port " + juce::String (currentPortNumber);
else
text += "Disconnected";
auto textColour = isConnected() ? juce::Colours::green : juce::Colours::red;

To determine the connection state, we check whether the port number was changed from its default value of -1:

bool isConnected() const
{
return currentPortNumber != -1;
}

Otherwise, when the user presses the "clear" button, simply send a clear instruction to the OSCLogListBox and reset the screen log:

void clearButtonClicked()
{
oscLogListBox.clear();
}

To connect to the sender application, let's implement the connect() function:

void connect()
{
auto portToConnect = portNumberField.getText().getIntValue(); // [9]
if (! isValidOscPort (portToConnect)) // [10]
{
handleInvalidPortNumberEntered();
return;
}
if (oscReceiver.connect (portToConnect)) // [11]
{
currentPortNumber = portToConnect;
connectButton.setButtonText ("Disconnect");
}
else // [12]
{
handleConnectError (portToConnect);
}
}
  • [9]: Convert the port number text to an int value and store it in a temporary variable.
  • [10]: If the port number is invalid, we display a error message using the handleInvalidPortNumberEntered() helper function.
  • [11]: Otherwise, this means that the port number is valid and we can attempt to connect. If the connection is successful, we update the temporary port number variable to the correct value and change the "connect" button text.
  • [12]: If the connection fails, call the corresponding handleConnectError() helper function to display the error.

In order to verify that the port number is valid, check if the range corresponds to 1 .. 65535 inclusive:

bool isValidOscPort (int port) const
{
return port > 0 && port < 65536;
}

To disconnect from the network, check if the disconnection was successful and if so, reset the port number to -1 and change the "connect" button text [13]. Otherwise, call the handleDisconnectError() helper function [14]:

void disconnect()
{
if (oscReceiver.disconnect()) // [13]
{
currentPortNumber = -1;
connectButton.setButtonText ("Connect");
}
else
{
handleDisconnectError(); // [14]
}
}

When an OSCMessage is received, the following callback function is called and we transfer the content of the message to the OSCLogListBox:

void oscMessageReceived (const juce::OSCMessage& message) override
{
oscLogListBox.addOSCMessage (message);
}

If an OSCBundle is received, a different callback function is called and we transfer the content of the bundle to the OSCLogListBox:

void oscBundleReceived (const juce::OSCBundle& bundle) override
{
oscLogListBox.addOSCBundle (bundle);
}

Complete the implementation by showing message box for each type of error:

//==============================================================================
void handleConnectError (int failedPort)
{
juce::AlertWindow::showMessageBoxAsync (juce::AlertWindow::WarningIcon,
"OSC Connection error",
"Error: could not connect to port " + juce::String (failedPort),
"OK");
}
//==============================================================================
void handleDisconnectError()
{
juce::AlertWindow::showMessageBoxAsync (juce::AlertWindow::WarningIcon,
"Unknown error",
"An unknown error occured while trying to disconnect from UDP port.",
"OK");
}
//==============================================================================
void handleInvalidPortNumberEntered()
{
juce::AlertWindow::showMessageBoxAsync (juce::AlertWindow::WarningIcon,
"Invalid port number",
"Error: you have entered an invalid UDP port number.",
"OK");
}

Now when the sender rotary knob is interacted with, the monitor application will log all the messages received and the window should look something like this:

OSC monitor app window
Note
The source code for this modified version of the code can be found in the OSCMonitorTutorial_02.h file of the demo project.
Exercise
Modify the sender and receiver applications to handle different OSC messages using other GUI components such as ToggleButton or ComboBox objects.

Summary

In this tutorial, we have learnt how to implement the OSC protocol to send information between application instances. In particular, we have:

  • Sent OSC messages using a rotary knob in the sender application.
  • Connected to the receiver application and handled the corresponding messages.
  • Displayed the OSC interactions in a verbose manner using the monitor application.

See also

linkedin facebook pinterest youtube rss twitter instagram facebook-blank rss-blank linkedin-blank pinterest youtube twitter instagram