
Loading...
Searching...
No Matches
This tutorial shows you how to install JUCE and how to create a new cross-platform JUCE project using the Projucer. You also learn how to export the project to an IDE such as Xcode or Visual Studio to develop, run and debug your JUCE application.
Level: Beginner
Platforms: Windows, macOS, Linux, iOS, Android
Download JUCE. Unpack the JUCE folder and place it to some location on your computer. Your user home folder is a convenient place.
Go into the JUCE folder you just installed. Launch the Projucer, which is located there.
The first time you launch Projucer, you are presented with the new project window. (You can also launch this later by selecting New Project... from the Projucer's main menu.):
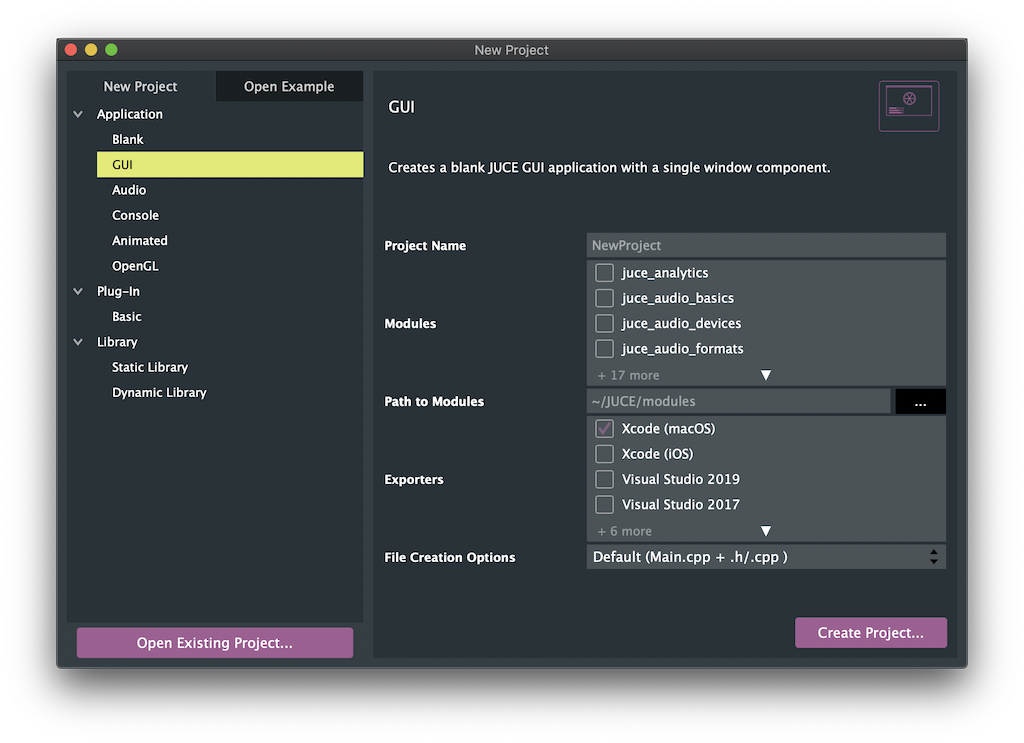
On the left-hand side of the window, select which type of project you want to create.
For each project type, the Projucer will generate all project files and add the appropriate minimal code that sets everything up. In this way, after you have created your project, you can immediately get started with developing your actual functionality.
If you are exploring JUCE for the first time and don't know where to start, go for a GUI application — this will set up all the basics for a working application for you, for both desktop and mobile platforms.
Below is an overview over all currently supported project types.
| Project type | Description |
|---|---|
| Application/Blank | This creates a blank JUCE application. |
| Application/GUI | This creates a minimal JUCE application with an empty application window. You can start here and add more functionality, such as more GUI components, using the various classes that JUCE offers. |
| Application/Audio | This creates a minimal JUCE application, like Application/GUI, but automatically adds all the setup code that you need to easily get audio input and output. You can use this for games, multimedia applications, and much more. |
| Application/Console | JUCE is also very useful for developing command-line applications that do not have any GUI at all. Use this project type to create such an application. |
| Application/Animated | This creates an application which draws an animated graphical display. You can start here to create an animated mobile app, for example. |
| Application/OpenGL | This creates a blank JUCE application, like Application/GUI, but adds support for OpenGL to draw features including 3D model import and GLSL shaders. |
| Plug-In/Basic | This creates a basic audio plug-in. All the code to support VST, AudioUnit and AAX plug-in formats, is added automatically. Depending on your setup, this project type may require some additional preparation steps to work correctly. See Tutorial: Create a basic Audio/MIDI plugin, Part 1: Setting up for more information. |
| Library/Static, Library/Dynamic | This project type is useful to create re-usable software libraries that build on top of JUCE. The Projucer supports creating libraries for both static and dynamic linking. |
There are also many example projects which can serve as an alternative starting point for your project, They are located in the subfolder JUCE/examples and can be browsed by clicking the Open Example tab.
After you have selected the appropriate project type, you can fill out some additional project settings on the right-hand side of the window:
modules subfolder located inside the JUCE folder you installed earlier.The Projucer currently has exporters for the following IDEs, build systems, and platforms:
| Target OS | Supported build systems |
|---|---|
| OSX | XCode |
| Windows | Visual Studio, Code::Blocks |
| Linux | Makefile, Code::Blocks |
| iOS | Xcode |
| Android | Android Studio |
After you have created your project, you can launch the native IDE with your project directly from the Projucer. Use the button near the top:
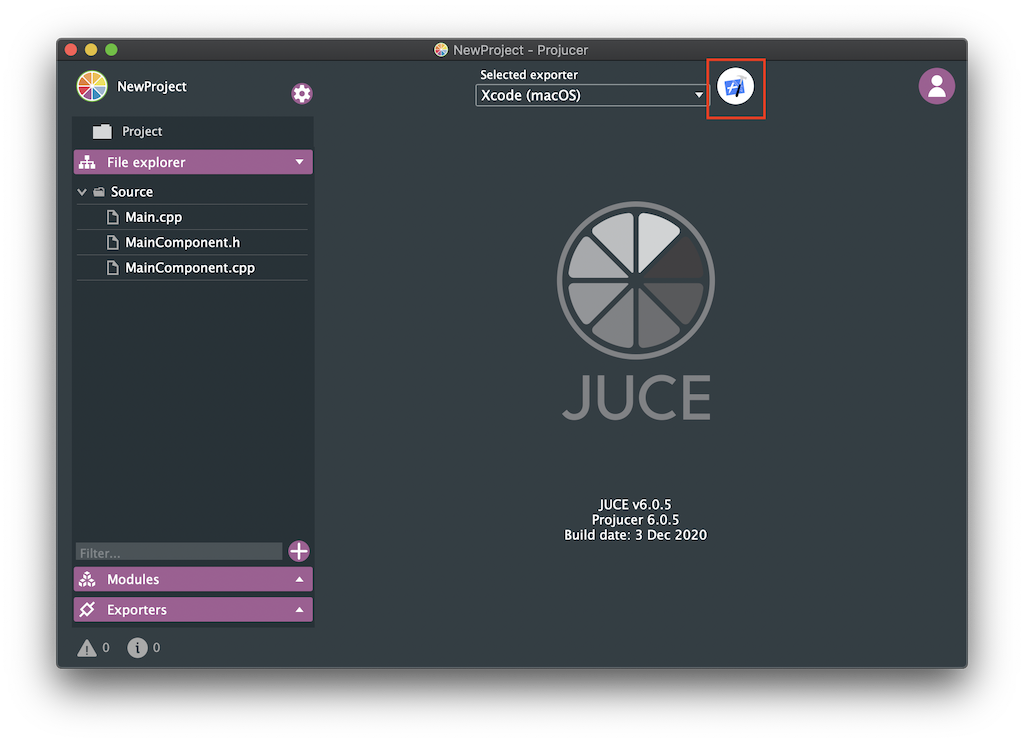
Now that you have opened your IDE (Xcode, Visual Studio, and so on), you can compile and run your JUCE app, and get started with coding!
All export targets (which are the native IDE projects) are generated when you create your Projucer project. They are also updated every time you save it in the Projucer. At any time, you can create new export targets to add support for more IDEs and platforms to your project. You can read about this and more features for managing your Projucer project in Tutorial: Projucer Part 2: Manage your Projucer projects.
To open up an existing Projucer project, you can either double-click on the .jucer file contained in the project folder or click on Open Existing Project from the wizard. (You can also navigate to Open... from the Projucer's main menu.)
You may come across Projucer Instant Project (PIP) files when following other JUCE tutorials. These are essentially header files with the usual .h extension that provide metadata to the Projucer in order to automatically create a project with the correct modules and exporters from a single file.
PIP files can be opened similarly by either selecting the file from the Open... dialog of the Projucer's main menu or a simple drag-and-drop onto the Projucer interface window.
After reading this tutorial, you should be able to: