In Tutorial: Projucer Part 1: Getting started with the Projucer, you learned how to create a new JUCE project, export it to your native IDE, and start coding. However, the Projucer is not just about that — it is also a very powerful cross-platform tool to manage all settings for your project, add source files, and much more. As you develop your JUCE application, the Projucer will be your faithful companion throughout the process. This tutorial gives you an overview over some essential features.
Level: Beginner
Platforms: Windows, macOS, Linux, iOS, Android
Create a new JUCE project and open it in the Projucer. This is described in Tutorial: Projucer Part 1: Getting started with the Projucer.
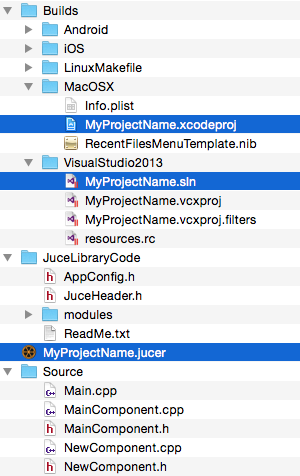
Let's have a closer look at the anatomy of an Projucer project. Below is the folder structure of a JUCE project that the Projucer generates for you:

At the top level is the .jucer file (highlighted above), which contains all project settings. Double-click this file to open the project in the Projucer. In addition to the .jucer file, three subfolders are generated:
| Folder | Content |
|---|---|
Source | The C++ source code of your JUCE app. |
Builds | The export targets generated by the Projucer. The Xcode project file and Visual Studio solution are highlighted as an example in the screenshot above. Open these files to start coding, debugging, and running your JUCE app. (You can also just use the Open in ... buttons in the Projucer, of course.) |
JuceLibraryCode | Here are some auto-generated header files that include the JUCE library code via the JUCE modules. Note that the actual JUCE library code is not located here, but inside your global JUCE folder that you installed earlier. |
Now we will have a look at the most essential features of the Projucer that you will frequently use as you develop your JUCE app.
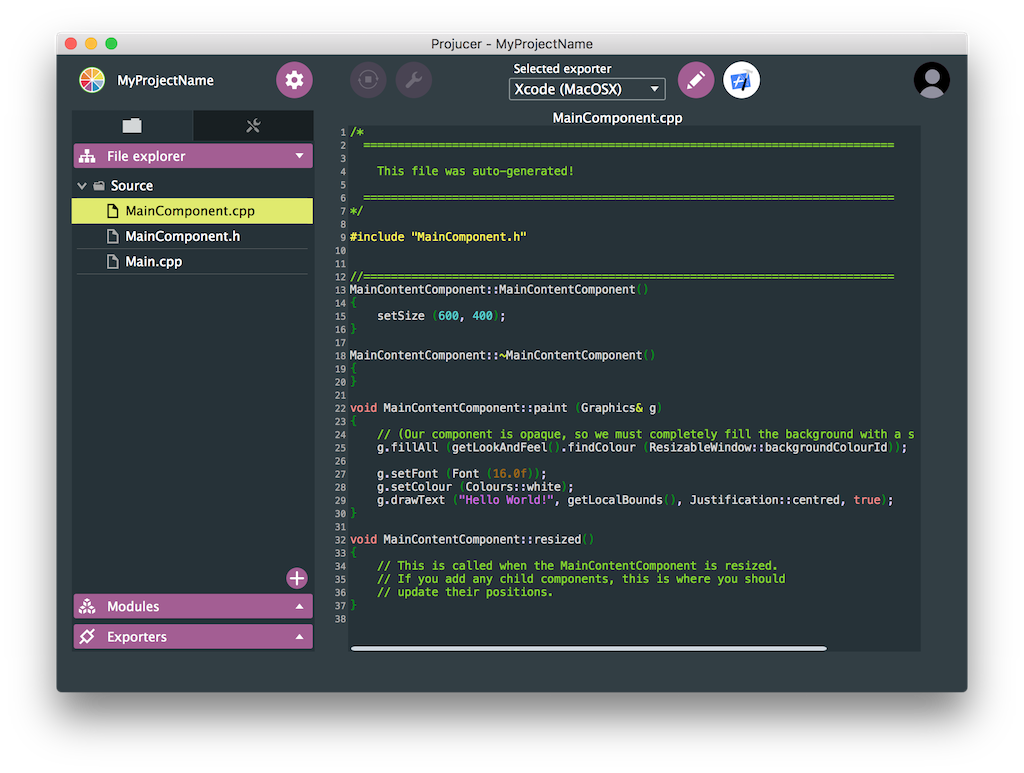
The projucer offers a file browser and a basic code editor for C++ source files. It is located under the File explorer tab on the left hand side. This is what it looks like:

With the Projucer, you can add new source files to your project and delete or rename existing ones, as well as organise files into groups. To do this (and access other functionality as well), click on the "+" symbol in the file explorer tab on the left, or right-click on the file or group, and select what you want to do from the pop-up menu.
If you make changes to the file structure and then save the project afterwards, your changes will be reflected in all native IDE projects that are exported. In this way, you can easily keep the file structure of the project consistent across all platforms you are developing on.
The Projucer's code editor appears when you select a file in the file browser. To do some quick changes to your code, you don't need to fire up a native IDE, instead just make the changes in the Projucer and save your changes.
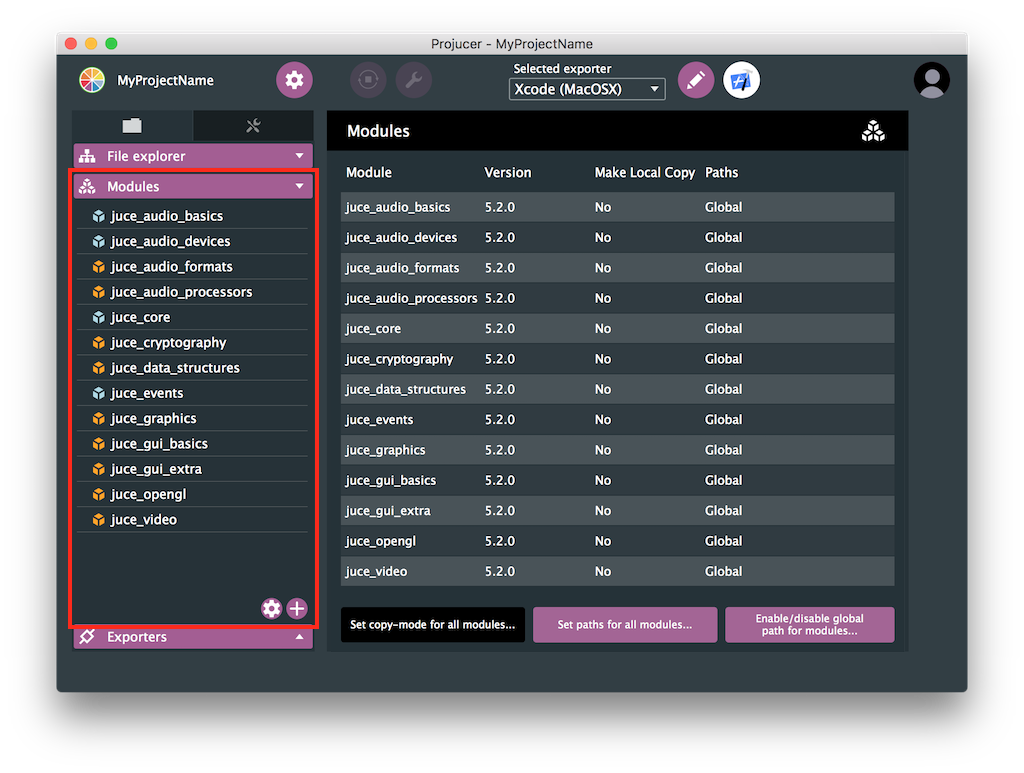
The JUCE library code is organised into different modules. By default, all modules that are needed for the type of your project are added.

Most JUCE modules require other JUCE modules to properly compile. If you ever remove a module on which other modules of your project depend on, then the Projucer will highlight the now "broken" modules in red. You must then either remove the "broken" modules or add the missing modules.
If you click on the settings icon in the Modules tab, the module settings page opens. It provides an overview over all currently used modules and allows you to set the paths to them. To change the paths of all modules at once, enter the correct path into one of the modules, select it, and click on Set paths for all modules...
Alternatively, you can choose to use global search paths for modules by clicking on Enable/disable global path for modules... To set your global search paths, navigate to menu item Projucer > Global Search Paths on MacOS or File > Global Search Paths on Windows and Linux.
If you click on an individual module in the browser, you get access to module-specific settings and properties. There, you can check the version and licence of a particular module, and set the paths to additional dependencies such as SDKs and external libraries that a particular module is using. Usually, the default settings work just fine and you should rarely need to go into this page.
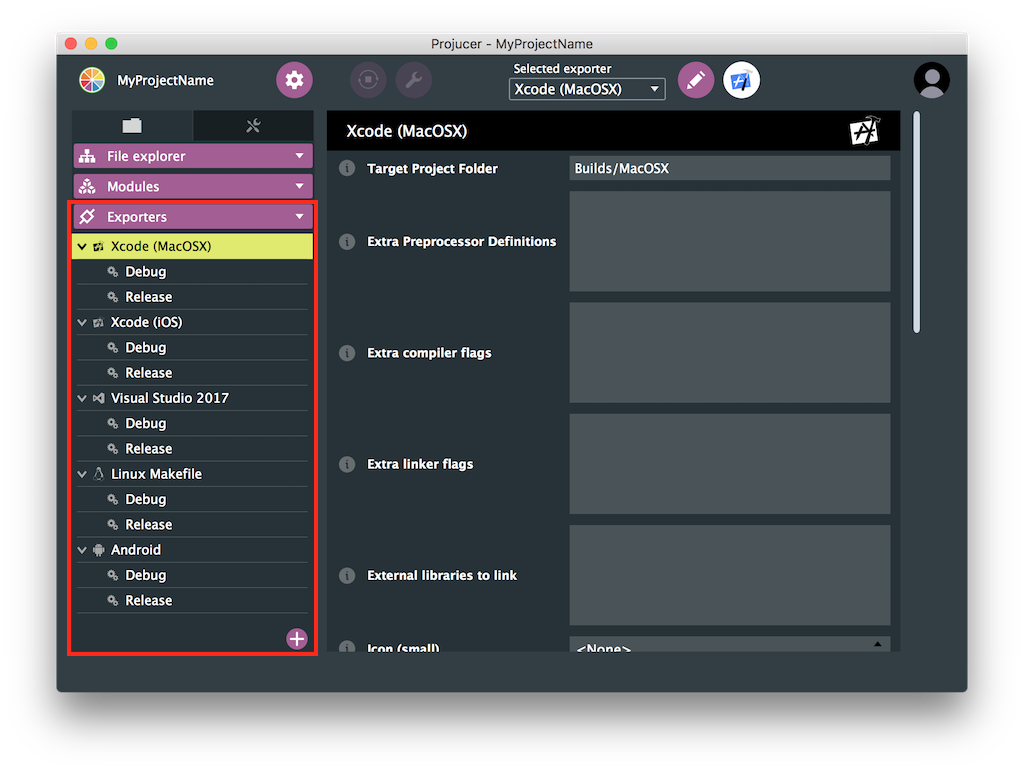
The different exporter targets that you created earlier (Xcode, Visual Studio, and so on) can be found in the Exporters tab. If you click on these in the browser, you get access to the build settings for this export target. This is the place to specify additional compiler and linker flags and other platform-specific build settings.
To create a new export target for an additional IDE and platform, click on the "+" symbol. You can do this at any time. For example, if you originally created a JUCE application for Windows and OSX, but then later you decided to also add support for Linux, you can do it with ease.
You can also delete export targets by right-clicking on them and selecting Delete this exporter.
The Projucer creates build configurations to each export target which your native IDE will use to actually compile and run your app. By default, the two configurations Debug and Release are added to every export target. By clicking on these configurations, you can access the platform-specific build settings for this particular configuration:

You can add additional configurations as well. For example, for Visual Studio export targets the Projucer adds Debug and Release configurations using 64-bit. However, you may also want to add 32-bit support to your Windows app. For this, you can copy the two existing configurations (right-click on the configuration and select Create a copy of this configuration), rename the copies to Debug32 and Release32, respectively, and then change the configuration build setting Architecture from 64-bit to 32-bit for both configurations.
After reading this tutorial, you should be able to: