This tutorial introduces a key concept in JUCE: the listener and broadcaster system. We look at this through implementing simple actions in response to button clicks.
Level: Beginner
Platforms: Windows, macOS, Linux, iOS, Android
Classes: Button, TextButton, Button::Listener, Time
Download the demo project for this tutorial here: PIP | ZIP. Unzip the project and open the first header file in the Projucer.
If you need help with this step, see Tutorial: Projucer Part 1: Getting started with the Projucer.
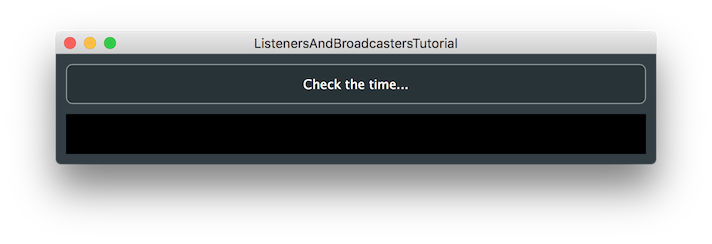
The demo project for this tutorial presents a simple user interface with a single button and a single label. The interface should look similar to the following screenshot:

The interface doesn't do anything in the state provided. We are going to add some code to make a click of the button cause the label to display the current date and time.
The MainContentComponent class comprises two child components: a TextButton object and a Label object. A TextButton object can display a button containing some specific text, and a Label object can display a piece of text.
The declaration for the MainContentComponent class is as follows:
The button and the label are added to the MainContentComponent object and made visible in the MainContentComponent constructor:
Here we set the button text and configure a specific appearance for the label. This so that the label shows white text on a black background. By default, the label will not show any text.
In JUCE, buttons, sliders, and many other types of controls that may need to inform other objects about a change in their state are a type of broadcaster object. In order to respond to changes in a broadcaster object, other classes need to be a listener for that specific type of broadcaster. Listeners also need to be registered with at least one specific broadcaster object of that type. (The broadcaster-listener system in JUCE follows the observer pattern.) Many broadcaster objects contain a nested Listener class, from which we can inherit, in order to become a listener for that type of broadcaster. For example, the Button class contains a nested class Button::Listener for this purpose.
To use the Button::Listener class we need to add it as a base class. In our case, we need to add the Button::Listener class as a base class of the MainContentComponent class [1]:
Custom classes can become listeners to different types of broadcaster by adding more listener base classes in the same way.
Usually each listener class has at least one pure virtual function. This is the function that will be called as a callback when the broadcaster object needs to broadcast its change. We must override this in order for the code to compile, and for us to use it.
The pure virtual function in the Button::Listener class is the Button::Listener::buttonClicked() function. We need to add its declaration [2] within our MainContentComponent class as shown here:
Now, let's implement the MainContentComponent::buttonClicked() function. Here, we are passed a pointer to the object that has broadcasted the change. We can then compare this pointer with other objects to determine which object it was:
bool values allow some customisation of the output (see the documentation for the Time::toString() function for more information).dontSendNotification argument [7] prevents the label from broadcasting this change to its listeners, should it have any. (Label objects can have listeners since they can be used to edit text, too.) In this case we know that it can't have any listeners (as it is our own private member) but it is good practice to be specific.In order to receive the messages that are broadcast, we need to register our listener object with one or more broadcaster objects. In this case, we need to register with the TextButton object. Typically, this would be done within the constructor of the listener subclass [7]:
addListener() function for this purpose (the ChangeBroadcaster object is an exception, it has the ChangeBroadcaster::addChangeListener() function instead).Broadcasters will also have a removeListener() function, too. For example, see the Button::removeListener() function. Since our button is owned by the same class that is performing the listening we don't really need to remove the listener as the button will be destroyed at the same time as the listener. For completeness, we could add this to our destructor:
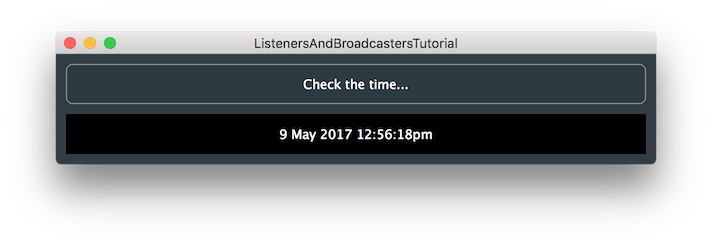
Build and run the application now. When you click the button it should display the time within the label.

ListenersAndBroadcastersTutorial_02.h file of the demo project for this tutorial.ListenersAndBroadcastersTutorial_03.h file of the demo project for this tutorial.Instead of using the listeners and broadcasters paradigm as shown in this tutorial, we can simplify button callbacks using lambda functions from the latest C++ standards. This works especially well for simple callbacks that don't require complex implementations.
First, let's remove the inheritance from the Button::Listener class and restore the MainContentComponent class definition like this:
Then, instead of adding the MainContentComponent as a listener to the Button, assign a lambda function to the Button::onClick helper object [8] as follows:
This tells the Button object which function to call when the Button is clicked by the user.
Finally, rename the callback function to checkTime() [9] and remove the if() statement checking the pointers to the Button objects as we don't need to check which Button called the function anymore:
ListenersAndBroadcastersTutorial_04.h file of the demo project for this tutorial.In this tutorial we have introduced the basics of the broadcaster-listener system in JUCE. While we have focused on buttons in this tutorial, the same techniques can be applied to many areas of JUCE code. In particular we have learned: