Add grit to a synthesiser sound by creating harmonic distortion through waveshaping. Learn the basics of convolution to retrieve the sonic characteristics contained in an impulse response.
Level: Advanced
Platforms: Windows, macOS, Linux
Plugin Format: VST, AU, Standalone
Classes: dsp::ProcessorChain, dsp::Gain, dsp::Oscillator, dsp::Convolution, dsp::WaveShaper, dsp::Reverb, dsp::ProcessorDuplicator
This tutorial leads on from Tutorial: Introduction to DSP. If you haven't done so already, you should read that tutorial first.
Download the demo project for this tutorial here: PIP | ZIP. Unzip the project and open the first header file in the Projucer.
Resources folder into the generated Projucer project.If you need help with this step, see Tutorial: Projucer Part 1: Getting started with the Projucer.
The project is conceived as a plugin but you can run it as a standalone application by selecting the proper deployment target in your IDE. In Xcode, you can change the target in the top left corner of the main window as shown in the following screenshot:

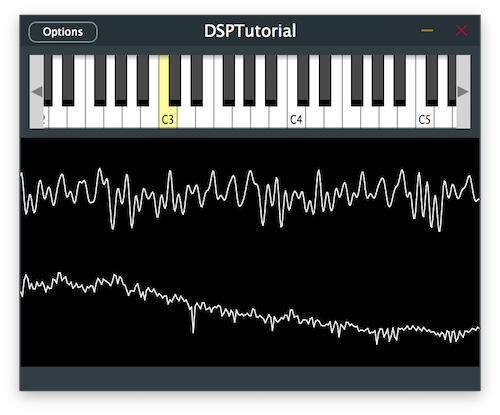
The demo project provides us with an on-screen MIDI keyboard in the top half of the plugin and a visual representation of the signal through an oscilloscope in the bottom half. Presently if a key is pressed, the plugin outputs a basic oscillator sound with some reverb added.
AudioEngine class.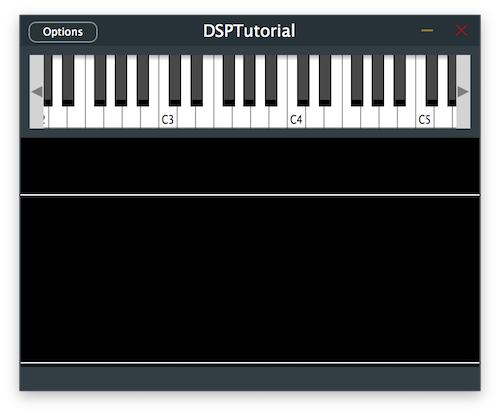
In this tutorial we are introducing two new DSP concepts that allow for signal processing in different ways: Waveshaping and Convolution.
Let's start by defining this DSP terminology.
Waveshaping is the process in which a certain signal is shaped into a different one by means of a transfer function that is applied on the original signal. For instance a simple sine wave can be shaped into a different waveform by applying a mathematical function to it.
Waveshapers can be used to effectively create distortion by adding harmonic content to the original signal when applying a certain transfer function. As you may know, square and triangle waves for example are essentially sine waves with odd harmonics added to them and a sawtooth wave is a sine wave with odd and even harmonics combined.
Knowing this fact, one way of creating distortion is to bring the shape of a sine wave closer to that of a square wave. So how can we achieve that using a transfer function?
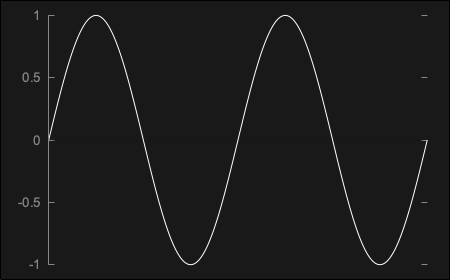
Consider for instance a simple sine wave sin(x) which could be plotted as follows:
By applying the signum transfer function onto the sine wave, a function that essentially outputs the sign of the inputted number, we end up with sgn(sin(x)) which perfectly represents the square wave like so:
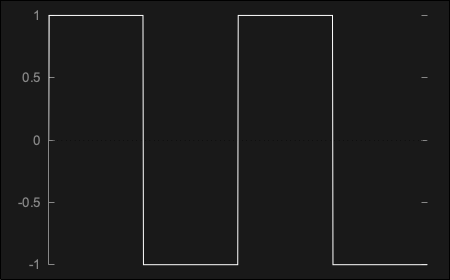
This perfect waveform however presents problems as it creates a harsh distortion referred to as hard-clipping, due to the hard edges on the curve. This kind of waveform is also "too perfect" to be recreated in the analog domain and therefore does not sound like the square wave created by most analog synthesisers.
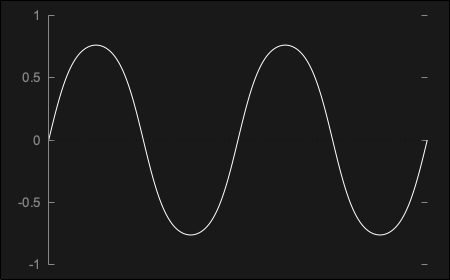
In order to create a more gentle kind of distortion called soft-clipping, we can use a hyperbolic tangent transfer function tanh(sin(x)) which outputs a signal that looks almost like a sine wave but with a rounder curve as shown here:
Then, in order to reach a square-like shape, we can boost the signal into clipping before applying the transfer function tanh(n*sin(x)), essentially truncating the top of the bell shape into a soft-edged square wave as seen below:
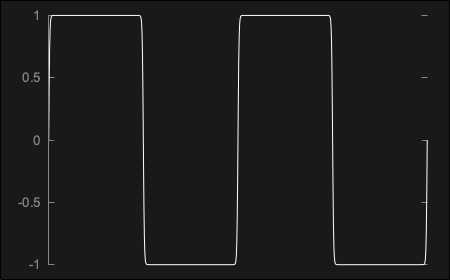
As you can see, the possibilities of waveshaping can be endless as any type of transfer function can be applied to the incoming signal.
In JUCE, you can perform Waveshaping with the dsp::WaveShaper class included in the DSP module.
Convolution consists in simulating the reverberation characteristics of a certain space by using a pre-recorded impulse response that describes the properties of the space in question. This process allows us to apply any type of acoustic profile to an incoming signal by convolving, essentially multiplying every sample of data against the impulse response samples to create the combined output.
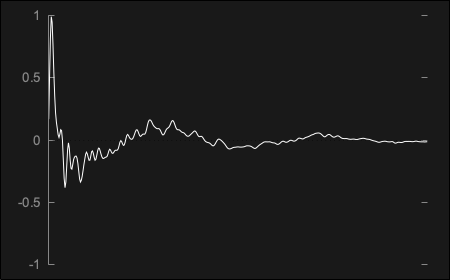
Impulse responses are audio files that are generated by recording short impulses in the spaces to profile but they do not necessarily need to be actual physical spaces. For instance, we can capture the profile of a guitar amplifier by playing the impulse through the cabinet and recording its effect as shown here:
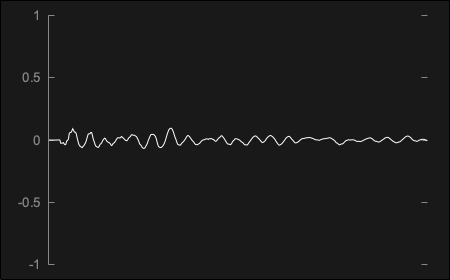
The same was performed through a cassette recorder and the impulse response generated is the following:
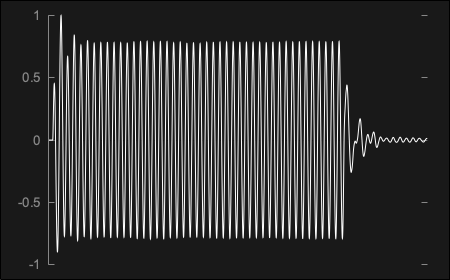
When an incoming signal is convolved with the impulse response, the original dry signal will be transformed into a wet reverberated counterpart that retains the characteristics of both. For example, the output of a 100ms 440Hz sine wave convolved through the guitar amp impulse response shown above produces the following outcome:
The same sine wave signal through the cassette recorder impulse response presented before ends up generating this waveform:
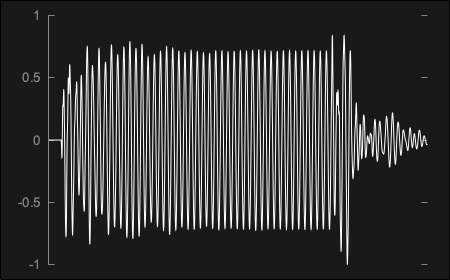
As you can see, the possibilities of convolution can be endless as any type of impulse response can be applied to the incoming signal.
In JUCE, you can perform Convolution with the dsp::Convolution class included in the DSP module.
In the Distortion class, add a juce::dsp::ProcessorChain with a juce::dsp::WaveShaper processor as a template argument [1]. Also define an enum with the processor index [2] to be able to clearly refer to the corresponding process via its index later on.
In the reset() function, call the reset function of the waveshaper in the processor chain [3].
In the prepare() function, call the prepare function of the waveshaper in the processor chain [4].
Now we want to define the transfer function that the waveshaper will use to shape the incoming signal. As described in the introduction section of this tutorial, let's start with a hard-clipping function first.
In the constructor, get a reference to the WaveShaper by supplying the index of the process and use the processorChain.get<>() method [5]. Let's initialise the waveshaper using a lambda function that limits the values to a range of -0.1 .. 0.1 [6].
In the process() function, we can call the process function of the waveshaper in the processor chain [7].
If we run this code after implementing the above changes in the Distortion class, we should be able to hear the effects of the waveshaper on the oscillator signal.
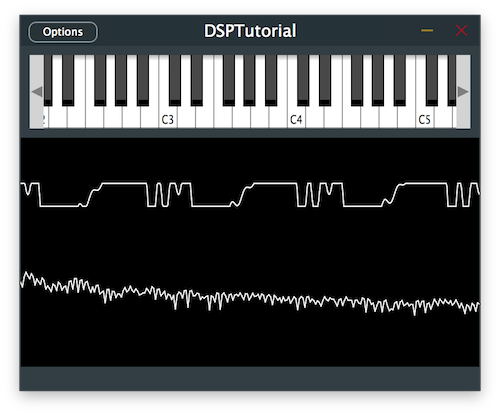
Let's make the clipping of our waveshaper a little softer by changing the transfer function to a hyperbolic tangent.
Add two juce::dsp::Gain processors to the processor chain with the juce::dsp::WaveShaper in between them [1] and add the corresponding indices to the enum as pre-gain [2] and post-gain [3]. These will allow us to adjust the level of the signal going into the waveshaper and control the level coming out of it, thus affecting the behaviour of the transfer function.
In the constructor, change the transfer function to a hyperbolic tangent [4] as described in the introduction of this tutorial:
Here we also retrieve a reference to the pre-gain processor [5] and boost the signal going into the waveshaper by 30dB [6]. Then we get a reference to the post-gain processor [7] and trim down the level coming from the waveshaper by 20dB [8].
Running the program should give us a different distorted sound.
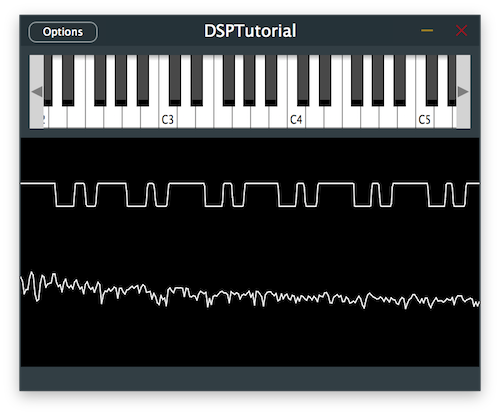
One thing you may have noticed is that when distorting low frequency content with the waveshaper, the distorted sound can get muddy very quickly. We can alleviate this problem by introducing a high-pass filter before processing the signal with the waveshaper.
Add a juce::dsp::ProcessorDuplicator with the juce::dsp::IIR::Filter and juce::dsp::IIR::Coefficients classes as template arguments [1] in order to easily convert the mono filter into a multi-channel version. To simplify the long class names, we use shorter names with the "using" keyword and add the corresponding index in the enum [2].
In the prepare() function, get a reference to the filter processor [3] and specify the cut-off frequency of the high-pass filter to 1kHz by calling the makeFirstOrderHighPass() function [4]:
The signal should now have its lower frequencies attenuated with a clearer sound.
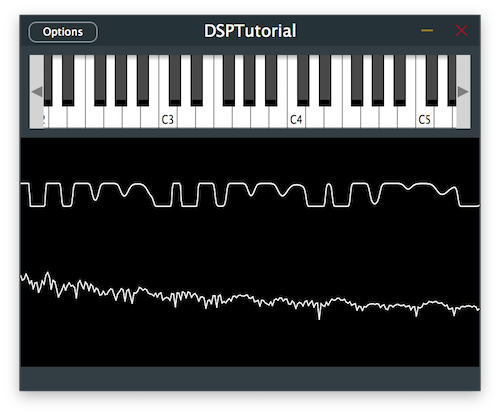
Let's give even more character to our sound by using convolution to simulate a guitar cabinet.
In the CabSimulator class, add a juce::dsp::Convolution processor to the processor chain [1] and add its corresponding index in the enum [2].
In the reset() function, call the reset function of the convolver in the processor chain [3].
In the prepare() function, call the prepare function of the convolver in the processor chain [4].
Now we want to specify the impulse response that the convolver will use to reverberate the incoming signal. As presented in the introduction section of this tutorial, let's load the convolution processor with the guitar amp impulse response included in the Resources folder of the project.
In the constructor, get a reference to the Convolution processor by supplying the index of the process and use the processorChain.get<>() method [5]. Let's initialise the convolver with the guitar amp impulse response by loading the audio file from the Resources folder [6].
Resources folder of your project.In the process() function, we can call the process function of the convolver in the processor chain [7].
In the Distortion class, remove the gain trim or set its level to 0dB of attenuation [8] as the signal will get attenuated naturally through the convolution process which happens after the distortion in our signal chain:
Let's run the program and see how it sounds like.
Resources folder and notice how drastically the convolved sound changes. DSPConvolutionTutorial_02.h file of the demo project.In this tutorial, we have learnt how to incorporate waveshaping and convolution. In particular, we have: