
Loading...
Searching...
No Matches
Use the Point, Line, and Rectangle classes to simplify your geometry calculations.
Level: Beginner
Platforms: Windows, macOS, Linux, iOS, Android
Classes: Point, Line, Rectangle, Path, Random, Range
Download the demo project for this tutorial here: PIP | ZIP. Unzip the project and open the first header file in the Projucer.
If you need help with this step, see Tutorial: Projucer Part 1: Getting started with the Projucer.
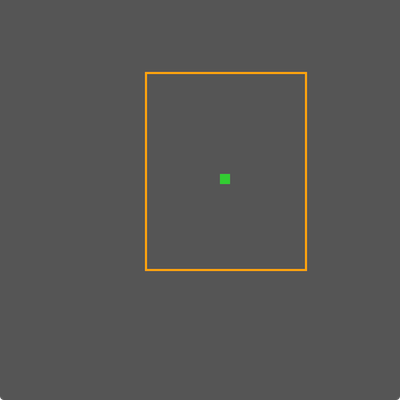
The demo project performs some simple drawing operations. In its default state it draws a grey background with a small orange square in the top-left corner:

We are going to look at different ways of drawing lines and rectangles, and how the Point, Line, and Rectangle classes can simplify the way you think about drawing operations (and component positions) in JUCE.
A great deal of graphics drawing and component layout code needs to deal with rectangles. This tutorial starts with the simple drawing of a filled square. We are now going to explore how the Point, Line, and Rectangle classes can help us with drawing operations. We can also apply these techniques to the positioning of child components (in your Component::resized() function). Our starter code in the paint() function is this:
Here we specify the bounds of the rectangle directly to the Graphics::fillRect() function as separate integers:
While this is straightforward, if we specify the bounds as a Rectangle object, it becomes much easier to perform manipulations of the rectangle.
It is easy to replace these separate coordinates, width, and height values with a Rectangle object, like so [1]:
While this is a very similar way of drawing the square, we can now very easily move the square around the component bounds, keeping its original size. The Rectangle class is a template class, as you can see above. In this example we use an int template parameter. In JUCE drawing code we will commonly use either Rectangle<int> or Rectangle<float> objects. The Point and Line classes are also template classes, and again we commonly use either int or float template parameters.
There are other ways to create rectangles. For example, rather than specifying width and height, we might have two points that we want to use as corners of the rectangle. We can use the Point class and a different Rectangle constructor:
One of the great things about this technique is that we can specify any two points. These points don't need to represent the top-left and bottom-right corners of the rectangle. Therefore, an equivalent would be:
In fact, using a Path object we can specify a rectangle with four points defining each corner:
We can also add a rectangle directly to a path:
Another useful feature of a Rectangle object is that it can test whether it contains a specified point. To test this out, we are going to get our component to repaint itself each time we click the mouse. To do this, add the following function:
Now let's write our paint() function such that it randomly generates a rectangle and a point. Then it will draw the rectangle and then a smaller rectangle located around the point. This smaller rectangle will be drawn in a different colour depending upon whether the randomly-generated point is within the larger rectangle or not. Our paint() function should start as before, but we're going to generate some random values so let's cache a reference of the system Random object too.
Now we'll create our random rectangle. Add the following code:
We limit the range of random values for each of the rectangle elements using a Range object. We also draw (rather than fill) the rectangle with a thickness of 2 points. To draw the smaller rectangle we are going to need another Rectangle object. If we use only two arguments to the Rectangle constructor, it creates a Rectangle object with the specified width and height (in that order) at a position of zero (0, 0). Add this line:
Now let's randomly-generate a point and position the centre of the pointArea rectangle at that point. Add the following code:
This demonstrates another useful feature of the Rectangle class as we can position its centre if we wish. This is sometimes preferable to considering a rectangle's position to be its top-left corner. Now we can use the Rectangle::contains() function to determine whether the point object is within the bounds of the rectArea object. Add this code:
Run the application, it should look something like the following screenshot. Remember to click on the component in order to cause it to redraw:
PointLineRectangleTutorial_02.h file of the demo project.Drawing and dealing with lines is similarly straightforward. The following code draws a diagonal line:
The Line class can also perform line intersection tests. To test this out we are going to generate several randomly-generated lines, then we are going to draw a circle at the points where any of these lines intersect with any of the other lines. First let's set up our paint() function with a background and get ready for generating some random numbers:
Now let's generate the random lines, not only drawing them, but also storing them in an array. Add the following code:
Then we'll change our colour and prepare a square which we will use as the bounds within which to paint our circle. Add this:
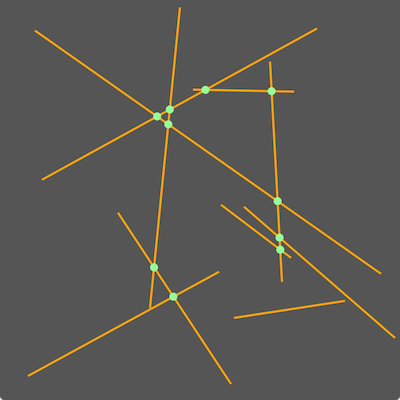
Finally, we'll iterate over the array of lines checking for intersections with any of the other lines using the Line::intersects() function. We then move the centre of the pointArea rectangle to this point and paint a circle. To do this, add the following code:
The piece of code that checks for the intersection [2], calls the Line::intersects() function. This not only returns true if the lines actually intersect, but also returns the point at which they intersect in the intersection argument.
Run the application now. If you left in the code to repaint in response to mouse clicks then you can generate new sets of lines by clicking on the component.
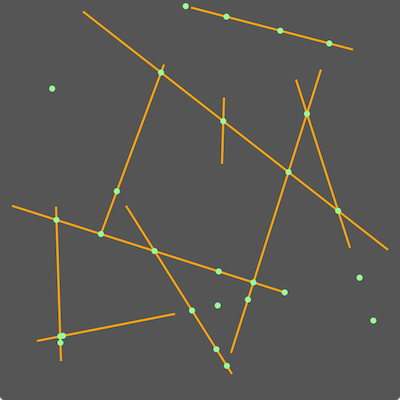
PointLineRectangleTutorial_03.h file of the demo project.If we didn't check the bool returned by the Line::intersects() function, or we used the Line::getIntersection() instead, then points would be drawn in places where the lines would intersect should they be extended in each direction to an infinite length. For example, look at the following code:
This would generate something like the following screenshot:
for() loop in the code for this example is simple, but not ideal. The problem is that it checks each line against every other line twice. Rewrite this code such that it only checks each pair of lines once. You should be able to remove the if (lines.indexOf (lineI) != lines.indexOf (lineJ)) statement as part of this rewrite. Now let's look at some more manipulations of rectangles that we can perform. Before we start, let's add a simple function to generate a random colour (see Tutorial: The Random class) as we're going to be doing this quite a number of times in the following examples:
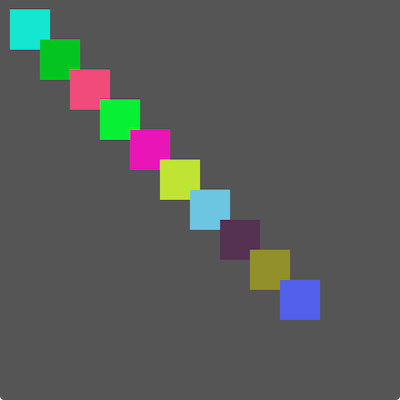
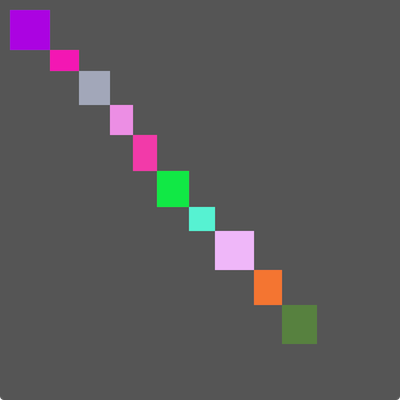
Now, let's extend the code for drawing the rectangle by using the Rectangle class, by drawing ten squares in a diagonal pattern, and using a randomly-generated colour:
The Rectangle::translate() function [3] moves the given rectangle by the horizontal and vertical offsets provided. The result should look something like the following screenshot:
Here is an extension to that code that resizes the rectangle before the next drawing operation. In addition to this, the translation is performed such that it is equal to the width and height of the rectangle.
This causes the rectangles to be "joined" at their corners as shown in the following screenshot:
As an alternative to using the Rectangle::translate() function, we could instead use addition to "add" points to rectangle in order to translate them. This means we could replace [4] above with the following line:
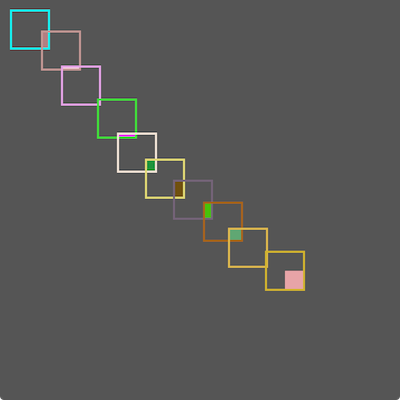
If we have rectangles that overlap, we can determine the intersecting area using the Rectangle::getIntersection() function. In the following example we calculate the intersecting rectangle between the current and next rectangles in the series. To make this clear, we draw outlines for each rectangle in the series and highlight the intersecting areas by drawing them as filled rectangles.
Notice that we use the + operator to offset the rectangle [5]. We also fill the intersecting areas first [6] before drawing the rectangle outlines [7]. This causes the last intersecting area to be drawn without its final corresponding rectangle.
PointLineRectangleTutorial_04.h file of the demo project.In this tutorial we have introduced the template classes Point, Line, and Rectangle. In particular, we have covered the following techniques: