This tutorial introduces generating random numbers using the Random class. Random numbers are useful in all sorts of situations including games, cryptography, and audio.
Beginner
Windows, macOS, Linux, iOS, Android
Random, Range, BigInteger, Colour
Getting started
Download the demo project for this tutorial here: PIP | ZIP. Unzip the project and open the first header file in the Projucer.
If you need help with this step, see Tutorial: Projucer Part 1: Getting started with the Projucer.
The demo project
The demo project sets up a simple text console where we can display the results of various operations. This allows us to demonstrate some of the features of the Random class in this tutorial.
In its default configuration, the demo project displays a series of 100 randomly-generated 32-bit integers. These values should be distributed roughly uniformly in the range -2,147,483,648 .. 2,147,483,647. Of course these values aren't truly random. Since they are generated by a computer, they are pseudorandom. For most purposes the Random object will be random enough, but you may need to use more sophisticated techniques for certain critical or specialist applications.
Test bed code
Throughout this tutorial we will modify parts of the demo project to demonstrate different features of the Random class. All of the code under discussion is in the MainComponent class. In fact, many of the changes in the first instance will be to the runExample() function.
void runExample()
{
logMessage ("------------------------- START --------------------------");
for (auto iteration = 0; iteration < 100; ++iteration)
{
auto randomInt = juce::Random::getSystemRandom().nextInt();
logMessage (juce::String (randomInt));
}
logMessage ("----------------------- FINISHED -------------------------");
}
Here we access a shared (global) Random object using the Random::getSystemRandom() function. We call the Random::nextInt() function with this system Random object to generate a random number. In most cases it is satisfactory to use this system random object for generating all of your random numbers. In some cases it is necessary to create your own instance of the Random class. This is usually where the values you are generating are being generated on another thread — see Tutorial: Build a white noise generator. If two (or more) threads try to access the system Random object then the sequence could get corrupted and may cause problems.
Limiting ranges
You will almost certainly want to limit the range of values generated by the Random class. While this can be done using simple arithmetic, the Random class makes it even easier.
Setting a maximum value
To set the maximum value you simply pass the Random::nextInt() an integer like so:
auto randomInt = juce::Random::getSystemRandom().nextInt (6);
This will set the maximum value to one less than the argument passed. In this case the values will be in the range 0 .. 5. It might be easier in this case to think of the argument as being the number of possible outcomes. Using 6 as the maximum value means there are 6 possible outcomes. This is just like rolling a die except the faces of the die are number 0 .. 5 rather than 1 .. 6!
Setting a minimum and maximum value
Of course, to generate values in the range 1 .. 6 we could just add 1 like this:
auto randomInt = juce::Random::getSystemRandom().nextInt (6) + 1;
But, the Random class can handle this for us by passing it a Range object
auto randomInt = juce::Random::getSystemRandom().nextInt (juce::Range<int> (1, 7));
The maximum value still needs to be one larger than the maximum value we want the Random object to be able to generate. The minimum value is inclusive and the maximum value is exclusive.
Other numerical types
In the examples above the values generated are all in the range of 32-bit integers. The Random class can generate 64-bit integer values and even arbitrarily large integers using the BigInteger class.
Larger integers
To generate 64-bit integers use the Random::nextInt64() function:
auto randomInt = juce::Random::getSystemRandom().nextInt64();
This generates an integer in the range −9,223,372,036,854,775,808 .. 9,223,372,036,854,775,807. To specify a smaller range for 64-bit integers you would need to perform the arithmetic yourself.
To generate arbitrarily large integers use the Random::nextLargeNumber() function. This returns a BigInteger object and takes a single BigInteger object as an argument to indicate the maximum value (again the maximum value is exclusive):
void runExample()
{
logMessage ("------------------------- START --------------------------");
juce::BigInteger maximumValue;
maximumValue.setBit (256);
for (auto iteration = 0; iteration < 100; ++iteration)
{
auto randomInt = juce::Random::getSystemRandom().nextLargeNumber (maximumValue);
logMessage (randomInt.toString (10));
}
logMessage ("----------------------- FINISHED -------------------------");
}
Here, we create a very large maximum value of 2256 by setting bit 256 in the maximumValue BigInteger object. The output is some very large, randomly generated integers. For example:
...
104920467355765962354471349450287456411052143302125448224736731840703932891139
113537286625531390989138082815985050172086775818737779507269901485377454431686
57847088262227027688174446009482649397747696846679750345153185249067937632876
54822036781617285561665007930420018266697875685845320423632890189355412858007
69785221527278648790869522951189615281519473001003509768672723497611119666776
53474255551114041705196319572561227500136240211575200675493708156631961926592
99704173402721617789464355135995656339243151513499563088758939994549638940776
89393625021259981953975863158742834192382645809510667002452217673394247775970
16555501734946882319812302845214545517919239951054372751749796998179564377182
----------------------- FINISHED -------------------------
Floating point values
The Random class can generate floating-point values too:
void runExample()
{
logMessage ("------------------------- START --------------------------");
for (auto iteration = 0; iteration < 100; ++iteration)
{
auto randomValue = juce::Random::getSystemRandom().nextFloat();
logMessage (juce::String (randomValue));
}
logMessage ("----------------------- FINISHED -------------------------");
}
And it can generate double values:
auto randomValue = juce::Random::getSystemRandom().nextDouble();
In both of these cases the values returned are in the range 0.0 .. 1.0. To generate a different range you will need to apply the arithmetic yourself (see Tutorial: Build a white noise generator for an example). You can use the jmap() function for this.
Visualising values
It can be useful to visualise the random values generated, rather than looking at long lists of numbers. This is especially useful if you need a set of random values with a distribution other than a uniform distribution. This can also create some interesting patterns.
Random rectangle positions
Change the MainContentComponent to the following simple code:
class MainContentComponent : public juce::Component
{
public:
MainContentComponent()
{
setSize (600, 600);
}
~MainContentComponent() {}
void paint (juce::Graphics& g) override
{
g.fillAll (juce::Colours::black);
g.setColour (juce::Colours::orange);
auto& random = juce::Random::getSystemRandom();
juce::Rectangle<int> rect (0, 0, 20, 20);
for (auto i = 0; i < 100; ++i)
{
rect.setCentre (random.nextInt (getWidth()), random.nextInt (getHeight()));
g.drawRect (rect);
}
}
private:
};
#define JUCE_DECLARE_NON_COPYABLE_WITH_LEAK_DETECTOR(className)
This is a shorthand way of writing both a JUCE_DECLARE_NON_COPYABLE and JUCE_LEAK_DETECTOR macro for ...
Definition juce_PlatformDefs.h:262
This should generate an image something like this:
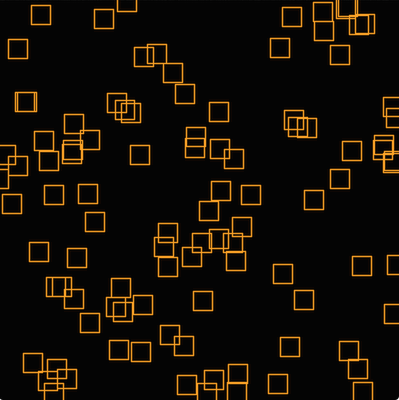
100 randomly generated rectangles
Try resizing the window. You will notice that a new set of rectangles is generated each time the window is resized and the paint() function is called.
- Exercise
- Try changing the number of rectangles and the size of the rectangles. You could make the rectangle size proportion to the size of the window, for example. Try drawing circles instead of rectangles.
Random rectangle sizes
To randomise the size of the rectangles we could do this:
{
auto& random = juce::Random::getSystemRandom();
juce::Rectangle<int> rect (0, 0, 20, 20);
for (auto i = 0; i < 100; ++i)
{
rect.setSize (random.nextInt (getWidth() / 4), random.nextInt (getHeight() / 4));
rect.setCentre (random.nextInt (getWidth()), random.nextInt (getHeight()));
}
}
A graphics context, used for drawing a component or image.
Definition juce_GraphicsContext.h:57
void drawRect(int x, int y, int width, int height, int lineThickness=1) const
Draws a rectangular outline, using the current colour or brush.
void fillAll() const
Fills the context's entire clip region with the current colour or brush.
void setColour(Colour newColour)
Changes the current drawing colour.
To make this generate squares each time we could do this:
for (auto i = 0; i < 100; ++i)
{
auto size = random.nextInt (
jmin (getWidth(), getHeight()) / 4);
rect.setSize (size, size);
rect.setCentre (random.nextInt (getWidth()), random.nextInt (getHeight()));
}
constexpr Type jmin(Type a, Type b)
Returns the smaller of two values.
Definition juce_MathsFunctions.h:367
Random colours
Colours can be randomised too, but to create colours that work well together using randomisation is a little trickier. For example, this generates a new random colour for each of the rectangles. But this colour could be any colour:
void paint (juce::Graphics& g) override
{
g.fillAll (juce::Colours::black);
auto& random = juce::Random::getSystemRandom();
juce::Rectangle<int> rect (0, 0, 20, 20);
for (auto i = 0; i < 100; ++i)
{
juce::Colour colour (random.nextInt (256),
random.nextInt (256),
random.nextInt (256));
g.setColour (colour);
rect.setCentre (random.nextInt (getWidth()), random.nextInt (getHeight()));
g.drawRect (rect);
}
}
This should look something like this:

Randomly generated colours
To limit the colours in a simple way we could randomise only one or two of the elements (red, green, or blue) and limit the range of values:
juce::Colour colour (random.nextInt (juce::Range<int> (100, 256)),
random.nextInt (juce::Range<int> (50, 200)),
200);
g.setColour (colour);
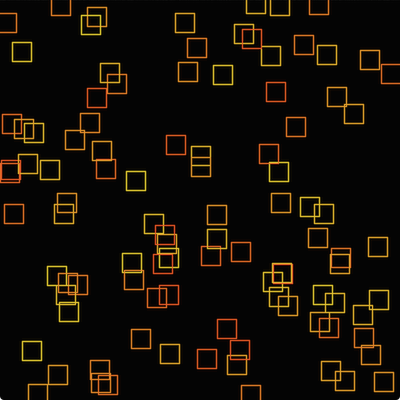
This produces colours in the pink and purple shades:

Pinks and purples
To be more specific, you could generate colours using hue, saturation, and brightness. For example, the oranges are at a hue of around 30° (or 0.083 in the 0 .. 1 range). If we generate random hues in the range 0.05 .. 0.15 these should all be different shades of orange.
for (auto i = 0; i < 100; ++i)
{
auto hue = juce::jmap (random.nextFloat(), 0.05f, 0.15f);
g.setColour (juce::Colour::fromHSV (hue, 0.9f, 0.9f, 1.0f));
rect.setCentre (random.nextInt (getWidth()), random.nextInt (getHeight()));
g.drawRect (rect);
}
Randomly generated orange hues
- Exercise
- Try generating other collections of random colours that work well together.
Choosing randomly from an array
You could choose randomly from a specific set of colours by using an array:
class MainContentComponent :
public Component
{
public:
MainContentComponent()
{
colours.add (juce::Colours::white);
colours.add (juce::Colours::orange);
colours.add (juce::Colours::lightgreen);
setSize (400, 400);
}
~MainContentComponent() {}
void paint (juce::Graphics& g) override
{
g.fillAll (juce::Colours::black);
juce::Rectangle<float> rect (0.0f, 0.0f, 5.0f, 5.0f);
for (auto i = 0; i < 1000; ++i)
{
g.setColour (colours[random.nextInt (colours.size())]);
rect.setCentre ((float) random.nextInt (getWidth()),
(float) random.nextInt (getHeight()));
g.drawEllipse (rect, 1.0f);
}
}
private:
juce::Array<Colour> colours;
};
The base class for all JUCE user-interface objects.
Definition juce_Component.h:48
static Random & getSystemRandom() noexcept
The overhead of creating a new Random object is fairly small, but if you want to avoid it,...
Here we store the items in an array. To select an item at random we generate a random value based on the array's size. Then we use this value as the index into the array.
Other distributions
All of the random numbers generated in this tutorial so far have been uniformly distributed between the minimum and maximum values. While this is not a tutorial on statistics, it can be useful to know some simple methods of making certain randomly-generated values more likely to occur than others. This has application in games, computer-generated art, and generative sound and music.
In the following code we generate 1,000 circles distributed uniformly across the window:
void paint (juce::Graphics& g) override
{
g.fillAll (juce::Colours::black);
g.setColour (juce::Colours::orange);
auto& random = juce::Random::getSystemRandom();
juce::Rectangle<float> rect (0.0f, 0.0f, 5.0f, 5.0f);
for (auto i = 0; i < 1000; ++i)
{
rect.setCentre ((float) random.nextInt (getWidth()),
(float) random.nextInt (getHeight()));
g.drawEllipse (rect, 1.0f);
}
}
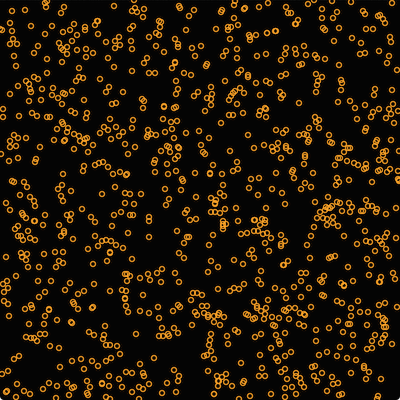
Uniformly distributed circles
You can see from the image that the circles are roughly distributed uniformly.
A linear distribution is where values at one end of the range are more likely than others. Values across the range become less likely towards the other end of the range. The probability between these two points changes in a linear fashion. A simple way to implement this is to generate one random value based on the outcome of another random value. In the following example we generate linearly-distributed values for both the x and y coordinates of the circles.
for (auto i = 0; i < 1000; ++i)
{
auto x = random.nextInt (random.nextInt (
Range<int> (1, getWidth())));
auto y = random.nextInt (random.nextInt (
Range<int> (1, getHeight())));
g.drawEllipse (rect, 1.0f);
}
A general-purpose range object, that simply represents any linear range with a start and end point.
Definition juce_Range.h:55
float x
Definition juce_UnityPluginInterface.h:200
float float y
Definition juce_UnityPluginInterface.h:200
Here you can see that we generate one random value then pass the result to the Random::nextInt() function to generate the final value.
- Note
- We can't use zero as the maximum value passed to the Random::nextInt() function so we have to make sure the first random number has a minimum of 1.
The result should look something like this:
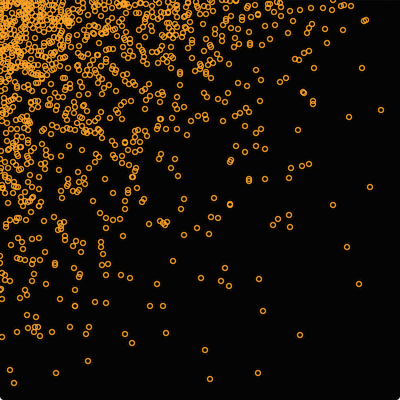
Circles focused around the top-left corner
Since values towards zero are more likely, the circles appear to be focused around the top-left corner. To focus the circles around the centre we could change the code like so:
auto centreX = getWidth() / 2;
auto centreY = getHeight() / 2;
for (auto i = 0; i < 1000; ++i)
{
auto x0 = random.nextInt (juce::Range<int> (1, getWidth() / 2));
auto x = random.nextInt (juce::Range<int> (centreX - x0, centreX + x0));
auto y0 = random.nextInt (juce::Range<int> (1, getHeight() / 2));
auto y = random.nextInt (juce::Range<int> (centreY - y0, centreY + y0));
g.drawEllipse (rect, 1.0f);
}
Weighted distributions
In some cases you may want to weight the probability of certain outcomes specifically. Let's take our earlier example where we chose randomly from three colours in an array. Let's say we want white to be the most likely, orange less likely, and green even less likely than orange. We could define probabilities as shown in the following table:
| Colour | Probability |
| White | 70% |
| Orange | 25% |
| Green | 5% |
We could add an additional array of weights to our code where the indices of the weights correspond with the indices of the colours:
class MainContentComponent : public juce::Component
{
public:
MainContentComponent()
{
colours.add (juce::Colours::white);
weights.add (0.7f);
colours.add (juce::Colours::orange);
weights.add (0.25f);
colours.add (juce::Colours::lightgreen);
weights.add (0.05f);
setSize (400, 400);
}
void paint (juce::Graphics& g) override
{
g.fillAll (juce::Colours::black);
juce::Random random;
juce::Rectangle<float> rect (0.0f, 0.0f, 5.0f, 5.0f);
auto sumOfWeights = sumFloatArray (weights);
for (auto i = 0; i < 1000; ++i)
{
g.setColour (colourAtQuantile (random.nextFloat() * sumOfWeights));
rect.setCentre ((float) random.nextInt (getWidth()),
(float) random.nextInt (getHeight()));
g.drawEllipse (rect, 1.0f);
}
}
private:
static float sumFloatArray (const juce::Array<float>& values)
{
auto sum = 0.0f;
for (auto value : values)
sum += value;
return sum;
}
static int indexOfQuantile (const juce::Array<float>& weights, float quantile)
{
auto runningTotal = 0.0f;
for (auto weight : weights)
{
runningTotal += weight;
if (quantile < runningTotal)
return weights.indexOf (weight);
}
return -1;
}
juce::Colour colourAtQuantile (float quantile) const
{
auto index = indexOfQuantile (weights, quantile);
return index < 0 ? juce::Colours::transparentBlack : colours[index];
}
juce::Array<juce::Colour> colours;
juce::Array<float> weights;
};
This works as follows:
- : To generate the random number, first take the sum of the weights. In this case we know that the sum of the weights is 1.0, but using this technique the weights do not need to sum to 1.0.
- : Then generate a random number in the range 0 .. sum.
- : The
colourAtQuantile() function uses this value to find the colour.
- : This is achieved by keeping a running total of the weights as we iterate over the the array of weights.
- : When the running total exceeds the randomly generated value we have found the colour.
- Note
- The code for this final example can be found in the
RandomTutorial_02.h file of the demo project.
The result is shown in the following screenshot:
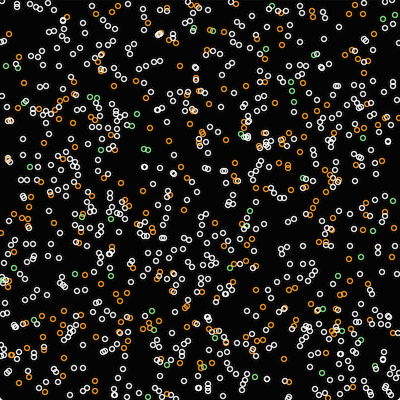
Weighted choices of colours
Summary
In this tutorial we have introduced the Random class and generating random numbers in general. After reading this tutorial you should be able to:
- Generate random integers and floating point values.
- Limit the range of the random numbers generated.
- Use random values to perform drawing tasks.
- Generate specific ranges of randomly generated colours.
- Choose values randomly from an array, including weighting the probability of these choices.
See also
