
Loading...
Searching...
No Matches
This tutorial shows how to use a Graphics object to draw text, lines, and geometric shapes. This is fundamental to performing drawing in JUCE.
Level: Beginner
Platforms: Windows, macOS, Linux, iOS, Android
Classes: Component, Graphics, Font, Colours, Path
Download the demo project for this tutorial here: PIP | ZIP
The demo project for this tutorial contains a main application window and a main component. You should be familiar with these from the last tutorials: Tutorial: The application window and Tutorial: The main component.
You already know that the appearance of the main component (or, as a matter of fact, any other Component!) is determined by the implementation of its paint() function. The demo project here takes off where the last tutorial (Tutorial: The main component) concluded. The implementation of the paint() function initially looks as follows:
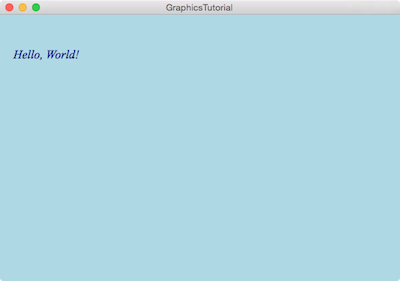
If you compile and run the app now, you should see that the window now has a light blue background colour, and the text Hello, World! is drawn on top of it, in the centre of the window.
In the following, we will add some code that draws some more graphics into the MainComponent object, using the Graphics class. This is a very powerful class, and we will be using it a lot in future tutorials to implement the custom visual appearance of different JUCE components.
Let's have another look at the paint function. Remember that the paint() function is a callback called by the operating system when it is time to render your Component on screen — you should never call this function yourself.
Notice that as the argument to this callback, a reference to a Graphics instance is passed in. This Graphics object is provided by the underlying framework. It is the graphics context that you can use to render any graphical elements: text, lines, shapes, colours, gradients and much more. We will explore some of these in this tutorial.
paint() callback. Normally, you should never use it anywhere else unless when drawing onto an image.Let's first continue with text. The line
sets the font size to 20 pixels for the subsequent line (which draws the text Hello, World! using that font). But what if we want to not only change the size of the font, but also use another typeface and bold or italic letters? And how do we change the position of the text?
There is actually another version of the Graphics::setFont() function that takes a Font object instead of just a float that determines the size. You can create a new Font object like this:
Because we are using this font for our main component, we choose the descriptive variable name mainComponentFont.
The first argument of the Font constructor determines the typeface, the second is the font size, and the third is the font style. Here, we chose italic for the style. The font styles are actually flags that can be used as a bitmask (see Tutorial: The application window), so you can combine them for example like this:
If you compile and run the app again, you should see that the font has changed.
Instead of creating a named Font object and then setting it with the Graphics::setFont() function on the next line, you could also do both in one statement:
although your code will usually be better readable and maintainable with separating the statements and using a named variable. (With modern compilers, introducing such an additional variable will have no impact on performance.)
Now we change the position of the text. In the process, we will learn how positioning is handled in JUCE.
The easy way would be to simply change the alignment of the text with respect to the whole component, for example by changing the Justification::centred value to another one of the possible values, for example the Justification::topLeft value. (You can also check out the other possible Justification::Flags values.) However, another very powerful approach is to explicitly define the size and position. There is another version of the Graphics::drawText() function using this approach. Change the line starting with the g.drawText() call to the following:
This tells the Graphics object to render the text into an area that is 200 pixels wide, 40 pixels high, and located 20 pixels to the right and 40 pixels to the bottom from the top-left corner of the main component.
The app should now look like this:
int or float numbers. When used to specify the position of a graphical element or child component, it will be positioned such that its top left corner will appear at the given position.Finally, the last argument of the Graphics::drawText() function is a bool flag which determines whether an ellipsis (...) should be shown if the text does not fit within the given width, or whether the text should be simply chopped off.
In this section, we continue with drawing some geometrical shapes using the Graphics class.
Add the following lines to the bottom of the paint() function:
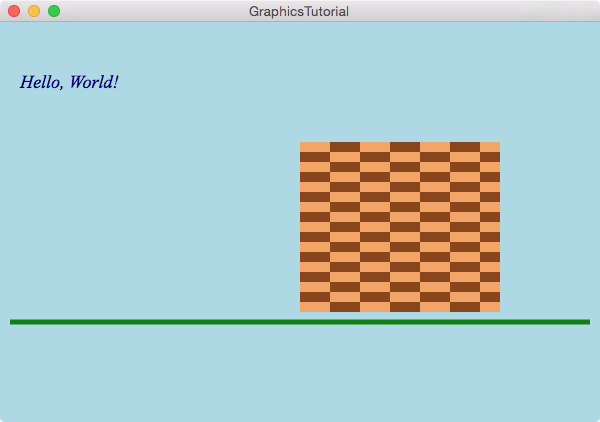
This will draw a green horizontal line 5 pixels wide across the window, starting from (10, 300) and ending at (590, 300). Note that every time you want to draw a geometric shape in another colour than the one used last time, you have to call the Graphics::setColour() function before you draw.
You can of course also draw diagonal lines by specifying other coordinates. In fact, JUCE also supports subpixel coordinates (you can use float values for the positions). If the position falls between physical screen pixels, JUCE will apply anti-aliasing for the drawing.
Drawing rectangles using the Graphics object is quite straightforward. Add the following line to the paint() function body:
This will render a brown rectangle, 200 pixels wide, 170 pixels high, positioned with its top-left corner at the position (300, 120).
An optional fifth argument lets you specify the line thickness:
If you want a filled rectangle, use the function Graphics::fillRect() instead:
Instead of giving the position, width, and height separately, there is a more convenient class to represent a rectangle: the Rectangle class. There is also a version of the Graphics::drawRect() function that takes such a Rectangle instance to specify the position of the rectangle:
This very convenient Rectangle class will be explored in a future tutorial.
You don't have to fill the rectangle with a solid colour. You can also use a colour gradient or one of several other patterns. Let's imagine that the brown rectangle represents a house. We can add a brick-like texture by filling it with a checkered pattern. Use the following code to draw the rectangle:
If you compile and run the application now, it should look as follows:
Let's see how the Graphics class draws circles and ellipses. Have a look at the functions Graphics::drawEllipse() and Graphics::fillEllipse(). They work just like the Graphics::drawRect() and Graphics::fillRect() functions.
Let's add a sun to our little landscape. The following code will draw a circle 60 pixels across in the upper-right region of the window:
Note that the position given (530, 10) does not place the centre of the circle at that position. Instead, as with all other graphical elements, the object will be placed such that the top-left corner of its enclosing rectangle will be located at the given position.
You can also explicitly use the bounds of the component to calculate the position, for example:
Finally, let's add a roof to our house. This will be a red triangle.
You will find out that there is no function called drawTriangle() or drawPolygon() in the Graphics class. For this, we have to take a more generic approach.
Check out the Path class. It essentially handles any sets of connected points. In this case, we need a triangle that comprises three points. For example, we could use the three points (300, 110), (500, 110), (400, 70) so that the roof triangle sits on top of the house rectangle.
That's how our red roof looks like in JUCE code:
Here is how the finished demo app should look if you compile and run it now:

In this tutorial, we showed how to use the Graphics object inside the paint() callback of a Component class to draw inside a component. You should now be familiar with:
You should now also know that a Graphics object is a drawing context provided by the underlying framework and should not be used outside the paint() callback.
The Graphics class is capable of more graphical rendering functionality than discussed in this tutorial. Notably, you can use it to draw images (from image files) on the screen. There is also much more you can do using the Path class. Some other features of the Graphics class include colour gradients, transparency layers, and transforms. Some of these will be covered in future tutorials.