Loading...
Searching...
No Matches
Tutorial: Animating geometry

Create simple animations in your JUCE applications. Bring static geometry shapes to life using the AnimatedAppComponent class.

Level: Beginner

Platforms: Windows, macOS, Linux, iOS, Android

Classes: AnimatedAppComponent, Path, Point

Getting started

Download the demo project for this tutorial here: PIP | ZIP. Unzip the project and open the first header file in the Projucer.

If you need help with this step, see Tutorial: Projucer Part 1: Getting started with the Projucer.

The demo project

When completed, the demo project will display a continuous and smooth animation of a fish on the screen made of multiple Path and Point objects.

The demo project window
Note
The code presented here is broadly similar to the AnimationAppExample from the JUCE Examples.

The AnimatedAppComponent class

When creating a simple animated JUCE application, a useful class to inherit from is the AnimatedAppComponent class. Just as the AudioAppComponent or OpenGLAppComponent classes are useful for audio applications and OpenGL applications respectively, the AnimatedAppComponent offers functions that are beneficial to animation making namely:

  • setFramesPerSecond(): This function allows us to set the FPS at the very start of our application for our animation to run as smoothly as possible. It also starts the repaint process at the given frequency when called.
  • update(): This function gets called at the rate set by the setFramesPerSecond() function and this is where step-by-step advancements of animation parameters are performed.
  • getFrameCounter(): Returns the total number of calls to the update() function since the start of the animation at the FPS rate defined. This is useful in periodic mathematical functions to compute animations.
  • getMillisecondsSinceLastUpdate(): Another useful function that returns the time taken since the last update() function call in milliseconds in order to create animations that are accurately timed regardless of the frame rate.

By using these functions along with the paint() function of the parent Component class, we can start creating simple animations.

Animating a Circle

As we can see in the MainContentComponent class, the MainContentComponent inherits from the AnimatedAppComponent.

The first step to creating an animation is to set the frame rate of our animation. We do this in the MainContentComponent constructor like so [1] by calling the setFramesPerSecond() function:

MainContentComponent()
{
setSize (800, 600);
setFramesPerSecond (60); // [1]
}

Here we set the FPS to 60 and this will internally call a timer at a frequency of 60Hz for our animation to be updated 60 times per second. This is roughly equivalent to most screen's refresh rate and will result in a smooth animation.

Let's start by animating a simple circle in a circular motion. In the paint() function, first set the colour in which we want to draw the circle by calling the setColour() function of the Graphics class [2]. Next define the radius of the circular path that the shape will follow [3] as shown here:

void paint (juce::Graphics& g) override
{
//...
g.setColour (getLookAndFeel().findColour (Slider::thumbColourId)); // [2]
int radius = 150; // [3]
juce::Point<float> p (getWidth() / 2.0f + 1.0f * radius,
getHeight() / 2.0f + 1.0f * radius); // [4]
g.fillEllipse (p.x, p.y, 30.0f, 30.0f); // [5]
}
@ thumbColourId
The colour to draw the thumb with.
Definition juce_Slider.h:873

Then create a Point that represents the position of the center of our shape at the given time frame [4]. Here, in order to create a circular motion first find the center of the screen by dividing the width and height of the screen by two. Then offset the x and y coordinates of the shape by adding the radius value to both of them.

Lastly, paint the actual circle by using the fillEllipse() function by providing the previously defined Point coordinates and a diameter of 30 as arguments.

Can you guess what happens to the circle if we run our application now? That's right, the circle gets painted in a static manner in the bottom right corner of the screen because as the coordinate system starts in the top left corner, the circle is only pushed by the radius value to the opposite direction as shown here:

The static circle

Let's modify our declaration of our Point to create the actual motion.

void paint (juce::Graphics& g) override
{
// (Our component is opaque, so we must completely fill the background with a solid colour)
g.fillAll (getLookAndFeel().findColour (juce::ResizableWindow::backgroundColourId));
g.setColour (getLookAndFeel().findColour (juce::Slider::thumbColourId));
int radius = 150;
juce::Point<float> p ((float) getWidth() / 2.0f + 1.0f * (float) radius * std::sin ((float) getFrameCounter() * 0.04f),
(float) getHeight() / 2.0f + 1.0f * (float) radius * std::cos ((float) getFrameCounter() * 0.04f));
g.fillEllipse (p.x, p.y, 30.0f, 30.0f);
}

Here we use the getFrameCounter() function to retrieve the counter on the number of frames since the start of our animation and use its value to compute a value between -1 .. 1 using the sine and cosine functions for the width and height respectively. The scalar multiplication of 0.04 on the frame counter controls the speed at which the periodic functions will alternate to create circular motion.

If we run the application now, we should see the circular motion appearing.

Note
The source code for this modified version of the code can be found in the 
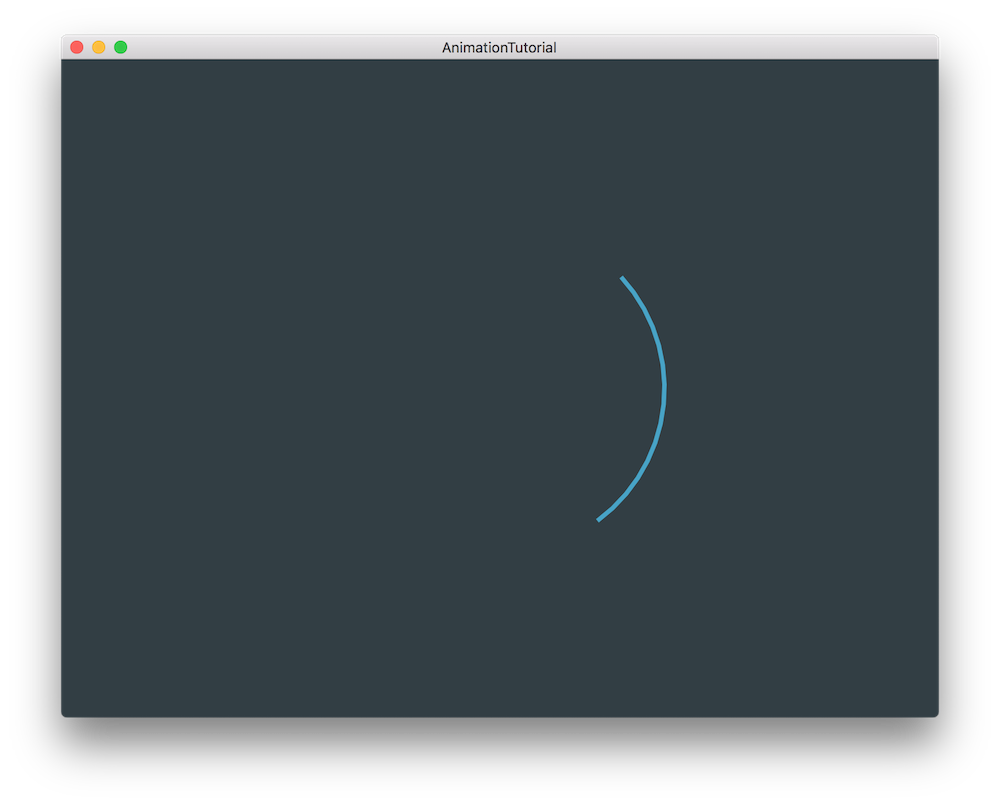
AnimationTutorial_02.h file of the demo project.

Animating a Path

Instead of a circle, let's animate a line along a circular path next.

Using the same code base as the previous section we are going to create multiple Point objects along which a Path will be created instead of just a single animated Point. Modify the paint() function as follows:

void paint (juce::Graphics& g) override
{
// (Our component is opaque, so we must completely fill the background with a solid colour)
g.fillAll (getLookAndFeel().findColour (juce::ResizableWindow::backgroundColourId));
g.setColour (getLookAndFeel().findColour (juce::Slider::thumbColourId));
auto numberOfDots = 15; // [1]
juce::Path spinePath; // [2]
for (auto i = 0; i < numberOfDots; ++i) // [3]
{
int radius = 150;
juce::Point<float> p ((float) getWidth() / 2.0f + 1.0f * (float) radius * std::sin ((float) getFrameCounter() * 0.04f + (float) i * 0.12f),
(float) getHeight() / 2.0f + 1.0f * (float) radius * std::cos ((float) getFrameCounter() * 0.04f + (float) i * 0.12f));
if (i == 0)
spinePath.startNewSubPath (p); // if this is the first point, start a new path..
else
spinePath.lineTo (p); // ...otherwise add the next point
}
// draw an outline around the path that we have created
g.strokePath (spinePath, juce::PathStrokeType (4.0f)); // [4]
}
  • [1]: First define the number of dots to create along the path.
  • [2]: Next create a Path object to draw the line that will connect the dots.
  • [3]: Now for every dot, create the same Point object as before but this time we are going to offset the animation for every subsequent iteration in the loop. Notice the addition of an offset of 0.12 between every dot in the circular motion. If the iteration is the first one, we create a new sub path by calling the startNewSubPath() function on the Path object, otherwise we connect the current dot to the previously defined dots on the Path.
  • [4]: Finally, draw an outline around the created Path along the Point objects.

By running the application, we can see a line drawn in a circular way.

The circular path
Exercise
Try changing the FPS of the application and notice how the smoothness of the animation varies. What happens at the standard 24FPS rate of film animations?
Note
The source code for this modified version of the code can be found in the AnimationTutorial_03.h file of the demo project.

Animating a Fish

Let's try something a little more interesting by animating a fish from the Path and Point objects we have created so far.

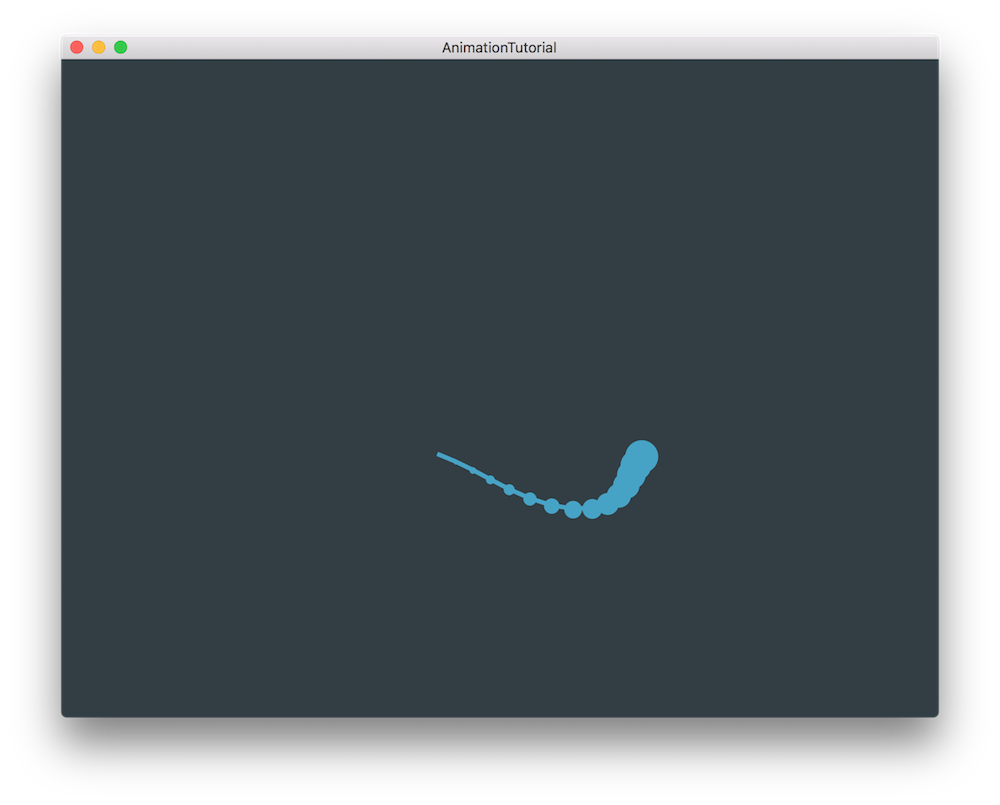
In order to show the actual points drawn along the circular path and create the body of the fish, let's add a line in our for loop that draws the circles by using the fillEllipse() function and by specifying an increasing width and height for each dot along the line [1] like so:

void paint (juce::Graphics& g) override
{
//...
g.setColour (getLookAndFeel().findColour (juce::Slider::thumbColourId));
auto fishLength = 15;
juce::Path spinePath;
for (auto i = 0; i < fishLength; ++i)
{
int radius = 150;
juce::Point<float> p (getWidth() / 2.0f + 1.0f * radius * std::sin (getFrameCounter() * 0.04f + i * 0.12f),
getHeight() / 2.0f + 1.0f * radius * std::cos (getFrameCounter() * 0.04f + i * 0.12f));
// draw the circles along the fish
g.fillEllipse (p.x - i, p.y - i, 2.0f + 2.0f * i, 2.0f + 2.0f * i); // [1]
if (i == 0)
spinePath.startNewSubPath (p); // if this is the first point, start a new path..
else
spinePath.lineTo (p); // ...otherwise add the next point
}
// draw an outline around the path that we have created
g.strokePath (spinePath, juce::PathStrokeType (4.0f));
}

Now by running the application we should see something that starts to look like a fish but does not behave like one yet.

The body of the fish

So let's change its animation a bit to mimic the motion of a fish.

void paint (juce::Graphics& g) override
{
//...
for (auto i = 0; i < fishLength; ++i)
{
auto radius = 100 + 10 * std::sin (getFrameCounter() * 0.1f + i * 0.5f); // [2]
juce::Point<float> p (getWidth() / 2.0f + 1.0f * radius * std::sin (getFrameCounter() * 0.04f + i * 0.12f),
getHeight() / 2.0f + 1.0f * radius * std::cos (getFrameCounter() * 0.04f + i * 0.12f));
//...
}
//...
}

Here we apply modulation to the radius of the circle using a sine function and the frame counter by using the same getFrameCounter() function along with a scalar and a slightly different offset for every dot along the line [2]. This should provide us with a snake like motion if we run the application.

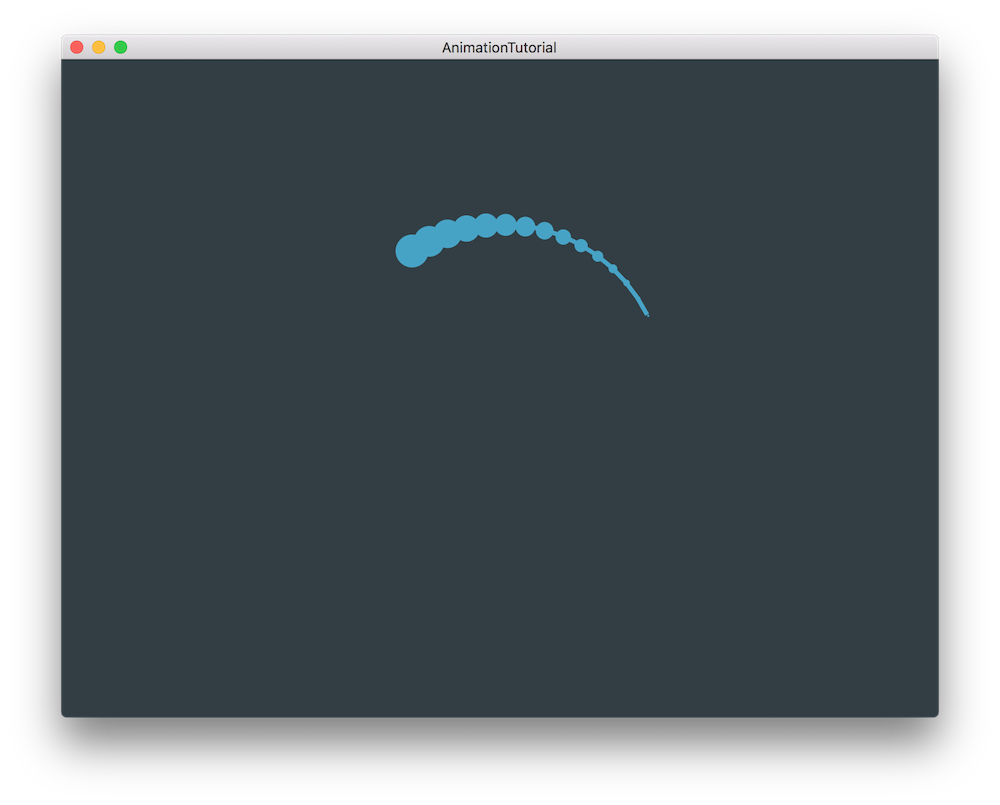
The motion looks convincing but seems a little monotonous as it repeats itself fairly quickly with no surprise and still on its initial circular trajectory.

void paint (juce::Graphics& g) override
{
//...
for (auto i = 0; i < fishLength; ++i)
{
auto radius = 100 + 10 * std::sin (getFrameCounter() * 0.1f + i * 0.5f);
juce::Point<float> p (getWidth() / 2.0f + 1.5f * radius * std::sin (getFrameCounter() * 0.02f + i * 0.12f),
getHeight() / 2.0f + 1.0f * radius * std::cos (getFrameCounter() * 0.04f + i * 0.12f)); // [3]
//...
}
//...
}

If we offset the rate of our sine and cosine functions in the Point creation and provide a different ratio for the width and height of the radius [3], we can get much more convincing results.

Run the application one last time to notice the improvement in the randomness of the motion.

Exercise
Modify the fish length or create your own custom animated shape using similar methods.
Note
The source code for this modified version of the code can be found in the AnimationTutorial_04.h file of the demo project.

Summary

In this tutorial, we have learnt how to animate geometry shapes in a JUCE application. In particular, we have:

  • Explored the mechanics of the AnimatedAppComponent class.
  • Painted shapes using the Graphics class.
  • Animated the shapes on a frame-by-frame basis.

See also

linkedin facebook pinterest youtube rss twitter instagram facebook-blank rss-blank linkedin-blank pinterest youtube twitter instagram