
Loading...
Searching...
No Matches
Welcome to the Projucer manual. This document will be updated regularly as new features are added to the Projucer. The manual is up to date as of the Projucer version displayed below.
Version: 5.3.0
The Projucer is a convenient application that allows you to develop, manage and deploy cross-platform applications in conjunction with your preferred IDE. It comes packaged with the JUCE library when downloaded or can be alternatively built from the latest development branch of the GitHub repository.
It is also a very powerful tool to manage all settings for your project, add source files, and much more. As you develop your JUCE application, the Projucer will be your faithful companion throughout the process.
If you haven't downloaded JUCE yet, visit the JUCE website at www.juce.com to download the library first. Unpack the JUCE folder and place it to some location on your computer. Your user home folder is a convenient place.
Go into the JUCE folder you just installed. You will find the Projucer that you can launch, located there.
The Projucer is available for all three major operating systems and has the following system requirements:
| macOS | Windows | Linux |
|---|---|---|
| 10.9 or higher | 8.1 or higher | Ubuntu 16.04.3 LTS |
| Xcode 7.3 or higher | Visual Studio 2015 or higher | Makefile |
| 64 Bit |
All of the files that you need to create VST and AU (macOS only) plug-ins are packaged with JUCE. In order to build VST3 or AAX plugins, please download the appropriate SDKs from Steinberg and Avid respectively.
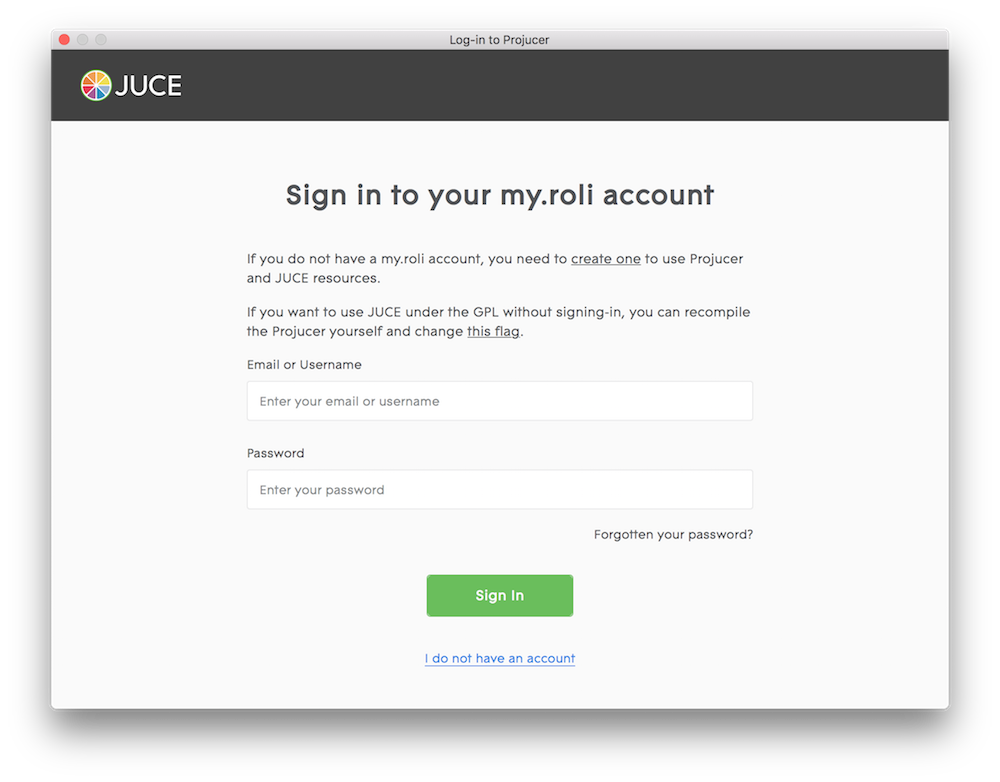
When first launched, the application will ask you to sign in with your my.roli credentials. Enter your email or username and password to log in.
You will also need a JUCE license registered in your ROLI account to use the Projucer. In the following screen, you can choose the type of license you wish to use:

The first time you launch the Projucer, you are presented with the new project wizard. (You can also launch the wizard later by selecting New Project... from the Projucer's main menu.) To create a new Projucer project, select the project type of your choice in the project template chooser:

For each project type, the Projucer will generate all project files and add the appropriate minimal code that sets everything up. In this way, after you have created your project, you can immediately get started with developing your actual functionality.
If you are exploring JUCE for the first time and don't know where to start, go for a GUI application — this will set up all the basics for a working application for you, for both desktop and mobile platforms.
The following table describes the different types of template project that the Projucer can create for you:
| Project Type | Description |
|---|---|
| GUI Application | This creates a minimal JUCE application with an empty application window. You can start here and add more functionality, such as more GUI components, using the various classes that JUCE offers. |
| Animated Application | This creates an application which draws an animated graphical display. You can start here to create an animated mobile app, for example. |
| OpenGL Application | This creates a blank JUCE application, like GUI Application, but adds support for OpenGL to draw features including 3D model import and GLSL shaders. |
| Console Application | JUCE is also very useful for developing command-line applications that do not have any GUI at all. Use this project type to create such an application. |
| Audio Application | This creates a blank JUCE application, like GUI Application, but automatically adds all the setup code that you need to easily get audio input and output. You can use this for games, multimedia applications, and much more. |
| Audio Plug-In | This creates a blank audio plug-in. All the code to support VST, AudioUnit and AAX plug-in formats, is added automatically. Depending on your setup, this project type may require some additional preparation steps to work correctly. |
| Static Library | This project type is useful to create re-usable software libraries that build on top of JUCE. Use this for static library linking. |
| Dynamic Library | This project type is useful to create re-usable software libraries that build on top of JUCE. Use this for dynamic library linking. |
Optionally, you can open existing projects or create blank templates in the same screen as described below:
| Command | Description |
|---|---|
| Open Existing Project | Opens an existing project from the file browser. |
| Create Blank Project | This creates a blank project with no source files at all. |
| Browse JUCE Demos | Opens the DemoRunner app to browse through demo projects from the JUCE/examples directory. |
| View JUCE Tutorials | Opens the default browser to view JUCE tutorials on the website. |
There are also many example projects which can serve as an alternative starting point for your project. They are located in the subfolder JUCE/examples. You can open an example project by navigating to File > Open Example from the menu items.
After you have selected the appropriate project type, the Projucer will take you through some additional settings, such as the target platform of your application and various project paths. In the second page of the wizard, you will be prompted with a configuration screen like this:

In this screen you can specify the name of your project and its location on your local system and choose which type of files to auto-generate. You will also select the location of your modules folder and the target platforms of your choice.
modules subfolder located inside the JUCE folder installed on your system. You can alternatively choose to use the Global Module Paths by checking the appropriate checkbox below the field.The following target platforms are currently supported in the Projucer:
| Target Platform | Description |
|---|---|
| Xcode (macOS) | Exports an Xcode project to build an executable for macOS. |
| Xcode (iOS) | Exports an Xcode project to build an executable for iOS. |
| Visual Studio 2017 | Exports a Visual Studio 2017 project to build an executable for Windows. |
| Visual Studio 2015 | Exports a Visual Studio 2015 project to build an executable for Windows. |
| Visual Studio 2013 | Exports a Visual Studio 2013 project to build an executable for Windows. |
| Linux Makefile | Exports a Makefile project to build an executable for Linux. |
| Android | Exports an Android Studio project to build an executable for Android. |
| Code::Blocks (Windows) | Exports a Code::Blocks project to build an executable for Windows. |
| Code::Blocks (Linux) | Exports a Code::Blocks project to build an executable for Linux. |
| CLion (beta) | Exports a CLion project to build an executable for macOS, Windows or Linux. |
This table shows the currently supported IDEs depending on your target platform:
| Target Platform | Supported IDEs |
|---|---|
| macOS | Xcode, CLion |
| Windows | Visual Studio, Code::Blocks, CLion |
| Linux | Makefile, Code::Blocks, CLion |
| iOS | Xcode, CLion |
| Android | Android Studio |
All export targets (which are the native IDE projects) are generated when you create your Projucer project. They are also updated every time you save it in the Projucer. At any time, you can create new export targets to add support for more IDEs and platforms to your project.
Below is the folder structure of a JUCE project that the Projucer generates for you:
| Folder/File | Content |
|---|---|
| .jucer File | Contains all project settings. |
| Source Folder | The C++ source code of your JUCE app. |
| Builds Folder | The export targets generated by the Projucer. Open these files to start coding, debugging, and running your JUCE app. |
| JuceLibraryCode Folder | Auto-generated header files that include the JUCE library code via the JUCE modules. Note that the actual JUCE library code is not located here, but inside your globally-installed JUCE folder. |
Instead of specifying an absolute or relative path for your modules in each of your Projucer projects, you can choose to use the global paths that are set on your development machine. This way you can open up the same Projucer project on another machine and it will automatically search for the global paths set on that system. You can access this setup screen by navigating under the menu items to Projucer > Global Paths...:

If the path is correct it should be displayed in white text (or red if there is a problem).
These paths are platform-specific and they are stored locally on your development machine:
| JUCE Path | Description |
|---|---|
| Path to JUCE | Location of the JUCE library on your local system as an absolute or relative path. |
| Module Path | Description |
|---|---|
| JUCE Modules | Location of the JUCE library modules on your local system as an absolute or relative path. |
| User Modules | Location of the custom user modules on your local system as an absolute or relative path. |
You can also set the global paths for your plug-in SDKs and Android SDKs in the same window:
| SDK Path | Description |
|---|---|
| VST3 SDK | Location of the Steinberg VST3 SDK on your local system as an absolute or relative path. |
| RTAS SDK | [Except Linux] - Location of the Avid RTAS SDK on your local system as an absolute or relative path. |
| AAX SDK | [Except Linux] - Location of the Avid AAX SDK on your local system as an absolute or relative path. |
| Android SDK | Location of the Android SDK on your local system as an absolute or relative path. |
| Android NDK | Location of the Android NDK on your local system as an absolute or relative path. |
| Other Path | Description |
|---|---|
| CLion app/executable/startup script | Location of the CLion application on your local system as an absolute or relative path. |
The main Projucer project window is separated into three different sections namely the toolbar at the top, the side panel on the left and the editor on the right as shown in the following screenshot:

The toolbar at the top of the window provides various functionalities described in this table:
| Icon | Action | Description |
|---|---|---|
| Project Settings | Opens the project settings panel. |
| Save and Open in IDE | Saves the project and opens it in the default IDE for the chosen exporter. Icon varies depending on IDE. |
| Launch Application | Launches the application in the Projucer. This action is only available when compilation is enabled. |
| User Settings | Opens the user settings popup window. |
The side panel of the Projucer is divided into two sections namely the project tab with file explorer, modules and exporters panels and a live-build engine tab as shown here:

In various sections of the side panel, you will find buttons with different functionalities described in this table:
| Icon | Action | Description |
|---|---|---|
| Info Popup | Provides useful help text as a popup for the parameter in question. |
| Add File/Module/Exporter | Provides a contextual menu to add files, modules and exporters in the appropriate section. |
| Live Build/Module Settings | Opens the live build settings or the global module settings window to manage all module settings at once. |
In the Projucer’s configuration settings, you can change project settings, such as which plug-in types you wish to export and whether the plug-in receives or produces MIDI notes (amongst many other things). You can change these settings at any time.
The project settings page can be accessed by clicking on the corresponding button in the toolbar or through the menu items under View > Show Project Settings.

The following table describes the settings for an application type project:
| Project Setting | Description |
|---|---|
| Project Name | The name of the project. |
| Project Version | The project's version number, This should be in the format major.minor.point[.point]. |
| Company Name | Your company name, which will be added to the properties of the binary where possible. |
| Company Copyright | Your company copyright, which will be added to the properties of the binary where possible. |
| Company Website | Your company website, which will be added to the properties of the binary where possible. |
| Company E-mail | Your company e-mail, which will be added to the properties of the binary where possible. |
| Report JUCE app usage | This option controls the collection of usage data from users of this JUCE application. Required for closed source applications without an Indie or Pro JUCE license. In accordance with the terms of the JUCE 5 End-Use License Agreement (www.juce.com/juce-5-licence), this option can only be disabled for closed source applications if you have a JUCE Indie or Pro license, or are using JUCE under the GPL v3 license. |
| Display the JUCE splash screen | This option controls the display of the standard JUCE splash screen. Required for closed source applications without an Indie or Pro JUCE license. In accordance with the terms of the JUCE 5 End-Use License Agreement (www.juce.com/juce-5-licence), this option can only be disabled for closed source applications if you have a JUCE Indie or Pro license, or are using JUCE under the GPL v3 license. |
| Splash screen colour | Choose the colour of the JUCE splash screen between "Dark" and "Light". |
| Project Type | The project type for which settings should be shown. Can be selected from "GUI Application", "Console Application", "Static Library", "Dynamic Library" and "Audio Plug-In". |
| Bundle Identifier | A unique identifier for this product, mainly for use in OSX/iOS builds. It should be something like 'com.yourcompanyname.yourproductname'. |
| BinaryData.cpp size limit | When splitting binary data into multiple cpp files, the Projucer attempts to keep the file sizes below this threshold. (Note that individual resource files which are larger than this size cannot be split across multiple cpp files). The options are "64 KB", "128 KB", "256 KB", "512 KB", "1 MB", "2 MB", "6 MB", "10 MB", "20MB" and "Default". |
| Include BinaryData in AppConfig | Enable this if you want to include the BinaryData header in your AppConfig header. |
| BinaryData Namespace | The namespace containing the binary assests. If left empty this defaults to "BinaryData". |
| C++ Language Standard | The standard of the C++ language that will be used for compilation. Can be selected from C++11, C++14, C++17 and the latest C++ version. |
| Preprocessor definitions | Global preprocessor definitions. Use the form "NAME1=value NAME2=value", using whitespace, commas, or new-lines to separate the items - to include a space or comma in a definition, precede it with a backslash. |
| Header search paths | Global header search paths. |
| Notes | Extra comments: This field is not used for code or project generation, it's just a space where you can express your thoughts. |
When the project is set as an audio plug-in, you will find different settings on the same page:

The following settings allow you to build different plug-in formats within the same Projucer project:
| Plugin Setting | Description |
|---|---|
| Build VST | Whether the project should produce a VST plugin. |
| Build VST3 | Whether the project should produce a VST3 plugin. |
| Build AudioUnit | Whether the project should produce an AudioUnit plugin. |
| Build AudioUnit v3 | Whether the project should produce an AudioUnit version 3 plugin. |
| Build RTAS | Whether the project should produce an RTAS plugin. |
| Build AAX | Whether the project should produce an AAX plugin. |
| Build Standalone Plug-In | Whether the project should produce a standalone version of your plugin. |
| Enable Inter-App Audio | Whether a standalone plug-in should be an Inter-App Audio app. You should also enable the audio background capability in the iOS exporter. |
The following table describes additional plug-in settings shown on the project settings page:
| Plugin Setting | Description |
|---|---|
| Plugin Name | The name of your plugin. (Keep it short!) |
| Plugin Description | A short description of your plugin. |
| Plugin Manufacturer | The name of your company (cannot be blank). |
| Plugin Manufacturer Code | A four-character unique ID for your company. Note that for AU compatibility, this must contain at least one upper-case letter! |
| Plugin Code | A four-character unique ID for your plugin. Note that for AU compatibility, this must contain at least one upper-case letter! |
| Plugin Channel Configurations | This list is a comma-separated set list in the form {numIns, numOuts} and each pair indicates a valid plug-in configuration. For example {1, 1}, {2, 2} means that the plugin can be used either with 1 input and 1 output, or with 2 inputs and 2 outputs. If your plug-in requires side-chains, aux output buses etc., then you must leave this field empty and override the isBusesLayoutSupported callback in your AudioProcessor. |
| Plugin is a Synth | Enable this if you want your plugin to be treated as a synth or generator. It doesn't make much difference to the plugin itself, but some hosts treat synths differently to other plugins. |
| Plugin Midi Input | Enable this if you want your plugin to accept midi messages. |
| Plugin Midi Output | Enable this if your plugin is going to produce midi messages. |
| Midi Effect Plugin | Enable this if your plugin only processes midi and no audio. |
| Plugin Editor Requires Keyboard Focus | Enable this if your plugin needs keyboard input - some hosts can be a bit funny about keyboard focus. |
| Plugin AU Export Prefix | A prefix for the names of exported entry-point functions that the component exposes - typically this will be a version of your plugin's name that can be used as part of a C++ token. |
| Plugin AU Main Type | In an AU, this is the value that is set as JucePlugin_AUMainType, such as:
|
| Plugin VST Category | In a VST, this is the value that is set as JucePlugin_VSTCategory, such as:
|
| Plugin RTAS Category | This is one of the RTAS categories from FicPluginEnums.h, such as:
|
| Plugin AAX Category | This is one of the categories from the AAX_EPlugInCategory enum, such as:
|
| Plugin AAX Identifier | The value to use for the JucePlugin_AAXIdentifier setting. |
The projucer offers a basic code editor for C++ source files. It is located on the right hand side of the interface.
When a header or CPP file is selected in the side panel file explorer, the editor window will show a code editor with syntax highlighting as shown below:

You can choose to edit your code directly in the Projucer or use your favourite IDE after exporting your project. The code editor in the Projucer has convenient features such as slider controls on numeric types and colour picker wheels on colour types.
You can also choose to change the colour scheme of the code editor to fit your needs using the editor colour scheme window that you can find under View > Editor Colour Scheme > Create...:

You can optionally save and load custom colour schemes on your local machine.
The projucer offers a file browser for C++ source files. It is located under the File explorer tab on the left hand side.
With the Projucer, you can add new source files to your project and delete or rename existing ones, as well as organise files into groups.
The file explorer shows a hierarchical view of your project files. You can rename, delete and create files as well as folders in this side panel.

If you select a folder in the side panel, you can access the bulk settings of all the files contained in that folder as shown in the following screen:

The various options offered on this screen are described in the following table:
| Toggle | Description |
|---|---|
| Binary Resource | The file is added as a binary resource in your executable. Counts towards your platform-specific binary app size limits. |
| Xcode Resource | The file is added as a resource in a separate folder. Counts towards your total resource size limits. |
| Compile | Whether the file should be compiled and added to the appropriate build target. |
By clicking on the + button of the file explorer, you are presented with different options as shown here:

If you make changes to the file structure and then save the project afterwards, your changes will be reflected in all native IDE projects that are exported. In this way, you can easily keep the file structure of the project consistent across all platforms you are developing on.
The JUCE library code is organised into different modules. By default, all modules that are needed for the type of your project are added.
The JUCE library is organised into different modules with separate functionalities. You can choose to include certain modules in the modules section of the Projucer depending on the requirements and features of your project.
Most JUCE modules require other JUCE modules to properly compile. If you ever remove a module on which other modules of your project depend on, then the Projucer will highlight the now "broken" modules in red. You must then either remove the "broken" modules or add the missing modules.
The following table shows the currently available modules to JUCE users:
| Module | Description |
|---|---|
| juce_analytics | Classes to collect analytics and send to destinations |
| juce_audio_basics | Classes for audio buffer manipulation, midi message handling, synthesis, etc |
| juce_audio_devices | Classes to play and record from audio and MIDI I/O devices |
| juce_audio_formats | Classes for reading and writing various audio file formats |
| juce_audio_plugin_client | Classes for building VST, VST3, AudioUnit, AAX and RTAS plugins |
| juce_audio_processors | Classes for loading and playing VST, AU, or internally-generated audio processors |
| juce_audio_utils | Classes for audio-related GUI and miscellaneous tasks |
| juce_blocks_basics | JUCE wrapper for low-level control over ROLI BLOCKS devices |
| juce_box2d | The Box2D physics engine and some utility classes |
| juce_core | The essential set of basic JUCE classes, as required by all the other JUCE modules |
| juce_cryptography | Classes for various basic cryptography functions, including RSA, Blowfish, MD5, SHA, etc |
| juce_data_structures | Classes for undo/redo management, and smart data structures |
| juce_dsp | Classes for audio buffer manipulation, digital audio processing, filtering, oversampling, fast math functions etc |
| juce_events | Classes for running an application's main event loop and sending/receiving messages, timers, etc |
| juce_graphics | Classes for 2D vector graphics, image loading/saving, font handling, etc |
| juce_gui_basics | Basic user-interface components and related classes |
| juce_gui_extra | Miscellaneous GUI classes for specialised tasks |
| juce_opengl | Classes for rendering OpenGL in a JUCE window |
| juce_osc | Open Sound Control implementation |
| juce_product_unlocking | Classes for online product authentication |
| juce_video | Classes for playing video and capturing camera input |
The modules side panel shows the modules that are currently included in your project and lets you manage the settings associated with them.

To manage all the modules at once, click on the settings icon of the side panel to access the global settings as shown in the following screenshot:

It provides an overview over all currently used modules and allows you to set the paths to them.
The table of modules shown on the screen describe current settings for individual modules.
| Setting | Description |
|---|---|
| Version | Describes the module version according to the JUCE library version. |
| Make Local Copy | Creates a local copy of the entire module into your project making it self-contained and free of references into other folders. |
| Paths | Location of the module on your local system as an absolute or relative path. You can specify different paths for different platforms or optionally instruct the module to use the global path set in the Global Paths... menu. |
These settings can be modified in bulk by clicking on the buttons at the bottom of the window.
By clicking on an individual module in the side panel, you can access individual settings for the specified module:

Here, you can check the version and licence of a particular module, and set the paths to additional dependencies such as SDKs and external libraries that a particular module is using. Usually, the default settings work just fine and you should rarely need to go into this page.
The following table shows the settings common to all modules:
| Setting | Description |
|---|---|
| Version | Describes the module version according to the JUCE library version. |
| License | Describes the module license such as ISC or GPL/Commercial. |
| Location | Describes the location of the module on your local system as an absolute path. |
| Path for "Exporter" | Location of the module per exporter on your local system as an absolute or relative path. |
| Use global path | Whether to use the global path set in the Global Paths... menu instead of the exporter-specific paths. |
| Create local copy | Creates a local copy of the entire module into your project making it self-contained and free of references into other folders. |
| Add source to project | Whether to include all the files of the module or only the necessary files to compile the project. |
The following table shows module-specific settings for all the included JUCE modules:
| Module | Setting | Description |
|---|---|---|
| juce_audio_devices | JUCE_ASIO | [Windows Only] - Enables ASIO audio devices. Turning this on means that you'll need to have the Steinberg ASIO SDK installed on your Windows build machine. |
| juce_audio_devices | JUCE_WASAPI | [Windows Vista and Above Only] - Enables WASAPI audio devices. See also the JUCE_WASAPI_EXCLUSIVE flag. |
| juce_audio_devices | JUCE_WASAPI_EXCLUSIVE | [Windows Vista and Above Only] - Enables WASAPI audio devices in exclusive mode. |
| juce_audio_devices | JUCE_DIRECTSOUND | [Windows Only] - Enables DirectSound audio. |
| juce_audio_devices | JUCE_ALSA | [Linux Only] - Enables ALSA audio devices. |
| juce_audio_devices | JUCE_JACK | [Linux Only] - Enables JACK audio devices. |
| juce_audio_devices | JUCE_USE_ANDROID_OBOE | [Android Only] - Enables Oboe devices (API 16 or above). Requires Oboe repository path to be specified in Android exporter. |
| juce_audio_devices | JUCE_USE_ANDROID_OPENSLES | [Android Only] - Enables OpenSLES devices. |
| juce_audio_devices | JUCE_USE_WINRT_MIDI | [Windows 10 and Above Only] - Enables the use of the Windows Runtime API for MIDI, which supports Bluetooth Low Energy connections on computers with the Anniversary Update of Windows 10. To compile with this flag requires version 10.0.14393.0 of the Windows Standalone SDK and you must add the path to the WinRT headers. This path should be something similar to "C:\Program Files (x86)\Windows Kits\10\Include\10.0.14393.0\winrt". Microsoft's Bluetooth MIDI stack has multiple issues, use at your own risk! |
| juce_audio_devices | JUCE_DISABLE_AUDIO_MIXING_WITH_OTHER_APPS | [iOS Only] - Turning this on gives your app exclusive access to the system's audio on platforms which support it. |
| juce_audio_formats | JUCE_USE_FLAC | Enables the FLAC audio codec classes. If your app doesn't need to read FLAC files, you might want to disable this to reduce the size of your codebase and build time. |
| juce_audio_formats | JUCE_USE_OGGVORBIS | Enables the Ogg-Vorbis audio codec classes. If your app doesn't need to read Ogg-Vorbis files, you might want to disable this to reduce the size of your codebase and build time. |
| juce_audio_formats | JUCE_USE_MP3AUDIOFORMAT | Enables the software-based MP3AudioFormat class. IMPORTANT DISCLAIMER: By choosing to enable the JUCE_USE_MP3AUDIOFORMAT flag and to compile this MP3 code into your software, you do so AT YOUR OWN RISK! By doing so, you are agreeing that ROLI Ltd. is in no way responsible for any patent, copyright, or other legal issues that you may suffer as a result. The code in juce_MP3AudioFormat.cpp is NOT guaranteed to be free from infringements of 3rd-party intellectual property. If you wish to use it, please seek your own independent advice about the legality of doing so. If you are not willing to accept full responsibility for the consequences of using this code, then do not enable this setting. |
| juce_audio_formats | JUCE_USE_LAME_AUDIO_FORMAT | Enables the LameEncoderAudioFormat class. |
| juce_audio_formats | JUCE_USE_WINDOWS_MEDIA_FORMAT | [Windows Only] - Enables the Windows Media SDK codecs. |
| juce_audio_plugin_client | JUCE_FORCE_USE_LEGACY_PARAM_IDS | [Plugin Only] - Enable this if you want to force JUCE to use a continuous parameter index to identify a parameter in a DAW (this was the default in old versions of JUCE). This is index is usually used by the DAW to save automation data and enabling this may mess up user's DAW projects. |
| juce_audio_plugin_client | JUCE_FORCE_LEGACY_PARAMETER_AUTOMATION_TYPE | [Plugin Only] - Enable this if you want to force JUCE to use a legacy scheme for identifying plug-in parameters as either continuous or discrete. DAW projects with automation data written by an AudioUnit, VST3 or AAX plug-in built with JUCE version 5.1.1 or earlier may load incorrectly when opened by an AudioUnit, VST3 or AAX plug-in built with JUCE version 5.2.0 and later. |
| juce_audio_plugin_client | JUCE_USE_STUDIO_ONE_COMPATIBLE_PARAMETERS | [Plugin Only] - Enable this if you want JUCE to use parameter ids which are compatible with Studio One. Studio One ignores any parameter ids which are negative. Enabling this option will make JUCE generate only positive parameter ids. Note that if you have already released a plug-in prior to JUCE 4.3.0 then enabling this will change your parameter ids making your plug-in incompatible to old automation data. |
| juce_audio_plugin_client | JUCE_STANDALONE_FILTER_WINDOW_USE_KIOSK_MODE | [Plugin Only] - Enable this if you want your standalone plugin window to use kiosk mode. By default, kiosk mode is enabled on iOS and Android. |
| juce_audio_processors | JUCE_PLUGINHOST_VST | [Plugin Only] - Enables the VST audio plugin hosting classes. |
| juce_audio_processors | JUCE_PLUGINHOST_VST3 | [Plugin Only] - Enables the VST3 audio plugin hosting classes. This requires the Steinberg VST3 SDK to be installed on your machine. |
| juce_audio_processors | JUCE_PLUGINHOST_AU | [Plugin and macOS Only] - Enables the AudioUnit plugin hosting classes. |
| juce_audio_utils | JUCE_USE_CDREADER | Enables the AudioCDReader class (on supported platforms). |
| juce_audio_utils | JUCE_USE_CDBURNER | Enables the AudioCDBurner class (on supported platforms). |
| juce_core | JUCE_FORCE_DEBUG | Normally, JUCE_DEBUG is set to 1 or 0 based on compiler and project settings, but if you define this value, you can override this to force it to be true or false. |
| juce_core | JUCE_LOG_ASSERTIONS | If this flag is enabled, the jassert and jassertfalse macros will always use Logger::writeToLog() to write a message when an assertion happens. Enabling it will also leave this turned on in release builds. When it's disabled, however, the jassert and jassertfalse macros will not be compiled in a release build. |
| juce_core | JUCE_CHECK_MEMORY_LEAKS | Enables a memory-leak check for certain objects when the app terminates. See the LeakedObjectDetector class and the JUCE_LEAK_DETECTOR macro for more details about enabling leak checking for specific classes. |
| juce_core | JUCE_DONT_AUTOLINK_TO_WIN32_LIBRARIES | [Visual Studio Only] - In a Visual C++ build, this can be used to stop the required system libs being automatically added to the link stage. |
| juce_core | JUCE_INCLUDE_ZLIB_CODE | This can be used to disable JUCE's embedded 3rd-party zlib code. You might need to tweak this if you're linking to an external zlib library in your app, but for normal apps, this option should be left alone. If you disable this, you might also want to set a value for JUCE_ZLIB_INCLUDE_PATH, to specify the path where your zlib headers live. |
| juce_core | JUCE_USE_CURL | [Linux Only] - Enables http/https support via libcurl. Enabling this will add an additional run-time dynamic dependency to libcurl. If you disable this then https/ssl support will not be available on linux. |
| juce_core | JUCE_CATCH_UNHANDLED_EXCEPTIONS | If enabled, this will add some exception-catching code to forward unhandled exceptions to your JUCEApplicationBase::unhandledException() callback. |
| juce_core | JUCE_ALLOW_STATIC_NULL_VARIABLES | If disabled, this will turn off dangerous static globals like String::empty, var::null, etc which can cause nasty order-of-initialisation problems if they are referenced during static constructor code. |
| juce_dsp | JUCE_ASSERTION_FIRFILTER | When this flag is enabled, an assertion will be generated during the execution of DEBUG configurations if you use a FIRFilter class to process FIRCoefficients with a size higher than 128, to tell you that's it would be more efficient to use the Convolution class instead. It is enabled by default, but you may want to disable it if you really want to process such a filter in the time domain. |
| juce_dsp | JUCE_DSP_USE_INTEL_MKL | If this flag is set, then JUCE will use Intel's MKL for JUCE's FFT and convolution classes. The folder containing the mkl_dfti.h header must be in your header search paths when using this flag. You also need to add all the necessary intel mkl libraries to the "External Libraries to Link" field in the Projucer. |
| juce_dsp | JUCE_DSP_USE_SHARED_FFTW | If this flag is set, then JUCE will search for the fftw shared libraries at runtime and use the library for JUCE's FFT and convolution classes. If the library is not found, then JUCE's fallback FFT routines will be used. This is especially useful on linux as fftw often comes pre-installed on popular linux distros. You must respect the FFTW license when enabling this option. |
| juce_dsp | JUCE_DSP_USE_STATIC_FFTW | If this flag is set, then JUCE will use the statically linked fftw libraries for JUCE's FFT and convolution classes. You must add the fftw header/library folder to the extra header/library search paths of your JUCE project. You also need to add the fftw library itself to the extra libraries supplied to your JUCE project during linking. You must respect the FFTW license when enabling this option. |
| juce_dsp | JUCE_DSP_ENABLE_SNAP_TO_ZERO | Enables code in the dsp module to avoid floating point denormals during the processing of some of the dsp module's filters. Enabling this will add a slight performance overhead to the DSP module's filters and algorithms. If your audio app already disables denormals altogether (for exmaple, by using the ScopedNoDenormals class or the FloatVectorOperations::disableDenormalisedNumberSupport method), then you can safely disable this flag to shave off a few cpu cycles from the DSP module's filters and algorithms. |
| juce_events | JUCE_EXECUTE_APP_SUSPEND_ON_IOS_BACKGROUND_TASK | [iOS Only] - Will execute your application's suspend method on an iOS background task, giving you extra time to save your applications state. |
| juce_graphics | JUCE_USE_COREIMAGE_LOADER | [macOS Only] - On OSX, enabling this flag means that the CoreImage codecs will be used to load PNG/JPEG/GIF files. It is enabled by default, but you may want to disable it if you'd rather use libpng, libjpeg, etc. |
| juce_graphics | JUCE_USE_DIRECTWRITE | [Windows Only] - Enabling this flag means that DirectWrite will be used when available for font management and layout. |
| juce_gui_basics | JUCE_ENABLE_REPAINT_DEBUGGING | If this option is turned on, each area of the screen that gets repainted will flash in a random colour, so that you can see exactly which bits of your components are being drawn. |
| juce_gui_basics | JUCE_USE_XRANDR | [Linux Only] - Enables Xrandr multi-monitor support. Unless you specifically want to disable this, it's best to leave this option turned on. Note that your users do not need to have Xrandr installed for your JUCE app to run, as the availability of Xrandr is queried during runtime. |
| juce_gui_basics | JUCE_USE_XINERAMA | [Linux Only] - Enables Xinerama multi-monitor support. Unless you specifically want to disable this, it's best to leave this option turned on. This will be used as a fallback if JUCE_USE_XRANDR not set or libxrandr cannot be found. Note that your users do not need to have Xinerama installed for your JUCE app to run, as the availability of Xinerama is queried during runtime. |
| juce_gui_basics | JUCE_USE_XSHM | [Linux Only] - Enables X shared memory for faster rendering on Linux. This is best left turned on unless you have a good reason to disable it. |
| juce_gui_basics | JUCE_USE_XRENDER | [Linux Only] - Enables XRender to allow semi-transparent windowing on Linux. |
| juce_gui_basics | JUCE_USE_XCURSOR | [Linux Only] - Uses XCursor to allow ARGB cursor on Linux. This is best left turned on unless you have a good reason to disable it. |
| juce_gui_extra | JUCE_WEB_BROWSER | [macOS and Windows Only] - This lets you disable the WebBrowserComponent class. If you're not using any embedded web-pages, turning this off may reduce your code size. |
| juce_gui_extra | JUCE_ENABLE_LIVE_CONSTANT_EDITOR | [Debug Only] - This lets you turn on the JUCE_ENABLE_LIVE_CONSTANT_EDITOR support. See the documentation for that macro for more details. |
| juce_video | JUCE_USE_CAMERA | [macOS and Windows Only] - Enables web-cam support using the CameraDevice class. |
The different exporter targets created (Xcode, Visual Studio, and so on) can be found in the Exporters tab on the left hand side.
This is the place to specify additional compiler and linker flags and other platform-specific build settings.
The exporters side panel shows all the different configurations for the exporters selected in the project.

By clicking on the parent exporter in the side panel, you can access the individual settings for the selected exporter:

The following table shows the settings common to all exporters:
| Common Exporter Settings | Description |
|---|---|
| Target Project Folder | The location of the folder in which the project will be created. This path can be absolute, but it's much more sensible to make it relative to the jucer project directory. |
| VST3 SDK Folder | [Plugin Only] - If you are building a VST3 plugin or host, this must be the folder containing the VST3 SDK. This can be an absolute path, or a path relative to the Projucer project file. |
| AAX SDK Folder | [Plugin Only] - If you are building an AAX plugin, this must be the folder containing the AAX SDK. This can be an absolute path, or a path relative to the Projucer project file. |
| RTAS SDK Folder | [Plugin Only] - If you are building an RTAS, this must be the folder containing the RTAS SDK. This can be an absolute path, or a path relative to the Projucer project file. |
| Extra Preprocessor Definitions | Extra preprocessor definitions. Use the form "NAME1=value NAME2=value", using whitespace, commas, or new-lines to separate the items - to include a space or comma in a definition, precede it with a backslash. |
| Extra compiler flags | Extra command-line flags to be passed to the compiler. This string can contain references to preprocessor definitions in the form ${NAME_OF_DEFINITION}, which will be replaced with their values. |
| Extra linker flags | Extra command-line flags to be passed to the linker. You might want to use this for adding additional libraries. This string can contain references to preprocessor definitions in the form ${NAME_OF_VALUE}, which will be replaced with their values. |
| External libraries to link | Additional libraries to link (one per line). You should not add any platform specific decoration to these names. This string can contain references to preprocessor definitions in the form ${NAME_OF_VALUE}, which will be replaced with their values. |
| GNU Compiler Extensions | [Except Visual Studio] - Enabling this will use the GNU C++ language standard variant for compilation. |
| Icon (small) | Sets an icon to use for the executable. Set to "<None>" by default. |
| Icon (large) | Sets an icon to use for the executable. Set to "<None>" by default. |
| Notes | Extra comments: This field is not used for code or project generation, it's just a space where you can express your thoughts. |
The following table shows specific settings for Xcode:
| Xcode Exporter Settings | Description |
|---|---|
| Custom Xcassets folder | [iOS Only] - If this field is not empty, your Xcode project will use the custom xcassets folder specified here for the app icons and launchimages, and will ignore the Icon files specified above. |
| Custom Xcode Resource folders | You can specify a list of custom resource folders here (separated by newlines or whitespace). References to these folders will then be added to the Xcode resources. This way you can specify them for OS X and iOS separately, and modify the content of the resource folders without re-saving the Projucer project. |
| Don't add resources folder to app extension | [Plugin and iOS Only] - Enable this to prevent the Projucer from creating a resources folder for AUv3 app extensions. |
| Device Family | [iOS Only] - The device family to target. Options include "iPhone", "iPad" and "Universal". |
| iPhone Screen orientation | [iOS Only] - The screen orientations that this app should support on iPhones. Options include "Portrait and Landscape", "Portrait" and "Landscape". |
| iPad Screen orientation | [iOS Only] - The screen orientations that this app should support on iPad. Options include "Portrait and Landscape", "Portrait" and "Landscape". |
| File Sharing Enabled | [iOS Only] - Enable this to expose your app's files to iTunes. |
| Support Document Browser | [iOS Only] - Enable this to allow the user to access your app documents from a native file chooser. |
| Status Bar Hidden | [iOS Only] - Enable this to disable the status bar in your app. |
| Microphone access | [iOS Only] - Enable this to allow your app to use the microphone. The user of your app will be prompted to grant microphone access permissions. |
| Microphone access text | [iOS Only] - A short description of why your app needs microphone access. |
| Document file extensions | [GUI Application Only] - A comma-separated list of file extensions for documents that your app can open. Using a leading '.' is optional, and the extensions are not case-sensitive. |
| In-App purchases capability | Enable this to grant your app the capability for in-app purchases. This option requires that you specify a valid Development Team ID. |
| Audio background capability | [iOS Only] - Enable this to grant your app the capability to access audio when in background mode. |
| Bluetooth MIDI background capability | [iOS Only] - Enable this to grant your app the capability to connect to Bluetooth LE devices when in background mode. |
| App groups capability | [iOS Only] - Enable this to grant your app the capability to share resources between apps using the same app group ID. |
| iCloud Permissions | [iOS Only] - Enable this to grant your app the capability to use native file load/save browser windows on iOS. |
| Push Notifications capability | Enable this to grant your app the capability to receive push notifications. |
| Custom PList | You can paste the contents of an XML PList file in here, and the settings that it contains will override any settings that the Projucer creates. BEWARE! When doing this, be careful to remove from the XML any values that you DO want the Projucer to change! |
| PList Preprocess | Enable this to preprocess PList file. This will allow you to set values to preprocessor defines, for instance if you define: #define MY_FLAG 1 in a prefix header file (see PList prefix header), you can have a key with MY_FLAG value and it will be replaced with 1. |
| PList Prefix Header | Header file containing definitions used in plist file (see PList Preprocess). |
| Extra Frameworks | A comma-separated list of extra frameworks that should be added to the build. (Don't include the .framework extension in the name). |
| Pre-build shell script | Some shell-script that will be run before a build starts. |
| Post-build shell script | Some shell-script that will be run after a build completes. |
| Development Team ID | The Development Team ID to be used for setting up code-signing your iOS app. This is a ten-character string (for example, "S7B6T5XJ2Q") that describes the distribution certificate Apple issued to you. You can find this string in the OS X app Keychain Access under "Certificates". |
| App Group ID | [iOS Only] - The App Group ID to be used for allowing multiple apps to access a shared resource folder. Multiple IDs can be added separated by a semicolon. |
| Keep custom Xcode schemes | Enable this to keep any Xcode schemes you have created for debugging or running, e.g. to launch a plug-in in various hosts. If disabled, all schemes are replaced by a default set. |
| USE_HEADERMAP | Enable this to make Xcode search all the projects folders for include files. This means you can be lazy and not bother using relative paths to include your headers, but it means your code won't be compatible with other build systems. |
The following table shows specific settings for Visual Studio:
| Visual Studio Exporter Settings | Description |
|---|---|
| Manifest file | Path to a manifest input file which should be linked into your binary (path is relative to jucer file). |
| Platform Toolset | Specifies the version of the platform toolset that will be used when building this project. Options include the "Default" toolset, "v140", "v140_xp", "v141" and "v141_xp". |
| Use IPP Library | Enable this to use Intel's Integrated Performance Primitives library. Options include "No", "Yes (Default Mode)", "Multi-Threaded Static Library", "Single-Threaded Static Library", "Multi-Threaded DLL" and "Single-Threaded DLL". |
| Windows Target Platform | Specifies the version of the Windows SDK that will be used when building this project. On Windows 10, you can see which SDKs you have installed on your machine by going to "Program Files (x86)\Windows Kits\10\Lib". The default value for this exporter depends on your Visual Studio version. |
The following table shows specific settings for Linux Makefile:
| Linux Makefile Exporter Settings | Description |
|---|---|
| pkg-config libraries | Extra pkg-config libraries for you application. Each package should be space separated. |
The following table shows specific settings for Android:
| Android Exporter Settings | Description |
|---|---|
| Java libraries to include | Java libs (JAR files) (one per line). These will be copied to app/libs folder and "implementation files" dependency will be automatically added to module "dependencies" section for each library, so do not add the dependency yourself. |
| Module repositories | Module repositories (one per line). These will be added to module-level gradle file repositories section. |
| Module dependencies | Module dependencies (one per line). These will be added to module-level gradle file dependencies section. |
| Screen orientation | The screen orientations that this app should support. Options include "Portrait and Landscape", "Portrait" and "Landscape". |
| Android Activity class name | The full java class name to use for the app's Activity class. |
| Android Activity sub-class name | If not empty, specifies the Android Activity class name stored in the app's manifest. Use this if you would like to use your own Android Activity sub-class. |
| Android Activity base class | If not empty, specifies the base class to use for your activity. If custom base class is specified, that base class should be a sub-class of android.app.Activity. When empty, Activity (android.app.Activity) will be used as the base class. Use this if you would like to use your own Android Activity base class. |
| Android Version Code | An integer value that represents the version of the application code, relative to other versions. |
| Android SDK Path | The path to the Android SDK folder on the target build machine. |
| Android NDK Path | The path to the Android NDK folder on the target build machine. |
| Minimum SDK version | The number of the minimum version of the Android SDK that the app requires. |
| Extra Android Assets | A path to a folder (relative to the project folder) which contains extra android assets. |
| gradle version | The version of gradle that is used to build this app (3.3 is fine for JUCE). |
| android plug-in version | The version of the android build plugin for gradle that is used to build this app. |
| NDK Toolchain | The toolchain that gradle should invoke for NDK compilation (variable model.android.ndk.tooclhain in app/build.gradle). Choice between "clang" and "gcc". |
| Android build tools version | The Android build tools version that should use to build this app. |
| Oboe repository path | Path to the root of Oboe repository. Make sure to point Oboe repository to commit with SHA 44c6b6ea9c8fa9b5b74cbd60f355068b57b50b37 before building. |
| Internet Access | If enabled, this will set the android.permission.INTERNET flag in the manifest. |
| Audio Input Required | If enabled, this will set the android.permission.RECORD_AUDIO flag in the manifest. |
| Bluetooth permissions Required | If enabled, this will set the android.permission.BLUETOOTH and android.permission.BLUETOOTH_ADMIN flag in the manifest. This is required for Bluetooth MIDI on Android. |
| Read from external storage | If enabled, this will set the android.permission.READ_EXTERNAL_STORAGE flag in the manifest. |
| Write to external storage | If enabled, this will set the android.permission.WRITE_EXTERNAL_STORAGE flag in the manifest. |
| In-App Billing | If enabled, this will set the com.android.vending.BILLING flag in the manifest. |
| Vibrate | If enabled, this will set the android.permission.VIBRATE flag in the manifest. |
| Content Sharing | If enabled, your app will be able to share content with other apps. |
| Custom permissions | A space-separated list of other permission flags that should be added to the manifest. |
| Remote Notifications | Enable to be able to send remote notifications to devices running your app (min API level 14). Provide Remote Notifications Config File, configure your app in Firebase Console and ensure you have the latest Google Repository in Android Studio's SDK Manager. |
| Remote Notifications Config File | Path to google-services.json file. This will be the file provided by Firebase when creating a new app in Firebase console. |
| Custom manifest XML content | You can specify custom AndroidManifest.xml content overriding the default one generated by Projucer. Projucer will automatically create any missing and required XML elements and attributes and merge them into your custom content. |
| Import static library modules | Comma or whitespace delimited list of static libraries (.a) defined in NDK_MODULE_PATH. |
| Import shared library modules | Comma or whitespace delimited list of shared libraries (.so) defined in NDK_MODULE_PATH. |
| Key Signing: key.store | The key.store value, used when signing the release package. |
| Key Signing: key.store.password | The key.store password, used when signing the release package. |
| Key Signing: key.alias | The key.alias value, used when signing the release package. |
| Key Signing: key.alias.password | The key.alias password, used when signing the release package. |
| Android Theme | The Android theme to use, e.g. @android:style/Theme.NoTitleBar or leave blank for default. |
The following table shows specific settings for Code::Blocks:
| Code::Blocks Exporter Settings | Description |
|---|---|
| Target platform | [Windows Only] - This sets the preprocessor macro WINVER to an appropriate value for the corresponding platform. Options include the "Default" platform, "Windows NT 4.0", "Windows 2000", "Windows XP", "Windows Server 2003", "Windows Vista", "Windows Server 2008", "Windows 7", "Windows 8", "Windows 8.1" and "Windows 10". |
The following table shows specific settings for CLion:
| CLion Exporter Settings | Description |
|---|---|
| Import settings from exporter | If this is enabled then settings from the corresponding exporter will be used in the generated CMakeLists.txt file. There are three possible exporter options namely Xcode (macOS), Code::Blocks (Windows) and Linux Makefile. |
By clicking on the + button of the exporter panel, you can add additional exporters as shown here:

You can do this at any time. For example, if you originally created a JUCE application for Windows and macOS, but then later you decided to also add support for Linux, you can do it with ease.
You can also delete export targets by right-clicking on them and selecting Delete this exporter.
The Projucer creates build configurations to each export target which your native IDE will use to actually compile and run your app.
Each exporter can have several deployment configurations and these settings can be accessed by selecting the corresponding child configuration in the exporters side panel. By default, the two configurations Debug and Release are added to every export target.
The following table shows the settings common to all configurations:
| Common Configuration Settings | Description |
|---|---|
| Name | The name of this configuration. |
| Debug mode | If enabled, this means that the configuration should be built with debug symbols. |
| Binary name | The filename to use for the destination binary executable file. If you don't add a suffix to this name, a suitable platform-specific suffix will be added automatically. |
| Binary location | The folder in which the finished binary should be placed. Leave this blank to cause the binary to be placed in its default location in the build folder. |
| Header search paths | Extra header search paths. |
| Extra library search paths | Extra library search paths. |
| Preprocessor definitions | Extra preprocessor definitions. Use the form "NAME1=value NAME2=value", using whitespace, commas, or new-lines to separate the items - to include a space or comma in a definition, precede it with a backslash. |
| Link-Time Optimisation | Enable this to perform link-time code optimisation. This is recommended for release builds. |
| Notes | Extra comments: This field is not used for code or project generation, it's just a space where you can express your thoughts. |
The following table shows specific settings for Xcode:
| Xcode Configuration Settings | Description |
|---|---|
| Enable Plugin Copy Step | [Plugin Only] - Enable this to copy plugin binaries to the specified folder after building. |
| VST Binary Location | [Plugin Only] - The folder in which the compiled VST binary should be placed. |
| VST3 Binary Location | [Plugin Only] - The folder in which the compiled VST3 binary should be placed. |
| AU Binary Location | [Plugin Only] - The folder in which the compiled AU binary should be placed. |
| RTAS Binary Location | [Plugin Only] - The folder in which the compiled RTAS binary should be placed. |
| AAX Binary Location | [Plugin Only] - The folder in which the compiled AAX binary should be placed. |
| Optimisation | The optimisation level for this configuration. Options include "-O0 (no optimisation)", "-Os (minimise code size)", "-O1 (fast)", "-O2 (faster)", "-O3 (fastest with safe optimisations)" and "-Ofast (uses aggressive optimisations)". |
| iOS Deployment Target | [iOS Only] - The minimum version of iOS that the target binary will run on. Options include "Use Default", "7.0", "7.1", "8.0", "8.1", "8.2", "8.3", "8.4", "9.0", "9.1", "9.2", "9.3", "10.0", "10.1", "10.2", "10.3" and "11.0". |
| OSX Base SDK Version | [macOS Only] - The version of OSX to link against in the Xcode build. Options include "Use Default", "10.5 SDK", "10.6 SDK", "10.7 SDK", "10.8 SDK", "10.9 SDK", "10.10 SDK", "10.11 SDK" and "10.12 SDK". |
| OSX Deployment Target | [macOS Only] - The minimum version of OSX that the target binary will be compatible with. Options include "Use Default", "10.5", "10.6", "10.7", "10.8", "10.9", "10.10", "10.11" and "10.12". |
| OSX Architecture | [macOS Only] - The type of OSX binary that will be produced. Options include "Use Default", "Native architecture of build machine", "Universal Binary (32-bit)", "Universal Binary (32/64-bit)" and "64-bit Intel". |
| Custom Xcode flags | A comma-separated list of custom Xcode setting flags which will be appended to the list of generated flags, e.g. MACOSX_DEPLOYMENT_TARGET_i386 = 10.5, VALID_ARCHS = "ppc i386 x86_64". |
| PList Preprocessor Definitions | Preprocessor definitions used during PList preprocessing (see PList Preprocess). |
| C++ Library | The type of C++ std lib that will be linked. Options include "Use Default", "LLVM libc++" and "GNU libstdc++". |
| Code-signing Identity | The name of a code-signing identity for Xcode to apply. |
| Relax IEEE compliance | Enable this to use FAST_MATH non-IEEE mode. (Warning: this can have unexpected results!) |
| Strip local symbols | Enable this to strip any locally defined symbols resulting in a smaller binary size. Enabling this will also remove any function names from crash logs. Must be disabled for static library projects. |
The following table shows specific settings for Visual Studio:
| Visual Studio Configuration Settings | Description |
|---|---|
| Enable Plugin Copy Step | [Plugin Only] - Enable this to copy plugin binaries to a specified folder after building. |
| VST Binary Location | [Plugin Only] - The folder in which the compiled VST binary should be placed. |
| VST3 Binary Location | [Plugin Only] - The folder in which the compiled VST3 binary should be placed. |
| RTAS Binary Location | [Plugin Only] - The folder in which the compiled RTAS binary should be placed. |
| AAX Binary Location | [Plugin Only] - The folder in which the compiled AAX binary should be placed. |
| Architecture | Whether to use a 32-bit or 64-bit architecture. Choice between "Win32" and "x64". |
| Debug Information Format | [Debug Only] - The type of debugging information created for your program for this configuration. This will always be used in a debug configuration and will be used in a release configuration with forced generation of debug symbols. Options include "None", "C7 Compatible (/Z7)", "Program Database (/Zi)" and "Program Database for Edit And Continue (/ZI)". |
| Relax IEEE compliance | Enable this to use FAST_MATH non-IEEE mode. (Warning: this can have unexpected results!) |
| Optimisation | The optimisation level for this configuration. Options include "No optimisation", "Minimise size" and "Maximise speed". |
| Intermediates path | An optional path to a folder to use for the intermediate build files. Note that Visual Studio allows you to use macros in this path, e.g. "$(TEMP)\MyAppBuildFiles\$(Configuration)", which is a handy way to send them to the user's temp folder. |
| Warning Level | The compilation warning level to use. Options include "Low", "Medium" and "High". |
| Treat Warnings as Errors | Enable this to treat compilation warnings as errors. |
| Runtime Library | If the static runtime is selected then your app/plug-in will not be dependent upon users having Microsoft's redistributable C++ runtime installed. However, if you are linking libraries from different sources you must select the same type of runtime used by the libraries. Options include "Default", "Use static runtime" and "Use DLL runtime". |
| Incremental Linking | Enable to avoid linking from scratch for every new build. Disable to ensure that your final release build does not contain padding or thunks. |
| Force Generation of Debug Symbols | [Except Debug] - Enable this to force generation of debug symbols in a release configuration. |
| Pre-build Command | Some command that will be run before a build starts. |
| Post-build Command | Some command that will be run after a build starts. |
| Generate Manifest | Enable this to generate a Manifest file. |
| Character Set | Specifies the character set used when building. Options include "Default", "MultiByte" and "Unicode". |
The following table shows specific settings for Linux Makefile:
| Linux Makefile Configuration Settings | Description |
|---|---|
| Optimisation | The optimisation level for this configuration. Options include "-O0 (no optimisation)", "-Os (minimise code size)", "-O1 (fast)", "-O2 (faster)", "-O3 (fastest with safe optimisations)" and "-Ofast (uses aggressive optimisations)". |
| Architecture | Specifies the 32/64-bit architecture to use. Options include "Default", "<None>", "32-bit (-m32)", "64-bit (-m64)", "ARM v6" and "ARM v7". |
The following table shows specific settings for Android:
| Android Configuration Settings | Description |
|---|---|
| Optimisation | The optimisation level for this configuration. Options include "-O0 (no optimisation)", "-Os (minimise code size)", "-O1 (fast)", "-O2 (faster)", "-O3 (fastest with safe optimisations)" and "-Ofast (uses aggressive optimisations)". |
| Architectures | A list of the ARM architectures to build (for a fat binary). Leave empty to build for all possible android archiftectures. |
| Remote Notifications Config File | Path to google-services.json file. This will be the file provided by Firebase when creating a new app in Firebase console. This will override the setting from the main Android exporter node. |
| Extra Android XML Value Resources | Paths to additional "value resource" files in XML format that should be included in the app (one per line). If you have additional XML resources that should be treated as value resources, add them here. |
| Extra Android Drawable Resources | Paths to additional "drawable resource" directories that should be included in the app (one per line). They will be added to "res" directory of Android project. Each path should point to a directory named "drawable" or "drawable-<size>" where <size> should be something like "hdpi", "ldpi", "xxxhdpi" etc, for instance "drawable-xhdpi". Refer to Android Studio documentation for available sizes. |
| Extra Android Raw Resources | Paths to additional "raw resource" files that should be included in the app (one per line). Resource file names must contain only lowercase a-z, 0-9 or underscore. |
| Custom string resources | Custom XML resources that will be added to string.xml as children of <resources> element. Example: <string name="value">text</string><string name2="value2">text2</string>. |
The following table shows specific settings for Code::Blocks:
| Code::Blocks Configuration Settings | Description |
|---|---|
| Optimisation | The optimisation level for this configuration. Options include "-O0 (no optimisation)", "-Os (minimise code size)", "-O1 (fast)", "-O2 (faster)", "-O3 (fastest with safe optimisations)" and "-Ofast (uses aggressive optimisations)". |
| Architecture | Specifies the 32/64-bit architecture to use. Options include "32-bit (-m32)", "64-bit (-m64)", "ARM v6" and "ARM v7". |
The live build engine allows for compilation of source code within the Projucer.
It can be access through the live build tab in the side panel and activated by clicking the Enable Now button or through the menu items under Build > Enable Compilation.

When compilation is enabled, the side panel will show compilation errors, Component objects and compilation activities in different sections of the panel as shown below:

To access the live build settings, click on the settings icon of the side panel as shown in the following screenshot:

The following table shows the live build engine settings:
| Live Build Engine Settings | Description |
|---|---|
| User header paths | User header search paths. |
| System header paths | System header search paths. |
| Preprocessor Definitions | Extra preprocessor definitions. Use the form "NAME1=value NAME2=value", using whitespace or commas to separate the items. To include a space or comma in a definition, precede it with a backslash. |
| Extra compiler flags | Extra command-line flags to be passed to the compiler. This string can contain references to preprocessor definitions in the form ${NAME_OF_DEFINITION}, which will be replaced with their values. |
| Extra dynamic libraries | Extra dynamic libs that the running code may require. Use new-lines or commas to separate the items. |
| Windows Target Platform | The Windows target platform to use. Options include "(default)", "8.1", "10.0.10240.0", "10.0.10586.0", "10.0.14393.0" and "10.0.16299.0". |
The live build engine allows you to conveniently preview components within the Projucer. To preview a component, click on the arrow next to the corresponding component in the side panel and the following window will be launched.

The window provides a toolbar at the bottom that presents useful features to help you debug your GUI:
| Toolbar Element | Description |
|---|---|
| Zoom | Alters the zoom factor to scale the content to the screen. |
| Set Size | Allows selection of common device sizes from a dropdown list. |
| Flip Orientation | Changes the orientation from portrait to landscape and vice versa. |
| Reinstantiate | Reinstantiates Components after modifications in the code. |
| View code | Jumps to the corresponding section of the code relating to the Component. |
When a GUI component file is created within the Projucer, the editor will show different parameters in the editor window. These changes will be reflected immediately in the code by filling the appropriate functions in the GUI component class created.
The class tab provides general settings for the class:

On the left side of the panel, general class settings can be found:
| General Class Settings | Description |
|---|---|
| Class name | The name of the Component class to create. |
| Template file | The template file to use for this Component class. |
| Component name | The name of the actual Component to use in the setName() function. |
| Parent classes | The classes to inherit from along with their access modifiers. |
| Constructor params | The parameters of the class constructor. |
| Member initialisers | The members to initialise in the class constructor. |
| Initial width | The initial width of the Component to use in the setSize() function. |
| Initial height | The initial height of the Component to use in the setSize() function. |
| Fixed size | Whether to resize the component to fit the workspace or keep the component size fixed. |
On the right side of the panel, extra callback methods can be added to the Component by checking the box next to the function to override.
The subcomponent tab provides preview and settings for subcomponents created in the class:

The graphics tab provides general graphics settings for the class:

The resources tab provides settings to manage resources used by the class:

The code tab displays the generated code for the class:

The Projucer comes with its own set of handy tools.
The UTF-8 String Literal Helper allows you to instantly convert any text to UTF-8 encoding.

The SVG Path Converter allows you to convert a single SVG path into a JUCE Path object in C++ that you can insert into your code right away.

The Translation File Builder allows you to generate annotated text from all your TRANS() macros in your project in order to facilitate translation in different languages.
The Projucer can also be run in command line mode by invoking the executable from the terminal like so:
The following table lists all the possible command line arguments and their corresponding descriptions:
| Command Line Argument | Description |
|---|---|
| –help | Displays the help manual. |
| –resave [project_file] | Resaves all files and resources in a project. |
| –resave-resources [project_file] | Resaves just the binary resources for a project. |
| –get-version [project_file] | Returns the version number of a project. |
| –set-version [version_number] [project_file] | Updates the version number in a project. |
| –bump-version [project_file] | Updates the minor version number in a project by 1. |
| –git-tag-version [project_file] | Invokes 'git tag' to attach the project's version number to the current git repository. |
| –status [project_file] | Displays information about a project. |
| –buildmodule [target_folder] [module_folder] | Zips a module into a downloadable file format. |
| –buildallmodules [target_folder] [module_folder] | Zips all modules in a given folder and creates an index for them. |
| –trim-whitespace [target_folder] | Scans the given folder for C/C++ source files (recursively), and trims any trailing whitespace from their lines, as well as normalising their line-endings to CR-LF. |
| –remove-tabs [target_folder] | Scans the given folder for C/C++ source files (recursively), and replaces any tab characters with 4 spaces. |
| –tidy-divider-comments [target_folder] | Scans the given folder for C/C++ source files (recursively), and normalises any juce-style comment division lines (i.e. any lines that look like //===== or //--— or /////// will be replaced). |
| –fix-broken-include-paths [target_folder] | Scans the given folder for C/C++ source files (recursively). Where a file contains an #include of one of the other filenames, it changes it to use the optimum relative path. Helpful for auto-fixing includes when re-arranging files and folders in a project. |
| –obfuscated-string-code [string_to_obfuscate] | Generates a C++ function which returns the given string, but in an obfuscated way. |
| –encode-binary [source_binary_file] [target_cpp_file] | Converts a binary file to a C++ file containing its contents as a block of data. Provide a .h file as the target if you want a single output file, or a .cpp file if you want a pair of .h/.cpp files. |
| –trans [target_folders...] | Scans each of the given folders (recursively) for any NEEDS_TRANS macros, and generates a translation file that can be used with Projucer's translation file builder |
| –trans-finish [pre_translated_file] [post_translated_file] [optional_existing_translation_file] | Creates a completed translations mapping file, that can be used to initialise a LocalisedStrings object. This allows you to localise the strings in your project. |
| –set-global-search-path [os] [identifier_to_set] [new_path] | Sets the global path for a specified os and identifier. The os should be either osx, windows or linux and the identifiers can be any of the following: defaultJuceModulePath, defaultUserModulePath, vst3path, aaxPath (not valid on linux), rtasPath (not valid on linux), androidSDKPath or androidNDKPath. |
| –create-project-from-pip [path/to/PIP] [path/to/output] | Generates a JUCE project from a PIP file. |
A Projucer project can be generated from a single header file containing metadata called a Projucer Instant Project or PIP.
A PIP file can be opened by a simple drag-and-drop onto the Projucer interface or by navigating to File > Open... from the menu items.
The following block of code illustrates an example of the PIP metadata that should be placed at the top of a header file:
The following table lists all the possible PIP metadata and their corresponding descriptions:
| Metadata Name | Description |
|---|---|
| name | [Required] - The JUCE project name. |
| version | Used for the "Project Version" field in the Projucer. |
| vendor | Used for the "Company Name" field in the Projucer. |
| website | Used for the "Company Website" field in the Projucer. |
| description | A short description of the PIP. |
| dependencies | [Required] - The JUCE modules that should be added to the project. |
| exporters | [Required] - The exporters that should be added to the project. |
| moduleFlags | Sets one or many of the JUCE module flags. |
| defines | Sets some global preprocessor definitions for the project. Used to populate the "Preprocessor Definitions" field in the Projucer. |
| type | [Required] - The type of project. This can either be Console, Component or AudioProcessor. |
| mainClass | [Required] - The name of the main class that should be instantiated. There can only be one main class and it must have a default constructor. Depending on the type, this may need to inherit from a specific JUCE class. |
| useLocalCopy | Set this to specify that the PIP file should be copied to the generated project directory instead of just referred to. This is used for the JUCE examples to prevent modification of original example code when creating a project from one of the example PIPs. |
Depending on the project type, the behaviour of the PIP output differs as follows:
The Help menu provides quick and easy access to useful website links by launching the corresponding resource in your default browser.
| Command | Description |
|---|---|
| JUCE Community Forum | Shows the JUCE community forum in a browser |
| API Modules | Shows the API modules documentation in a browser |
| API Classes | Shows the API classes documentation in a browser |
| JUCE Tutorials | Shows the JUCE tutorials in a browser |
Find out about the Projucer version you are running by going to Projucer > About Projucer.

Display the analytics notice by going to Projucer > Application Usage Analytics.

The following table shows all the shortcut commands to the menu bar items of the Projucer:
| Menu | Command | Shortcut |
|---|---|---|
| Projucer | Hide Projucer | ⌘H |
| Projucer | Hide Others | ⌥⌘H |
| Projucer | Quit Projucer | ⌘Q |
| File | New Project... | ⌘N |
| File | New Project From Clipboard... | ⇧⌘N |
| File | Open... | ⌘O |
| File | Close File | ⌃⌘W |
| File | Save File | ⌘S |
| File | Save As... | ⇧⌘S |
| File | Save All | ⌥⌘S |
| File | Save Project and Open in IDE... | ⇧⌘L |
| Edit | Undo | ⌘Z |
| Edit | Redo | ⇧⌘Z |
| Edit | Cut | ⌘X |
| Edit | Copy | ⌘C |
| Edit | Paste | ⌘V |
| Edit | Select All | ⌘A |
| Edit | Deselect All | ⌘D |
| Edit | Find | ⌘F |
| Edit | Find Selection | ⌘L |
| Edit | Find Next | ⌘G |
| Edit | Find Previous | ⇧⌘G |
| View | Show Project Settings | ⌃⌘X |
| View | Show Project Tab | ⌃⌘P |
| View | Show Build Tab | ⌃⌘B |
| View | Show File Explorer Panel | ⌃⌘F |
| View | Show Modules Panel | ⌃⌘M |
| View | Show Exporters Panel | ⌃⌘E |
| View | Show Exporter Settings | ⇧⌘E |
| Build | Enable Compilation | ⇧⌘B |
| Build | Build Now | ⌘B |
| Build | Launch Application | ⌘R |
| Build | Stop Application | ⌘. |
| Build | Clean All | ⇧⌘K |
| Build | Re-instantiate Components | ⇧⌘R |
| Build | Highlight next error | ⌘' |
| Build | Highlight previous error | ⌘" |
| Window | Previous Window | ⌃⇧⇥ |
| Window | Next Window | ⌃⇥ |
| Window | Close Window | ⌘W |
| Document | Previous Document | ⌃⌘← |
| Document | Next Document | ⌃⌘→ |
| Document | Open Counterpart File | ⌃⌘↑ |
| GUI Editor | Edit sub-component layout | ⌘N |
| GUI Editor | Edit background graphics | ⌘M |
| GUI Editor | Cut | ⌘X |
| GUI Editor | Copy | ⌘C |
| GUI Editor | Paste | ⌘V |
| GUI Editor | Select All | ⌘A |
| GUI Editor | Deselect All | ⌘D |
| GUI Editor | Bring to front | ⌘F |
| GUI Editor | Send to back | ⌘B |
| GUI Editor | Group selected items | ⌘K |
| GUI Editor | Ungroup selected items | ⇧⌘K |
| GUI Editor | Retrieve offscreen items | ⌘M |
| GUI Editor | Show snap-to-grid | ⇧⌘G |
| GUI Editor | Enable snap-to-grid | ⌘G |
| GUI Editor | Zoom in | ⌘] |
| GUI Editor | Zoom out | ⌘[ |
| GUI Editor | Zoom to 100% | ⌘1 |
| GUI Editor | Test component... | ⌘T |
| GUI Editor | Component Overlay > No component overlay | ⌘2 |
| GUI Editor | Component Overlay > Overlay with opacity of 33% | ⌘3 |
| GUI Editor | Component Overlay > Overlay with opacity of 66% | ⌘4 |
| GUI Editor | Component Overlay > Overlay with opacity of 100% | ⌘5 |
This manual is part of the JUCE library. Copyright (c) 2017 - ROLI Ltd.
JUCE is an open source library subject to commercial or open-source licensing.
By using JUCE, you agree to the terms of both the JUCE 5 End-User License Agreement and JUCE 5 Privacy Policy (both updated and effective as of the 27th April 2017).
End User License Agreement: www.juce.com/juce-5-licence Privacy Policy: www.juce.com/juce-5-privacy-policy
Or: You may also use this code under the terms of the GPL v3 (see www.gnu.org/licenses).
JUCE IS PROVIDED "AS IS" WITHOUT ANY WARRANTY, AND ALL WARRANTIES, WHETHER EXPRESSED OR IMPLIED, INCLUDING MERCHANTABILITY AND FITNESS FOR PURPOSE, ARE DISCLAIMED.


