This tutorial explains several audio/midi plug-in examples in detail and explores the open possibilities of plug-in development.
Intermediate
Windows, macOS, Linux, iOS
VST, VST3, AU, AAX, Standalone
MidiBuffer, SortedSet, AudioParameterFloat, Synthesiser, MidiBuffer, MidiMessage, AudioProcessorValueTreeState, GenericAudioProcessorEditor
Getting started
There are several demo projects to accompany this tutorial. Download links to these projects are provided in the relevant sections of the tutorial.
If you need help with this step in each of these sections, see Tutorial: Projucer Part 1: Getting started with the Projucer.
The demo projects
The demo projects provided with this tutorial illustrate several different examples of audio/midi plugins. In summary, these plugins are:
We use the GenericAudioProcessorEditor class common to all projects to lay out all of our GUI components across plugin examples.
- Note
- The code presented here is broadly similar to the PlugInSamples from the JUCE Examples.
The Arpeggiator Plugin
Download the demo project for this section here: PIP | ZIP. Unzip the project and open the first header file in the Projucer.
- Note
- Make sure to enable the "MIDI Effect Plugin" option in the "Plugin Characteristics" field of the project settings in the Projucer.
The Arpeggiator is a MIDI plugin without any audio processing that can be inserted on a software instrument or MIDI track in a DAW to modify the incoming MIDI signals.
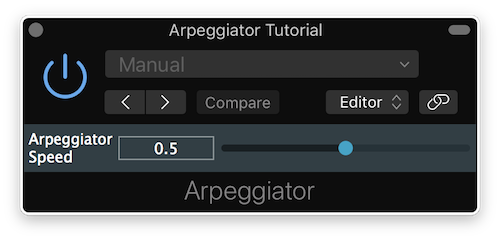
Arpeggiator plugin window
Arpeggiator Implementation
In the Arpeggiator class, we have defined several private member variables to implement our arpeggiator behaviour as shown below:
private:
juce::AudioParameterFloat* speed;
int currentNote, lastNoteValue;
int time;
float rate;
juce::SortedSet<int> notes;
};
Among these we have a SortedSet object that holds a set of unique int variables according to a certain sorting rule. This will allow us to reorder the MIDI notes efficiently to produce the desired musical patterns.
In the class constructor, we initialise the plugin without any audio bus as we are creating a MIDI plugin. We also add a single parameter for the speed of the arpeggiator as shown here:
Arpeggiator()
{
addParameter (speed = new juce::AudioParameterFloat ("speed", "Arpeggiator Speed", 0.0, 1.0, 0.5));
}
In the prepareToPlay() function, we initialise some variables to prepare for subsequent processing like follows:
void prepareToPlay (double sampleRate, int) override
{
notes.clear();
currentNote = 0;
lastNoteValue = -1;
time = 0;
rate = static_cast<float> (sampleRate);
}
- : First, we empty the SortedSet of MIDI note numbers.
- : The currentNote variable temporarily holds the current index for the SortedSet of notes.
- : The lastNoteValue variable temporarily holds the previous index to be able to stop the note.
- : The time variable keeps track of the note duration with respect to the buffer size and sample rate.
- : The rate stores the current sample rate in a float variable.
Next, we perform the actual processing in the processBlock() function as follows:
void processBlock (juce::AudioBuffer<float>& buffer, juce::MidiBuffer& midi) override
{
jassert (buffer.getNumChannels() == 0);
auto numSamples = buffer.getNumSamples();
auto noteDuration = static_cast<int> (std::ceil (rate * 0.25f * (0.1f + (1.0f - (*speed)))));
for (const auto metadata : midi)
{
const auto msg = metadata.getMessage();
if (msg.isNoteOn()) notes.add (msg.getNoteNumber());
else if (msg.isNoteOff()) notes.removeValue (msg.getNoteNumber());
}
midi.clear();
- : To ensure that we deal with a MIDI plugin, assert that there are no audio channels in the audio buffer.
- : We still retrieve the number of samples in the block from the audio buffer.
- : According to the speed parameter of our user interface and the sample rate, we calculate the note duration in number of samples.
- : For every event in the MidiBuffer, we add the note to the SortedSet if the event is a "Note On" and remove the note if the event is a "Note Off".
- : We then empty the MidiBuffer to add the single notes back in the buffer one by one in the next step.
if ((time + numSamples) >= noteDuration)
{
auto offset = juce::jmax (0, juce::jmin ((int) (noteDuration - time), numSamples - 1));
if (lastNoteValue > 0)
{
midi.addEvent (juce::MidiMessage::noteOff (1, lastNoteValue), offset);
lastNoteValue = -1;
}
if (notes.size() > 0)
{
currentNote = (currentNote + 1) % notes.size();
lastNoteValue = notes[currentNote];
midi.addEvent (juce::MidiMessage::noteOn (1, lastNoteValue, (juce::uint8) 127), offset);
}
}
time = (time + numSamples) % noteDuration;
}
- : We check whether the current time with the number of samples in the current block added to it is greater than the note duration. If it is the case this means that by the end of the current block, we would reach a note transition and we therefore proceed to modify the MidiBuffer. Otherwise we keep the MIDI state as is.
- : Calculate the sample offset at which the note transition occurs within the current audio block.
- : If the previous note is still playing, the lastNoteValue variable is greater than 0 and therefore we need to send a "Note Off" event to stop the note from playing with the correct sample offset. We then reset the lastNoteValue variable.
- : If there are notes to shuffle and play in the SortedSet, we send a "Note On" event to play the first note in the set after having stored the previous note number and retrieved the next note number.
- : Finally we keep track of our current time relative to the note duration whether we reach a note transition or not.
The Noise Gate Plugin
Download the demo project for this section here: PIP | ZIP. Unzip the project and open the first header file in the Projucer.
The noise gate is an audio plugin that filters out the input sound below a certain sidechain threshold when placed as an insert in a DAW track.
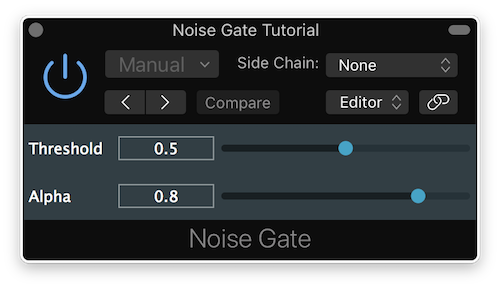
Noise gate plugin window
Noise Gate Implementation
In the NoiseGate class, we have defined several private member variables to implement our noise gate behaviour as shown below:
private:
juce::AudioParameterFloat* threshold;
juce::AudioParameterFloat* alpha;
int sampleCountDown;
float lowPassCoeff;
};
In the class constructor, we initialise the plugin with three stereo buses for the input, output and sidechain respectively . We also add two parameters namely threshold and alpha as shown here:
NoiseGate()
{
addParameter (threshold = new juce::AudioParameterFloat ("threshold", "Threshold", 0.0f, 1.0f, 0.5f));
addParameter (alpha = new juce::AudioParameterFloat ("alpha", "Alpha", 0.0f, 1.0f, 0.8f));
}
The threshold parameter determines the power level at which the noise gate should act upon the input signal. The alpha parameter controls the filtering of the sidechain signal.
In the isBusesLayoutSupported() function, we ensure that the number of input channels is identical to the number of output channels and that the input buses are enabled:
bool isBusesLayoutSupported (const BusesLayout& layouts) const override
{
return layouts.getMainInputChannelSet() == layouts.getMainOutputChannelSet()
&& ! layouts.getMainInputChannelSet().isDisabled();
}
In the prepareToPlay() function, we initialise some variables to prepare for subsequent processing like follows:
void prepareToPlay (double, int) override
{
lowPassCoeff = 0.0f;
sampleCountDown = 0;
}
- : The low-pass coefficient will be calculated from the sidechain signal and the alpha parameter to determine the gating behaviour.
- : The sample countdown allows us to keep track of the number of samples left with regards to the sample rate before the gating occurs.
Next, we perform the actual processing in the processBlock() function as follows:
void processBlock (juce::AudioBuffer<float>& buffer, juce::MidiBuffer&) override
{
auto mainInputOutput = getBusBuffer (buffer, true, 0);
auto sideChainInput = getBusBuffer (buffer, true, 1);
auto alphaCopy = alpha->get();
auto thresholdCopy = threshold->get();
for (auto j = 0; j < buffer.getNumSamples(); ++j)
{
auto mixedSamples = 0.0f;
for (auto i = 0; i < sideChainInput.getNumChannels(); ++i)
mixedSamples += sideChainInput.getReadPointer (i) [j];
mixedSamples /= static_cast<float> (sideChainInput.getNumChannels());
lowPassCoeff = (alphaCopy * lowPassCoeff) + ((1.0f - alphaCopy) * mixedSamples);
if (lowPassCoeff >= thresholdCopy)
sampleCountDown = (int) getSampleRate();
for (auto i = 0; i < mainInputOutput.getNumChannels(); ++i)
*mainInputOutput.getWritePointer (i, j) = sampleCountDown > 0 ? *mainInputOutput.getReadPointer (i, j)
: 0.0f;
if (sampleCountDown > 0)
--sampleCountDown;
}
}
- : First, we separate the sidechain buffer from the main IO buffer for separate processing in subsequent steps.
- : Then we retrieve copies of the threshold and alpha parameters.
- : The outer loop will process the individual samples in the audio buffer block while the inner loops will process the channels in an interleaved manner. This allows us to keep the same state for each channel in a single sample processing.
- : For each channel in the sidechain, we add the signals together and divide by the number of sidechain channels in order to sum the signal to mono.
- : Next we calculate the low-pass coefficient from the alpha parameter and the sidechain mono signal using the formula y[i] = ((1 - alpha) * sidechain) + (alpha * y[i - 1]).
- : If this coefficient is greater than or equal to the threshold, we reset the sample countdown to the sample rate.
- : For every input channel, we copy the input buffer sample to the output buffer if the countdown is non-zero. Otherwise, we mute the output signal by writing zero samples.
- : We make sure to decrement the sample countdown value for every sample processed.
- Note
- The implementation shown here is not how you would typically program a noise gate. There are much more efficient and better algorithms out there.
The Multi-Out Synth Plugin
Download the demo project for this section here: PIP | ZIP. Unzip the project and open the first header file in the Projucer.
- Note
- Make sure to enable the "Plugin MIDI Input" option in the "Plugin Characteristics" field of the project settings in the Projucer.
The multi-out synth is a software instrument plugin that produces up to five synthesiser voices based on an audio file sample and outputs the signal to up to 16 multiple outputs.
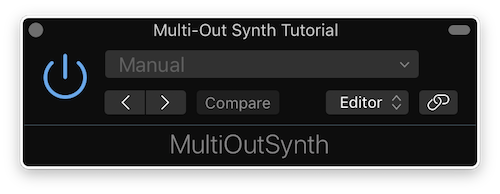
Multi-out synth plugin window
Multi-Out Synth Implementation
In the MultiOutSynth class, we have defined several private member variables to implement our multi-out synth behaviour as shown below:
juce::AudioFormatManager formatManager;
juce::OwnedArray<juce::Synthesiser> synth;
juce::SynthesiserSound::Ptr sound;
};
Among these we have an AudioFormatManager in order to register audio file formats to read our sample sound. We also have an array of Synthesiser objects that holds one synth per channel and a smart pointer to the sample sound we use in the tutorial.
We also declare some useful constants as an enum for the maximum number of midi channels and the maximum number of synth voices:
enum
{
maxMidiChannel = 16,
maxNumberOfVoices = 5
};
In the class constructor, we initialise the plugin with 16 stereo output buses but no input bus as we are creating a software instrument plugin. We also register basic audio file formats on the AudioFormatManager object in order to read the ".ogg" sample file as shown here:
MultiOutSynth()
{
formatManager.registerBasicFormats();
for (auto midiChannel = 0; midiChannel < maxMidiChannel; ++midiChannel)
{
synth.add (new juce::Synthesiser());
for (auto i = 0; i < maxNumberOfVoices; ++i)
synth[midiChannel]->addVoice (new juce::SamplerVoice());
}
loadNewSample (juce::MemoryBlock (singing_ogg, singing_oggSize));
}
For each midi/output channel, we instantiate a new Synthesiser object, add it to the array and create 5 SamplerVoice objects per synth . We also load the sample file as binary data using the loadNewSample() private function defined hereafter:
void loadNewSample (const juce::MemoryBlock& sampleData)
{
auto soundBuffer = std::make_unique<juce::MemoryInputStream> (sampleData, false);
std::unique_ptr<juce::AudioFormatReader> formatReader (formatManager.findFormatForFileExtension ("ogg")->createReaderFor (soundBuffer.release(), true));
juce::BigInteger midiNotes;
midiNotes.setRange (0, 126, true);
juce::SynthesiserSound::Ptr newSound = new juce::SamplerSound ("Voice", *formatReader, midiNotes, 0x40, 0.0, 0.0, 10.0);
for (auto channel = 0; channel < maxMidiChannel; ++channel)
synth[channel]->removeSound (0);
sound = newSound;
for (auto channel = 0; channel < maxMidiChannel; ++channel)
synth[channel]->addSound (sound);
}
- : First create a MemoryInputStream from the sample binary data and convert the stream to read the file as an "ogg" format.
- : Declare a SamplerSound object with the previously created stream reader and constrain the range of midi notes using a BigInteger.
- : For every Synthesiser object in the synth array, we make sure to clear the currently loaded SynthesiserSound before loading a new one.
- : Then assign the newly created SamplerSound to the smart pointer to keep a reference to the sound.
- : Finally, for every Synthesizer object we load the new sound as a SamplerSound object.
To make sure that no buses are added or removed beyond our requirements, we override two functions from the AudioProcessor class as follows:
bool canAddBus (bool isInput) const override { return (! isInput && getBusCount (false) < maxMidiChannel); }
bool canRemoveBus (bool isInput) const override { return (! isInput && getBusCount (false) > 1); }
This prevents input buses from being added or removed and output buses from being added beyond 16 channels or removed completely.
In the prepareToPlay() function, we prepare for subsequent processing by setting the sample rate for every Synthesiser object in the synth array by calling the setCurrentPlaybackSampleRate() function:
void prepareToPlay (double newSampleRate, int samplesPerBlock) override
{
juce::ignoreUnused (samplesPerBlock);
for (auto midiChannel = 0; midiChannel < maxMidiChannel; ++midiChannel)
synth[midiChannel]->setCurrentPlaybackSampleRate (newSampleRate);
}
Next, we perform the actual processing in the processBlock() function as follows:
void processBlock (juce::AudioBuffer<float>& buffer, juce::MidiBuffer& midiBuffer) override
{
auto busCount = getBusCount (false);
for (auto busNr = 0; busNr < busCount; ++busNr)
{
auto midiChannelBuffer = filterMidiMessagesForChannel (midiBuffer, busNr + 1);
auto audioBusBuffer = getBusBuffer (buffer, false, busNr);
synth [busNr]->renderNextBlock (audioBusBuffer, midiChannelBuffer, 0, audioBusBuffer.getNumSamples());
}
}
- : First, we retrieve the number of output buses.
- : For every output bus (and therefore for every Synthesiser instance), we filter out the unnecessary audio bus buffers and filter out the midi messages that do not correspond to the midi channel of the synthesiser by calling a private helper function defined thereafter.
- : We can then call the
renderNextBlock() function directly on the corresponding Synthesiser object to generate the sound by supplying the correct audio bus buffer and midi channel buffer.
The helper function to filter out midi channels is implemented as described below:
static juce::MidiBuffer filterMidiMessagesForChannel (const juce::MidiBuffer& input, int channel)
{
juce::MidiBuffer output;
for (auto metadata : input)
{
auto message = metadata.getMessage();
if (message.getChannel() == channel)
output.addEvent (message, metadata.samplePosition);
}
return output;
}
- : For every midi channel buffer, we check whether the midi message channel matches the midi channel of the output bus we are looking for and if so we add the MidiMessage to a newly-created MidiBuffer.
- : When we have iterated over all midi messages in all midi channels, we return with a buffer containing only the midi messages of the selected channel.
The Surround Plugin
Download the demo project for this section here: PIP | ZIP. Unzip the project and open the first header file in the Projucer.
The surround utility is a plugin that monitors incoming signal on individual channels including surround configurations and allows you to send ping sine waves to the channel of your choice.
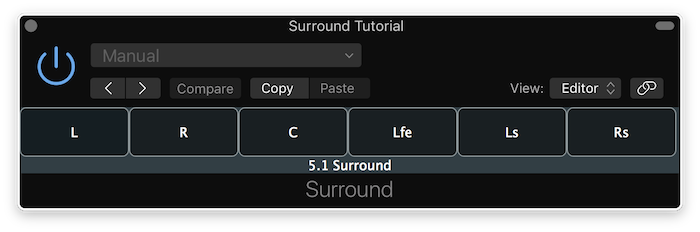
Surround plugin window
Surround Implementation
In the SurroundProcessor class, we have defined several private member variables to implement our surround behaviour as shown below:
juce::Array<int> channelActive;
juce::Array<float> alphaCoeffs;
int channelClicked;
int sampleOffset;
};
Among these we have an array to keep track of the number of samples in active channels of the plugin and an array to keep track of the alpha coefficients for each channel.
In the class constructor, we initialise the plugin with two stereo pairs of buses for the input and output respectively by default but the configuration will be changed according to the currently-used bus layout setup.
In the isBusesLayoutSupported() function, we ensure that the input/output channels are discrete channels , that the number of input channels is identical to the number of output channels and that the input buses are enabled as shown below:
bool isBusesLayoutSupported (const BusesLayout& layouts) const override
{
return ((! layouts.getMainInputChannelSet() .isDiscreteLayout())
&& (! layouts.getMainOutputChannelSet().isDiscreteLayout())
&& (layouts.getMainInputChannelSet() == layouts.getMainOutputChannelSet())
&& (! layouts.getMainInputChannelSet().isDisabled()));
}
In the prepareToPlay() function, we initialise some variables to prepare for subsequent processing like follows:
void prepareToPlay (double sampleRate, int samplesPerBlock) override
{
channelClicked = 0;
sampleOffset = static_cast<int> (std::ceil (sampleRate));
auto numChannels = getChannelCountOfBus (true, 0);
channelActive.resize (numChannels);
alphaCoeffs.resize (numChannels);
reset();
triggerAsyncUpdate();
juce::ignoreUnused (samplesPerBlock);
}
- : First, we reset the temporary variable that designates the channel index that is clicked by the user.
- : Then we store the sample rate before processing the block and later on incrementing this temporary variable to keep track of phase with sample offsets.
- : We need to resize the active channels and coefficients arrays to the currently active number of channels for the block.
- : The
reset() function is called at several places to clear the active channels array as defined later.
- : Finally, we trigger an asynchronous update to the GUI thread and handle the callback later on.
The reset() function is also called in the releaseResources() function after the block processing finishes:
The reset() function is implemented by setting every channel value to 0 like follows:
void reset() override
{
for (auto& channel : channelActive)
channel = 0;
}
As for the asynchronous update of the GUI, we handle the callback by calling the updateGUI() function on the AudioProcessorEditor:
void handleAsyncUpdate() override
{
if (auto* editor = getActiveEditor())
if (auto* surroundEditor = dynamic_cast<SurroundEditor*> (editor))
surroundEditor->updateGUI();
}
Since the AudioProcessor inherits from the ChannelClickListener class defined in the SurroundEditor class, we have to override its virtual functions. The channelButtonClicked() callback function is triggered when the user clicks on a channel button. It provides the channel index that was pressed and resets the sample offset variable like so:
void channelButtonClicked (int channelIndex) override
{
channelClicked = channelIndex;
sampleOffset = 0;
}
The isChannelActive() helper function returns whether the specified channel is active by checking whether the active channel array still has samples to process:
bool isChannelActive (int channelIndex) override
{
return channelActive[channelIndex] > 0;
}
Next, we perform the actual processing in the processBlock() function as follows:
void processBlock (juce::AudioBuffer<float>& buffer, juce::MidiBuffer&) override
{
for (auto ch = 0; ch < buffer.getNumChannels(); ++ch)
{
auto& channelTime = channelActive.getReference (ch);
auto& alpha = alphaCoeffs.getReference (ch);
for (auto j = 0; j < buffer.getNumSamples(); ++j)
{
auto sample = buffer.getReadPointer (ch)[j];
alpha = (0.8f * alpha) + (0.2f * sample);
if (std::abs (alpha) >= 0.1f)
channelTime = static_cast<int> (getSampleRate() / 2.0);
}
channelTime = juce::jmax (0, channelTime - buffer.getNumSamples());
}
- : For each channel in the audio buffer, we get a reference to the active channel countdown samples and the alpha coefficient values.
- : Then for every sample in the buffer block, we get the input sample value of the channel and calculate the alpha coefficient using the formula alpha[i] = ((1 - x) * sample) + (x * alpha[i - 1]) where x = 0.8 in this case.
- : If the alpha coefficient is greater than or equals to a certain threshold in this case 0.1, we set the countdown samples for that specific channel to half of the sample rate.
- : We also make sure to subtract the number of samples in the current block from the number of samples in the countdown.
auto fillSamples = juce::jmin (static_cast<int> (std::ceil (getSampleRate())) - sampleOffset,
buffer.getNumSamples());
if (juce::isPositiveAndBelow (channelClicked, buffer.getNumChannels()))
{
auto* channelBuffer = buffer.getWritePointer (channelClicked);
auto freq = (float) (440.0 / getSampleRate());
for (auto i = 0; i < fillSamples; ++i)
channelBuffer[i] += std::sin (2.0f * juce::MathConstants<float>::pi * freq * static_cast<float> (sampleOffset++));
}
}
- : Next we calculate the number of output samples to fill by taking the smallest number of the two from the sample offset and the number of samples in the block.
- : Then we can check whether the channel index clicked is valid and get the write pointer for the correct channel buffer.
- : Finally we calculate the frequency of the sine wave by dividing the A4 frequency by the sample rate. Then for every sample to fill, we produce a sine wave with appropriate frequency and phase offset using the sample offset variable that we increment after the assignment for the next sample.
Summary
In this tutorial, we have examined some audio/midi plugin examples. In particular, we have:
- Built a simple arpeggiator to create interesting musical patterns.
- Built a noise gate to filter out unwanted noise.
- Built a synthesiser with multiple outputs.
- Built a surround compatible plugin to expand the channel count.
See also
