Learn how to get started with OpenGL as a high performance rendering library within your JUCE applications. Render beautiful 2D and 3D graphics in your audio apps and plugins.
Advanced
Windows, macOS, Linux, iOS, Android
OpenGLAppComponent, OpenGLContext, OpenGLShaderProgram, OpenGLHelpers, Matrix3D, Vector3D
Getting started
This tutorial assumes basic understanding of the OpenGL graphics library. If you are not familiar with OpenGL, you should read about it first here.
Download the demo project for this tutorial here: PIP | ZIP. Unzip the project and open the first header file in the Projucer.
- Warning
- If using the PIP version of this project, please make sure to copy the
Resources folder into the generated Projucer project.
If you need help with this step, see Tutorial: Projucer Part 1: Getting started with the Projucer.
The demo project
The demo project displays the standard OpenGL teapot object in 3D graphics by parsing a Wavefront ".obj" file as shown in the screenshot below:
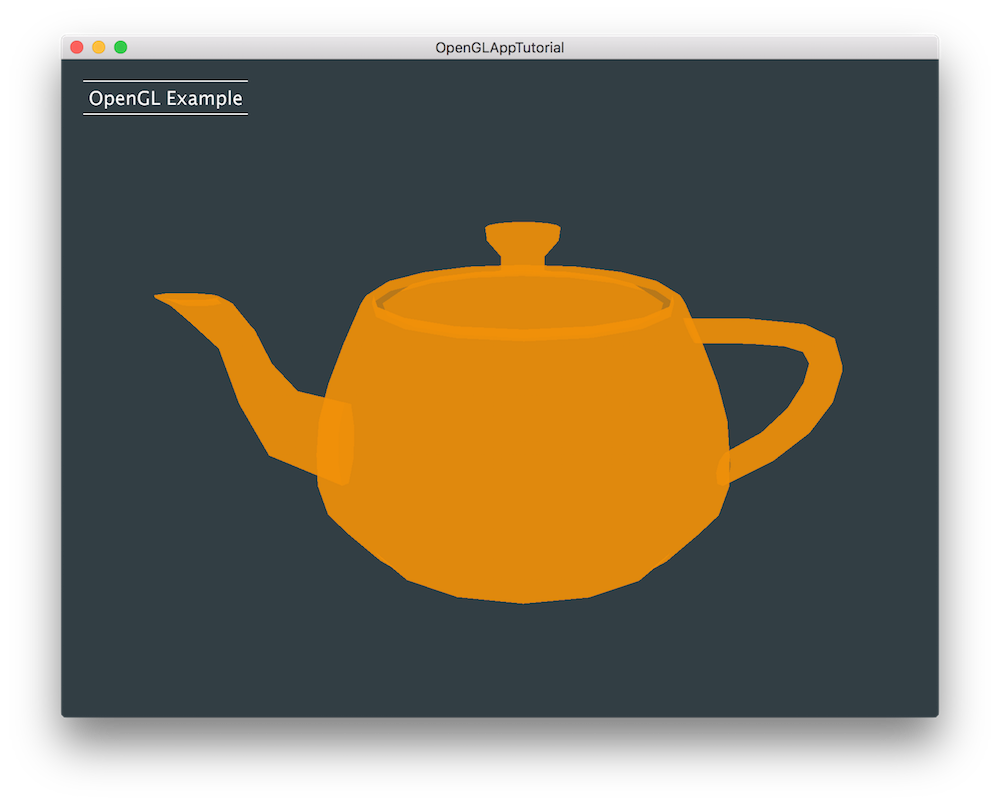
The demo project app window
- Note
- The code presented here is broadly similar to the OpenGLAppExample from the JUCE Examples.
Anatomy of an OpenGL app
Although the OpenGL API is a powerful and versatile library that works within many different platforms and build environments, the principles around 3D rendering remain similar across all applications. Some of the terms we are exploring here are fundamental to understanding how OpenGL performs its rendering routines:
- GL Context: The context is set once at the initialisation stage to describe GL settings for the graphics renderer in a platform-specific manner and necessary OpenGL functions are loaded to be used within the application.
- Projection Matrix: The projection matrix allows us to convert the 3D objects into a 2D plane for the scene to be rendered on the screen.
- View Matrix: The view matrix allows us to perform geometric transformations in the 3D environment to place our objects within the scene.
- Shaders: In order to customise the appearance of objects, shaders are used to describe the properties of the materials such as how shiny or reflective our surfaces are and how lights and shadows appear on our 3D objects.
- Vertices: They represent the 3D points that define the 3D objects we are trying to render within the scene. These are used within vertex shaders.
- Fragments: They represent pixels that are present between vertices by interpolation. These are used within fragment or pixel shaders.
- Attributes: They describe vertex parameters such as colour and texture coordinates used in the shader language.
- Uniforms: They describe global parameters that are used in the shader language but remain constant between shader programs.
- Varyings: They describe parameters that are shared between the vertex and fragment shader programs.
- Shapes: They encapsulate the polygons we ultimately want to render in our application. In this case, it's the teapot.
The OpenGL Shading Language
The OpenGL shading language or GLSL is a C-type language that gives direct control over graphics rendering pipelines on multiple operating systems and hardware graphics cards. Using GLSL, we can write small programs called shaders that describe appearances of objects. Depending on whether we are using OpenGL or the subset library OpenGL ES designed specifically for embedded systems like smartphones and tablets, the language syntax remains the same but performance considerations need to be taken into account.
As an example, the vertex shader used in this tutorial looks like this:
attribute vec4 position;
attribute vec4 sourceColour;
attribute vec2 textureCoordIn;
uniform mat4 projectionMatrix;
uniform mat4 viewMatrix;
varying vec4 destinationColour;
varying vec2 textureCoordOut;
void main()
{
destinationColour = sourceColour;
textureCoordOut = textureCoordIn;
gl_Position = projectionMatrix * viewMatrix * position;
}
And the fragment shader used in this tutorial looks like this:
varying vec4 destinationColour;
varying vec2 textureCoordOut;
void main()
{
vec4 colour = vec4(0.95, 0.57, 0.03, 0.7);
gl_FragColor = colour;
}
varying lowp vec4 destinationColour;
varying lowp vec2 textureCoordOut;
void main()
{
lowp vec4 colour = vec4(0.95, 0.57, 0.03, 0.7);
gl_FragColor = colour;
}
As you can see the shaders are quite trivial and the differences between the OpenGL and OpenGL ES shaders are minimal. The GLSL types, variables and functions used here are the following:
vec2/vec4: Represents a floating point vector with 2 or 4 components.mat4: Represents a 4-by-4 floating point matrix.lowp: Specifies a lower precision data type for OpenGL ES.attribute: Represents a vertex-specific parameter.uniform: Represents a global parameter describing the GL environment.varying: Represents a shared parameter between the vertex and fragment shaders.gl_Position: The transformed vertex position for the vertex shader to execute vertex manipulations.gl_FragColor: The colour for the fragment shader to execute fragment manipulations.main(): The main function is where the vertex or fragment shader computation is performed.
The OpenGLAppComponent class
In JUCE, the OpenGLAppComponent class is very similar to the AudioAppComponent class but instead it is used for graphical apps. When inheriting from the OpenGLAppComponent class, there are several functions that we have to override namely:
- initialise(): This function prepares any GL objects needed for rendering such as shaders.
- render(): The render function is called by the OpenGL renderer and this is where the projection and view matrices are calculated to draw the OpenGL context.
- shutdown(): This function clears any GL objects that were used for rendering such as shaders.
- shutdownOpenGL(): In the destructor of our subclass, we have to call this function in order to shut down the GL system before the class is destroyed.
Now that we have explored the basics of OpenGL, let's start implementing the teapot rendering!
Calculating the Projection and View matrices
In order to decouple the calculation of projection and view matrices, we create two helper functions that returns these matrices for later use.
First we calculate the projection matrix using a frustum and the screen bounds as shown below:
juce::Matrix3D<float> getProjectionMatrix() const
{
auto w = 1.0f / (0.5f + 0.1f);
auto h =
w * getLocalBounds().toFloat().getAspectRatio (
false);
return juce::Matrix3D<float>::fromFrustum (-
w,
w, -
h,
h, 4.0f, 30.0f);
}
A frustum is a shape cutout from a polygon by slicing it with two parallel planes and the Matrix3D class provides a handy function called fromFrustum() that returns a matrix from one. In the function above:
- : We first declare a width variable to define half the width of the frustum on the near plane with an arbitrary number that works well for our scenario.
- : Then we declare a height variable to define half the height of the frustum on the near plane based on the screen ratio and the width variable.
- : We finally use the
fromFrustum() function with width, height, near plane and far plane distances as arguments to retrieve the projection matrix. This gives us a perspective projection as opposed to an orthographic projection.
Next, we calculate the view matrix using a rotation matrix to animate our teapot as shown below:
juce::Matrix3D<float> getViewMatrix() const
{
auto viewMatrix = juce::Matrix3D<float>::fromTranslation ({ 0.0f, 0.0f, -10.0f });
auto rotationMatrix = viewMatrix.rotation ({ -0.3f,
5.0f * std::sin ((float) getFrameCounter() * 0.01f),
0.0f });
return viewMatrix * rotationMatrix;
}
- : First we create an identity matrix translated by a vector to push the matrix 10 units back into the scene. This puts our teapot right at the center of the screen but a little bit far off.
- : We then create a rotation matrix from the previously defined matrix that rotates the teapot around the y-axis depending on the rendering frame counter. This will also make the rotation change direction back and forth at the rate of the sin function.
- : Finally we apply the rotation by multiplaying the matrices and return the view matrix.
The mathematical computation part is complete and we can start writing the shader program next.
Writing the OpenGL shaders
Let's start by defining some useful member variables that we will use throughout the tutorial code base:
juce::String vertexShader;
juce::String fragmentShader;
std::unique_ptr<juce::OpenGLShaderProgram> shader;
std::unique_ptr<Shape> shape;
std::unique_ptr<Attributes> attributes;
std::unique_ptr<Uniforms> uniforms;
};
Here we have defined several pointers to the shape, attributes and uniforms we will be using in this GL context as well as an OpenGLShaderProgram object that manages the shader program. We also have two char pointers to define the vertex shader and fragment shader as shown in the next step:
void createShaders()
{
vertexShader = R"(
attribute vec4 position;
attribute vec4 sourceColour;
attribute vec2 textureCoordIn;
uniform mat4 projectionMatrix;
uniform mat4 viewMatrix;
varying vec4 destinationColour;
varying vec2 textureCoordOut;
void main()
{
destinationColour = sourceColour;
textureCoordOut = textureCoordIn;
gl_Position = projectionMatrix * viewMatrix * position;
})";
fragmentShader =
#if JUCE_OPENGL_ES
R"(varying lowp vec4 destinationColour;
varying lowp vec2 textureCoordOut;)"
#else
R"(varying vec4 destinationColour;
varying vec2 textureCoordOut;)"
#endif
R"(
void main()
{)"
#if JUCE_OPENGL_ES
R"( lowp vec4 colour = vec4(0.95, 0.57, 0.03, 0.7);)"
#else
R"( vec4 colour = vec4(0.95, 0.57, 0.03, 0.7);)"
#endif
R"( gl_FragColor = colour;
})";
In the createShaders() function, we first copy the previously shown shaders into the char pointers by inserting line breaks. This function will be later called in the initialise() function of the OpenGLAppComponent. The vertex shader essentially sets the position of every vertex in the shape by setting the "gl_Position" variable to the product of the transformation matrices namely the projection matrix followed by the view matrix. As for the fragment shader, the colour of the pixel is specified by setting the "gl_FragColor" variable to the specified colour.
In the second half of the createShaders() function, we create a new shader program within the current GL context and perform some initialisation as follows:
std::unique_ptr<juce::OpenGLShaderProgram> newShader (new juce::OpenGLShaderProgram (openGLContext));
juce::String statusText;
if (newShader->addVertexShader (juce::OpenGLHelpers::translateVertexShaderToV3 (vertexShader))
&& newShader->addFragmentShader (juce::OpenGLHelpers::translateFragmentShaderToV3 (fragmentShader))
&& newShader->link())
{
shape .reset();
attributes.reset();
uniforms .reset();
shader.reset (newShader.release());
shader->use();
shape .reset (new Shape());
attributes.reset (new Attributes (*shader));
uniforms .reset (new Uniforms (*shader));
statusText = "GLSL: v" + juce::String (juce::OpenGLShaderProgram::getLanguageVersion(), 2);
}
else
{
statusText = newShader->getLastError();
}
}
- : We first add the vertex shader followed by the fragment shader and attempt to link the compiled shaders into a single program.
- : If the compilation and linking of the shaders are successful, we can clear the shape, attributes and uniforms pointers, assign the newly created shader to the shader program pointer and instantiate new objects for the shape, attributes and uniforms pointers.
- : We can optionally keep track of the initialisation status in case the compilation of shaders fails.
Now let's define useful structures to represent vertices, attributes, uniforms and shapes.
The Vertex struct
In order to represent a vertex we require four important variables as shown below:
struct Vertex
{
float position[3];
float normal[3];
float colour[4];
float texCoord[2];
};
- Positions: The position array represents the vertex position in the 3D local space.
- Normals: The normal array represents the direction of the normal vector of the vertex in question computed from the normals of the adjacent faces.
- Colours: The colour array represents the colour of the vertex in RGBA format.
- Texture Coordinates: If a texture is used, this represents the 2D coordinates of the texture to use on the vertex in question.
The Attributes struct
The attributes structure is essentially a container class to hold several OpenGLShaderProgram::Attribute objects together and the attributes we store are defined here:
They correspond exactly to the variables in the Vertex struct defined earlier since attributes are meant to describe vertex parameters in the vertex shader program.
As expected, we create these attributes in the constructor by calling the private helper function defined in the next step by passing the shader program as an argument:
explicit Attributes (juce::OpenGLShaderProgram& shaderProgram)
{
position .reset (createAttribute (shaderProgram, "position"));
normal .reset (createAttribute (shaderProgram, "normal"));
sourceColour .reset (createAttribute (shaderProgram, "sourceColour"));
textureCoordIn.reset (createAttribute (shaderProgram, "textureCoordIn"));
}
The helper function in turn will call the OpenGLShaderProgram::Attribute constructor to instantiate new objects:
private:
static juce::OpenGLShaderProgram::Attribute* createAttribute (juce::OpenGLShaderProgram& shader,
const juce::String& attributeName)
{
using namespace ::juce::gl;
if (glGetAttribLocation (shader.getProgramID(), attributeName.toRawUTF8()) < 0)
return nullptr;
return new juce::OpenGLShaderProgram::Attribute (shader, attributeName.toRawUTF8());
}
However, in the above we first check whether the attribute exists in the shader program by using the glGetAttribLocation() function. If the number returned is -1 then we abort the attribute instantiation.
In the enable() function, all the attributes are activated (after checking if they exist) by calling the glVertexAttribPointer() and glEnableVertexAttribArray() functions as shown below:
void enable()
{
using namespace ::juce::gl;
if (position.get() != nullptr)
{
}
if (normal.get() != nullptr)
{
}
if (sourceColour.get() != nullptr)
{
}
if (textureCoordIn.get() != nullptr)
{
}
}
The glVertexAttribPointer() function defines the array of vertex attribute data with information such as the index, size and type of data to hold. Notice that the last argument specifies the offset of the data cumulatively with regards to the other attributes defined previously in the structure. Then the glEnableVertexAttribArray() function enables the actual array to be used within the context.
In the disable() function, we do the exact opposite by calling the glDisableVertexAttribArray() function on all attributes:
void disable()
{
using namespace ::juce::gl;
}
The Uniforms struct
The uniforms structure similarly contains several OpenGLShaderProgram::Uniform objects in the same manner as defined here:
They correspond exactly to the matrix variables defined earlier in the vertex shader program.
As expected, we create these attributes in the constructor by calling the private helper function defined in the next step by passing the shader program as an argument:
explicit Uniforms (juce::OpenGLShaderProgram& shaderProgram)
{
projectionMatrix.reset (createUniform (shaderProgram, "projectionMatrix"));
viewMatrix .reset (createUniform (shaderProgram, "viewMatrix"));
}
The helper function in turn will call the OpenGLShaderProgram::Uniform constructor to instantiate new objects:
private:
static juce::OpenGLShaderProgram::Uniform* createUniform (juce::OpenGLShaderProgram& shaderProgram,
const juce::String& uniformName)
{
using namespace ::juce::gl;
if (glGetUniformLocation (shaderProgram.getProgramID(), uniformName.toRawUTF8()) < 0)
return nullptr;
return new juce::OpenGLShaderProgram::Uniform (shaderProgram, uniformName.toRawUTF8());
}
};
However, in the above we first check whether the uniform exists in the shader program by using the glGetUniformLocation() function. If the number returned is -1 then we abort the uniform instantiation.
The Shape struct
The shape structure is where we define the teapot object in OpenGL terms. The member variables are used to store the Wavefront Obj file for the teapot model and an array of vertex buffers defined as a sub-structure just below:
WavefrontObjFile shapeFile;
juce::OwnedArray<VertexBuffer> vertexBuffers;
Let's first examine how a vertex buffer is defined. It essentially contains the total number of indices in the mesh as well as a vertex buffer and an index buffer in order to prepare for later rendering:
GLuint vertexBuffer, indexBuffer;
int numIndices;
};
The class constructor initialises a vertex buffer in the following way:
explicit VertexBuffer (WavefrontObjFile::Shape& aShape)
{
using namespace ::juce::gl;
numIndices = aShape.mesh.indices.size();
juce::Array<Vertex> vertices;
createVertexListFromMesh (aShape.mesh, vertices, juce::Colours::green);
static_cast<GLsizeiptr> (
static_cast<size_t> (vertices.size()) * sizeof (Vertex)),
vertices.getRawDataPointer(), GL_STATIC_DRAW);
static_cast<GLsizeiptr> (
static_cast<size_t> (numIndices) *
sizeof (juce::uint32)),
aShape.mesh.indices.getRawDataPointer(), GL_STATIC_DRAW);
}
- : We first retrieve the number of indices in the mesh we want to draw.
- : Then we generate the buffer object name for our single vertex buffer with the
glGenBuffers() function and bind the vertex attributes to it with the glBindBuffer() function.
- : Using the helper function defined below, we create a vertex list from the teapot mesh.
- : We can then copy the vertex list into the vertex buffer by calling the
glBufferData() function.
- : Finally we do the same for the index buffer by generating the buffer object name, binding the vertex array indices to it and copying the indices into the index buffer.
The helper function that creates a mesh from a vertex list is defined as follows:
static void createVertexListFromMesh (
const WavefrontObjFile::Mesh& mesh, juce::Array<Vertex>&
list, juce::Colour colour)
{
auto scale = 0.2f;
WavefrontObjFile::TextureCoord defaultTexCoord { 0.5f, 0.5f };
WavefrontObjFile::Vertex defaultNormal { 0.5f, 0.5f, 0.5f };
for (auto i = 0; i < mesh.vertices.size(); ++i)
{
const auto& v = mesh.vertices.getReference (i);
const auto& n = i < mesh.normals.size() ? mesh.normals.getReference (i) : defaultNormal;
const auto& tc = i < mesh.textureCoords.size() ? mesh.textureCoords.getReference (i) : defaultTexCoord;
list.add ({ { scale * v.x, scale * v.y, scale * v.z, },
{ scale * n.x, scale * n.y, scale * n.z, },
{ colour.getFloatRed(), colour.getFloatGreen(), colour.getFloatBlue(), colour.getFloatAlpha() },
{ tc.x, tc.y } });
}
}
- : We first define several local variables for the mesh scale, the default texture coordinates and the default normal vector.
- : Then for every vertex in the mesh, we get a reference to the vertex position, normal vector and texture coordinates to create a new Vertex object that we defined earlier.
- : On the Vertex object that was created, we scale the position and normal vectors, assign a dummy green colour and finally we add it to the vertex list.
In the destructor, we delete the vertex and index buffers by calling the glDeleteBuffers() function on each variable:
~VertexBuffer()
{
using namespace ::juce::gl;
}
The bind() function defined below is called when the shape is drawn and binds the vertex and index buffers using the glBindBuffer() function:
void bind()
{
using namespace ::juce::gl;
glBindBuffer (GL_ARRAY_BUFFER, vertexBuffer);
glBindBuffer (GL_ELEMENT_ARRAY_BUFFER, indexBuffer);
}
Now let's go back to the shape constructor where the teapot binary data is loaded into the WavefrontObjFile variable:
Shape()
{
auto dir = juce::File::getCurrentWorkingDirectory();
int numTries = 0;
while (! dir.getChildFile ("Resources").exists() && numTries++ < 15)
dir = dir.getParentDirectory();
if (shapeFile.load (dir.getChildFile ("Resources").getChildFile ("teapot.obj")).wasOk())
for (auto* s : shapeFile.shapes)
vertexBuffers.add (new VertexBuffer (*s));
}
- Warning
- Make sure that the "teapot.obj" file exists in the
Resources folder of your project.
If the loading is successful, we can iterate over every shape contained in the WavefrontObjFile object and we can create a new VertexBuffer object and add it to the vertex buffer array.
Finally, we implement a draw() function that will be called in the render() function of the OpenGLAppComponent later on as defined below:
void draw (Attributes& glAttributes)
{
using namespace ::juce::gl;
for (auto* vertexBuffer : vertexBuffers)
{
vertexBuffer->bind();
glAttributes.enable();
glDrawElements (GL_TRIANGLES, vertexBuffer->numIndices, GL_UNSIGNED_INT,
nullptr);
glAttributes.disable();
}
}
For every vertex buffer in the member variable array, we first call the bind() function to bind the vertex and index buffers to the GL context. We then call the enable() function defined earlier on every attribute to fill the arrays with data. Finally, the glDrawElements function draws every set of three vertices contained in the vertex buffer as triangles before the attributes are disabled and emptied.
Putting it all together
We now have all the components to render our teapot so let's put it all together.
As mentioned before our app inherits from the OpenGLAppComponent class as shown here in the MainContentComponent class:
class MainContentComponent : public juce::OpenGLAppComponent
{
public:
In the class constructor, we set the size of our window as usual using the setSize() function:
MainContentComponent()
{
setSize (800, 600);
}
In the class destructor, we make sure that the OpenGL system is shutdown before our class is destroyed by calling the shutdownOpenGL() function:
~MainContentComponent() override
{
shutdownOpenGL();
}
As described before the OpenGLAppComponent class provides startup and shutdown functions to facilitate implementation of our graphics application. In the initialise() function we call the helper function createShaders() defined earlier to prepare the vertex and fragment shaders as shown here:
void initialise() override
{
createShaders();
}
As for the shutdown() function, we ensure there is no leakage by setting all the member variable pointers to null as done here:
void shutdown() override
{
shader .reset();
shape .reset();
attributes.reset();
uniforms .reset();
}
Next, we perform the actual rendering by overriding the OpenGLAppComponent::render() function as explained below:
void render() override
{
using namespace ::juce::gl;
jassert (juce::OpenGLHelpers::isContextActive());
auto desktopScale = (float) openGLContext.getRenderingScale();
juce::OpenGLHelpers::clear (getLookAndFeel().findColour (juce::ResizableWindow::backgroundColourId));
0,
juce::roundToInt (desktopScale * (float) getWidth()),
juce::roundToInt (desktopScale * (float) getHeight()));
shader->use();
if (uniforms->projectionMatrix.get() != nullptr)
uniforms->projectionMatrix->setMatrix4 (getProjectionMatrix().mat, 1, false);
if (uniforms->viewMatrix.get() != nullptr)
uniforms->viewMatrix->setMatrix4 (getViewMatrix().mat, 1, false);
shape->draw (*attributes);
}
- : First check that the GL context is active using the
OpenGLHelpers::isContextActive() function so that we can retrieve the scale factor of the rendering display.
- : We can then clear the display by painting the background with the appropriate look and feel colour.
- : This goes beyond the scope of the tutorial but the
glEnable() function activates the "GL_BLEND" option which blends the colour of the computed fragment colour with the colour buffer values. The blending method is specified in the glBlendFunc() function by specifying the transparency calculation.
- : The
glViewport() function sets the viewport of the GL window relative to the device screen by multiplying the width and height by the rendering display scale factor.
- : By calling the
use() function on the shader pointer, we specify which shader we want to use in this GL context.
- : We set the projection matrix as a uniform variable from our helper function to compute the shader.
- : We also set the view matrix as a uniform variable from our helper function to compute the shader.
- : Finally, we call the
draw() function defined earlier on the shape pointer to render the teapot within the GL context and attributes specified as arguments.
- : We also make sure to empty the vertex attributes and vertex array indices using the
glBindBuffer() function on the GL context.
- Note
- All functions with the "gl" prefix are contained in the OpenGL library of your development machine as opposed to the JUCE library.
Summary
In this tutorial, we have learnt how to set up an OpenGL JUCE application. In particular, we have:
- Learnt the functionalities of the OpenGLAppComponent class.
- Loaded a Wavefront Obj file into the OpenGL renderer.
- Calculated projection and view matrices.
- Configured the OpenGLContext and render appearance using shaders.
See also
