
Loading...
Searching...
No Matches
This tutorial will help you to set up your computer and create an Projucer project for developing audio plug-ins (VST3 and AudioUnit) using JUCE. At the end, we will end up with an audio plug-in that says "Hello, World!" and can be loaded into VST3 hosts like Cubase or REAPER.
Level: Intermediate
Platforms: Windows, macOS, Linux
Plugin Format: VST3, AU, Standalone
Download JUCE. Unpack the JUCE folder and place it to some location on your computer. Your user home folder is a convenient place.
Launch the Projucer application, which is located in your JUCE folder.
If you are not familiar with the Projucer yet, please read Tutorial: Projucer Part 1: Getting started with the Projucer first.
All of the files that you need to create VST3 and AU (MacOS only) plug-ins are packaged with JUCE (as long as you are using a recent version of JUCE).
To create an audio plug-in with JUCE, create a new project in the Projucer and select Audio Plug-In as the project type. See Tutorial: Projucer Part 1: Getting started with the Projucer if you don't know how to do that.
In the Projucer’s configuration settings for the new project, you can change project settings, such as which plug-in types you wish to export and whether the plug-in receives or produces MIDI notes (amongst many other things). You can change these settings at any time.
In this tutorial we are creating a VST3 plug-in, so make sure that the VST3 setting is ticked in the "Plugin Formats" field. Then tick Plugin MIDI input and Plugin MIDI output in the "Plugin Characteristics" field below.
That’s all the config you need! Now click Save Project and Open in IDE... Your new project will open. Click the build button to verify that your plug-in builds and that everything has been set up correctly.
One of the challenges of building plug-ins is testing them. Thankfully, JUCE makes that easy, with a built-in plug-in host. To access the host go to extras/AudioPluginHost/ and open the .jucer file with the Projucer. Click Save Project and Open in IDE.... Then inside your IDE build the project to create a binary (which on Mac OS X you will find at extras/AudioPluginHost/Builds/MacOSX/build).
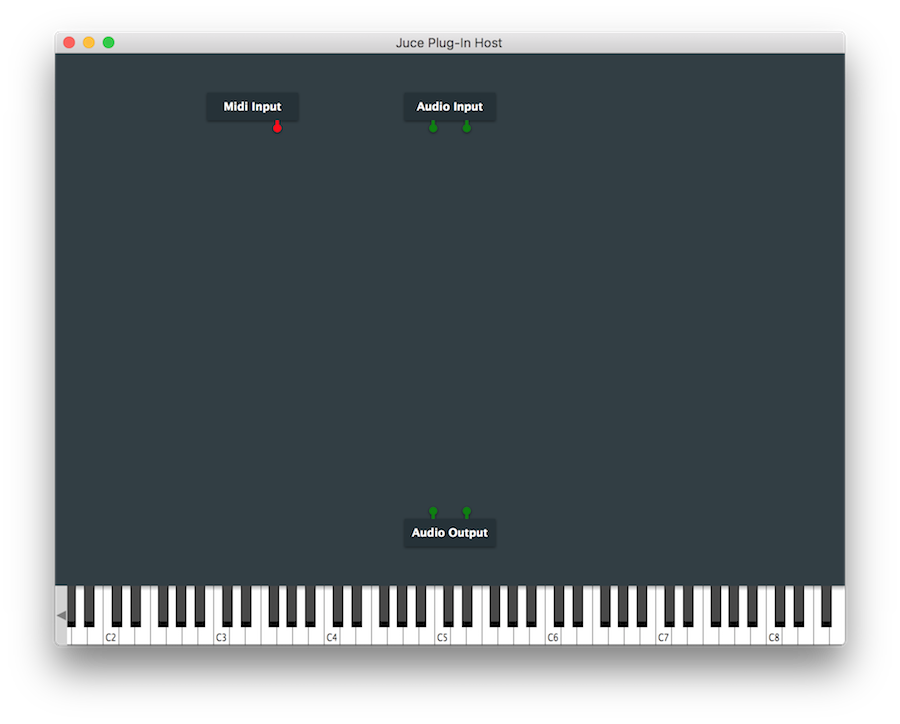
Run the application and you will see the graphical node editor that looks like this:
Pressing "Cmd-P" (or going to Options > Edit the List of Available Plug-ins...) will allow you to update the list of plug-ins on your system (you will only have to do this once per project). Click the options button at the bottom of the pop-up window and click Scan for new or updated VST3 plug-ins.... On macOS JUCE Audio plugins are automatically copied to ~/Library/Audio/Plug-Ins/VST3, and the host application automatically searches that folder, so you shouldn’t need to manually specify where to look — just click Scan. On Windows you will need to manually copy the VST3 you built from your project's build folder to the VST3 installation folder, which is typically C:\Program Files\Common Files\VST3.
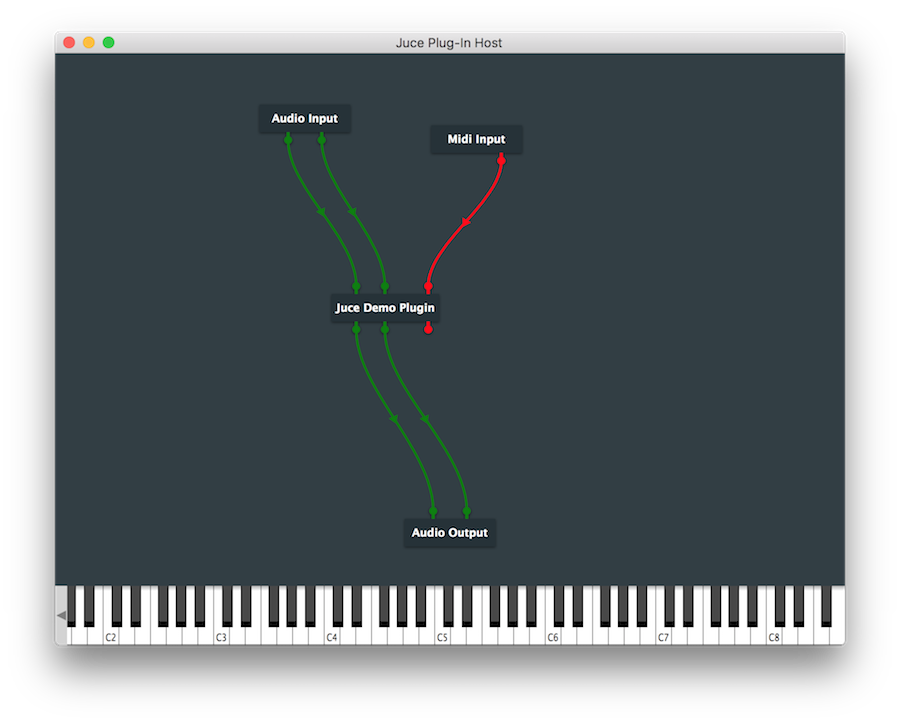
Once the scan is complete go back to the node editor and right click, then select your plug-in from the context menu (it will be under a company called "yourcompany" by default - you can edit this in the Projucer). Connect the nodes up such that the MIDI input and Audio Input nodes are routed to the inputs of your plug-in, and that your plug-in’s audio output are routed to the Audio Output node.
Double click your plugin to launch the GUI. The default plugin does nothing but show Hello world.
You can select Options > Change the Audio Device Settings... to make sure your inputs and outputs all go to the right places. Hit File > Save to make it easy to retrieve this configuration.
Used in this way the Plug-In Host gives you a very simple environment in which to test a plug-in, but there’s more that we can do. We can configure the host to enable step-through debugging of your plugin. To do this on macOS go back to your plug-in project in Xcode, click Product > Scheme > Edit Scheme..., then under Run select Other... from the Executable dropdown and locate Plugin Host.app. Make sure Debug executable is ticked. In Visual Studio on Windows you should go to the properties page of the VST3 build target, select the "Debugging" pane, then set the path to the AudioPluginHost executable in the "Command" field.
Now when you build and run your plugin it will automatically launch the host, and when your plug-in is loaded inside the host you can set breakpoints and do step-through debugging.
Now you are ready and good to go to code an audio plug-in that actually does some audio. Read on in Tutorial: Create a basic Audio/MIDI plugin, Part 2: Coding your plug-in.
To build AAX plug-ins (for Pro Tools) you will need to contact Avid for a developer license in order to access their SDK. If you do obtain access to the AAX SDK you will notice that the Projucer has a path that you can set in its Global Preferences window.
After reading this tutorial, you should be able to: