
Loading...
Searching...
No Matches
This tutorial introduces the hierarchical nature of the Component class whereby one component can contain one or more nested child components. This is key to laying out user interfaces in JUCE.
Level: Beginner
Platforms: Windows, macOS, Linux, iOS, Android
Classes: Component, Path, Colours
Download the demo project for this tutorial here: PIP | ZIP. Unzip the project and open the first header file in the Projucer.
If you need help with this step, see Tutorial: Projucer Part 1: Getting started with the Projucer.
The demo project displays a scene containing a simple drawing of a house, as shown in the following screenshot:
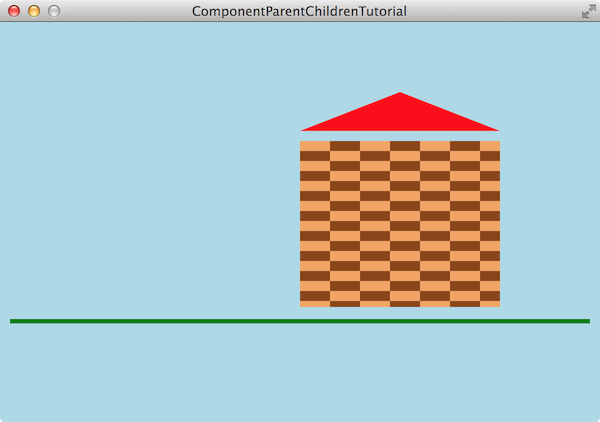
Does that look familiar? It's rather similar to the end result of Tutorial: The Graphics class! The difference here is that each of the parts is drawn into a separate Component object using separate paint() functions. As we will see, these are grouped logically. For example, the wall of the house and its roof are grouped into a single "house" object.
Let's explore how this is put together and why it is a good idea to structure your components in this way.
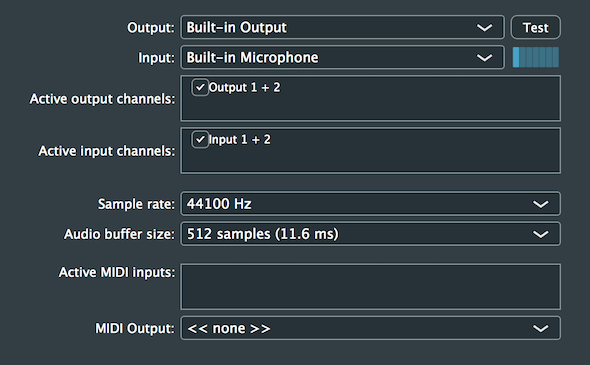
Most user interfaces comprise a number of elements, such as pieces of text, buttons, sliders, menus, and so on. For example, the following screenshot shows the AudioDeviceSelectorComponent class (which is for controlling audio hardware settings, see Tutorial: The AudioDeviceManager class for more information). This contains a button, some labels, some menus (combo boxes), some radio buttons, and an audio level indicator.
Some individual user interface elements may also group together other user interface elements to form more useful controls. For example, the JUCE Slider class can contain not only the slider itself but also a text box that shows the slider's current value. This is shown in the following screenshot:

In each of these cases, by separating the individual elements into separate parts of hierarchy, it is much easier to design the layout of the interface (and respond to user interaction). Some components may use their paint() function to draw themselves. Other components may simply contain other components. Some components may contain other components and perform some drawing. The design choices are quite flexible.
In this tutorial the MainContentComponent class contains an instance of another component class as a member. This is the SceneComponent class, which draws the actual scene. Look at the MainContentComponent class within the project. A SceneComponent object is added as a private member:
Within the MainContentComponent constructor, this SceneComponent object is added as a child component and the MainContentComponent object becomes its parent.
In order for the child component to be displayed, it also needs to be made visible. These two steps can be done separately, but it is a common idiom in JUCE to perform both of these actions in one single step using the Component::addAndMakeVisible() function:
While our MainContentComponent class sets its own size during construction, many component objects initially have a zero size. The call to the Component::setSize() function will in turn trigger a call to our MainContentComponent::resized() function. This is a good place to set the size and position of any child components:
The important point here is that the coordinates in the call to the SceneComponent::setBounds() function are relative to its parent component (in this case our MainContentComponent object). What this means is that the top-left corner of the parent component is point (0, 0) and the child component will be positioned such that its top-left corner will be relative to this point. In fact our SceneComponent object fills the entire content of our MainContentComponent object. An alternative way to write this is to use the Component::getLocalBounds() function. This returns a Rectangle object representing the bounds of the component that calls it. This results in a rectangle with a position (0, 0) and a size that its width and height. This Rectangle object can then be passed to the SceneComponent::setBounds() function. The alternative code is shown in the following code snippet:
The next section of this tutorial reflects the structure of this SceneComponent object.
resized() function).The SceneComponent class does some of its own drawing and contains two child components (representing the floor and the house). The SceneComponent declaration is as follows:
The FloorComponent and HouseComponent objects are added and made visible in the constructor:
To draw the sky, we fill the entire component with light blue in the SceneComponent::paint() function.
The floor and the house have their bounds positioned within the SceneComponent::resized() function:
Let's look at how the floor and the house are drawn within the respective classes.
The floor is drawn as a green horizontal line (as in Tutorial: The Graphics class) five pixels thick, centred vertically within the component, and spanning its full width. Here is the FloorComponent::paint() function (from the FloorComponent class):
The house itself doesn't perform any drawing of its own (it does not have a paint() function) but comprises two other components (representing the wall and roof of the house) in the HouseComponent class:
The WallComponent and RoofComponent objects are added and made visible in the constructor:
These are positioned proportionally in the HouseComponent::resized() function:
The WallComponent class is simple. It just fills itself with a checkerboard pattern in the WallComponent::paint() function (from the WallComponent class):
The RoofComponent class draws a triangle using a Path object in the RoofComponent::paint() function:
If we call the width of the RoofComponent object w and the height h then the three points that make up the triangle are: (0, h), (w, h), (w⁄2, 0).
Let's add a sun to our scene. A number of empty functions are provided for you in the SunComponent class, to which we will add some code in a moment.
First, we need to make some changes to the SceneComponent class. Add an instance of the SunComponent class to the private section [4]:
Then we need to add the sun and make it visible [5]:
And position the sun in the top-right corner [6]:
We need to add the drawing code to the SunComponent::paint() function (in the SunComponent class):
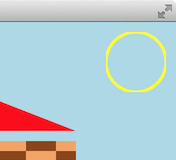
Notice that we need to position the ellipse slightly within the bounds of the component. This should be dependent on the line thickness. This is because it is the centre of the line that sits exactly on the coordinates specified. For example, if we draw a line on an edge of the component, then half of the thickness of the line will sit outside the bounds of the component. Look as the following screenshot to see what could happen if we didn't adjust the position and size of the ellipse slightly.
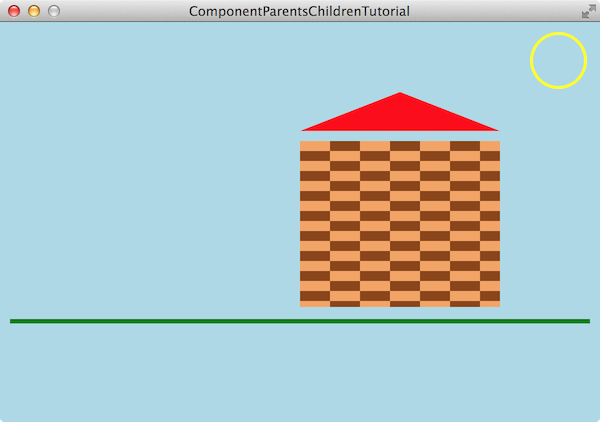
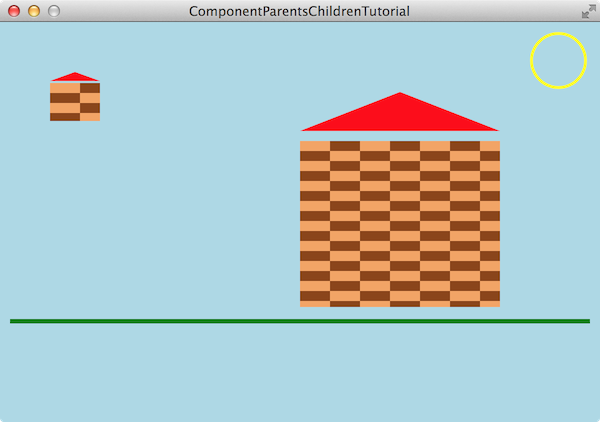
Our final scene should look like this:
ComponentParentsChildrenTutorial_02.h file of the demo project.SunComponent object to be a square, we don't notice this potential problem. Fix the SunComponent class such that it always draws a circle within its bounds — rather than an ellipse — even if its width and height aren't the same. One of the main benefits of the coordinate system used by the Component class, is that drawing is always performed relative to the top-left of the component. Another benefit of encapsulating drawing into a separate class is that it can be reused easily.
For example, we can easily add another house [7] to the SceneComponent class:
Then add it and make it visible [8] in the SceneComponent constructor:
And position it [9] in the SceneComponent::resized() function:
With the small house added, the scene should look like this:
ComponentParentsChildrenTutorial_03.h file of the demo project.StreetComponent that contains a number of HouseComponent objects in a row to form a street, and add it to the project. Modify the SceneComponent class such that it contains some streets and individual houses. In this tutorial we have introduced the hierarchical parent and child system that is used by the Component class. In particular, we have learned: