
Loading...
Searching...
No Matches
Specify and apply colours within your application in various ways.
Level: Beginner
Platforms: Windows, macOS, Linux, iOS, Android
Classes: Colour, Colours, LookAndFeel
Download the demo project for this tutorial here: PIP | ZIP. Unzip the project and open the first header file in the Projucer.
If you need help with this step, see Tutorial: Projucer Part 1: Getting started with the Projucer.
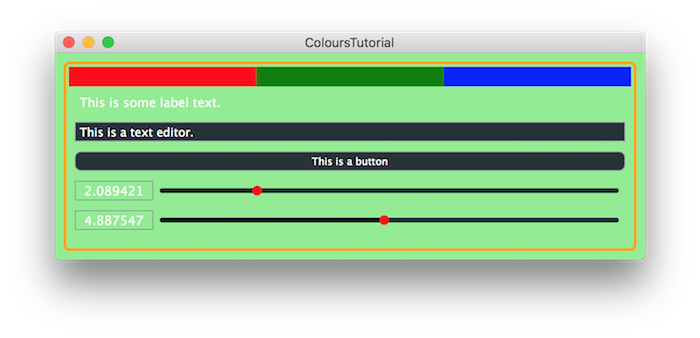
The demo project displays some child components and performs some simple drawing commands, which are used to illustrate how colours are specified and applied to components in JUCE. The application should look similar to the following screenshot:

The first part of this tutorial looks at specifying colours more generally. This is illustrated by modifying the drawing code in the paint() function within the demo application. The second part of the tutorial shows how colours are specified for elements of the built-in component types (such as labels, sliders, and so on).
JUCE specifies colours using red, green, blue, and alpha (transparency) values. This is, of course, a widely used method of specificy colours in computing, but all implementations are slightly different. In particular, JUCE provides some useful methods for manipulating colours, which can help you maintain a consistent colour palette for your application. First, let's look at the paint() function from the demo application:
The first line fills the entire graphics context with a single colour (which means the entire component's bounds):
The next line sets the colour for future drawing operations for a given graphics context.
Then we define a slightly inset rectangle and draw a rounded rectangle, as a border, using the current colour:
Next, we set up an array of colours, which we will use to draw a row of different coloured rectangles.
To draw this row of coloured rectangles, we first define the area within which they will be placed:
Then we define the area for the first coloured rectangle. This will be a proportion of the total width of the colourBarArea rectangle, divided by the number of colours that we are using:
Finally, we iterate over the array of colours, fill the rectangle with the specified colour, and move the colourArea rectangle to the right for the next iteration:
In the next few examples we will demonstrate some methods for specifying colours by changing the colours added to the colours array.
As shown in the demo project and the code above, colours can be specified in JUCE using some constants in the Colours namespace.
In addition to the constants within the Colours namespace, you can use the Colours::findColourForName() function, using a string to look up the desired colour name. For example, we could use the same red, green, and blue colours using the following code to fill our colours array:
The Colours::findColourForName() function performs a case-insensitive search and trims whitespace from the start and end of the string, but not spaces within the string. For example, the following code will still work as expected, even though the colours are stored internally using all lowercase strings:
This produces the following colours:

But including spaces within the colour name will fail, in our case returning a black colour in each case:
It is straightforward to write your own functions to suit your needs in these instances. For example, you could write a function to remove all spaces from a string:
And use that when passing a string to the Colours::findColourForName() function:
Colours can also be specified using the raw red, green, blue, and alpha values. Here you can create a Colour object using either floating point values in the range 0.0-1.0, or integers (of type uint8) between 0-255. Using integers we can create the same red, green, and blue colours as follows:
Omitting the alpha value in this case sets the alpha value to the maximum (255) making the colour completely opaque.
We can also use a single hexadecimal value to specify a colour. In this case the order of the colour value elements is: alpha, red, green, and blue:
We can also use floating point values using the Colour::fromFloatRGBA() function:
colours array, you can use any number of colours (greater than or equal to one). Colour objects can also be initialised from hue, saturation, and brightness values. This is one way to generate different colours that share some perceptual qualities.
For example we could create a series of light and dark reds using the following code:
Here the hue, saturation, and alpha values are constant for each colour (a hue of 0.0f should generate colours perceived as "reds"). The result is shown in the following screenshot:

We can also obtain the hue, saturation, and brightness values from a Colour object. For example, if we wanted a series of purples of different brightnesses, we could use the following code:
The result of this is shown in the following screenshot:

We can also use existing colours to create new colours. For example, to make colours that are slightly brighter or darker than an existing colour we can use the Colour::brighter() or Colour::darker() functions respectively:
Or you can blend between two colours using the Colour::interpolatedWith() function:
The result of this is shown in the following screenshot:

Given one colour you can create another colour that will be clearly visible against another colour using the Colour::contrasting() function. This allows you to specify the amount of contrast using an argument:
You can even create a colour that is contrasting against two other colours:
There are various other manipulations that can be performed such as blending two colours taking into account the alpha channel of the overlaid colour using the Colour::overlaidWith() function.
The previous section explored the use of colours when performing your own drawing operations with your component's paint() function. To customise the colours of the built-in components (such as sliders, labels, and so on) you need to use Component::setColour() or LookAndFeel::setColour() functions.
Essentially, each of the built-in Component subclasses contains an enum that lists the various elements of the component that can have a specific colour. Each of these items is referred to as a colour ID. (The values of these colour IDs are unique across the JUCE library.) For example, the colour IDs for the Label class are as follows (from Label::ColourIds):
Label::outlineColourId : An optional colour to use to draw a border around the label.
Leave this transparent to not have an outline.
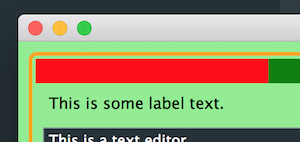
Let's try changing some of these colours. If you look in the MainContentComponent constructor you will see a Label, a TextEditor, a TextButton, and two Slider objects added as child components. Add the line [1] as shown below to change the label's text colour to black:
The result should be similar to the following screenshot:
It is very common for applications, or parts of applications, to require the same colour palette for all components of the same type. You may have found in the exercise in the previous section that you needed to repeat the calls to the Component::setColour() function for both sliders in order to give them the same appearance. One use of the LookAndFeel class is to provide a single point where these colours can be specified. To illustrate this, return the MainContentComponent constructor back to its original state as shown below:
Now add the following line [2] to set the colour of the thumbs for both sliders:
This should produce a result similar to the following screenshot:
You can also make a subclass of one of the LookAndFeel classes (LookAndFeel_V1, LookAndFeel_V2, LookAndFeel_V3, or LookAndFeel_V4) and customise specific colours in its constructor. To do this you could add the following class as a nested class of our MainContentComponent class:
Add an instance of this class to our private member section [3]:
And set the MainContentComponent class to use this look-and-feel in its constructor [4]:
ColoursTutorial_02.h file of the demo project.CustomLookAndFeel constructor. In this tutorial we have looked at the following items that you can use in your own applications:
paint() function when performing drawing operations.