
Loading...
Searching...
No Matches
Add parameters to your audio plug-in to allow control and automation from your digital audio workstation. Learn how to use the audio parameters for processing audio and create a user interface for them.
Level: Beginner
Platforms: Windows, macOS, Linux
Classes: AudioParameterFloat, AudioParameterBool, GenericAudioProcessorEditor
Download the demo project for this tutorial here: PIP | ZIP. Unzip the project and open the first header file in the Projucer.
If you need help with this step, see Tutorial: Projucer Part 1: Getting started with the Projucer.
You should also know how to build an audio plug-in using JUCE and load this into your preferred audio host (also known as a Digital Audio Workstation — DAW). See Tutorial: Create a basic Audio/MIDI plugin, Part 1: Setting up for an introduction.
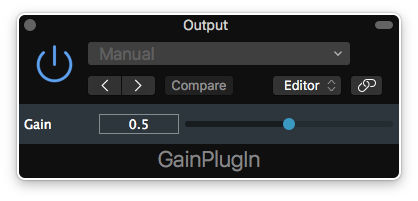
The demo project is based on the GainPlugin project in the JUCE/examples/Plugins directory. This plug-in simply changes the gain of an incoming signal using a single parameter.
Most of the code in the TutorialProcessor class is the same as that generated by the Projucer when you use the Audio Plug-In project template. For simplicity, we have bundled the processor code into a single .h file rather than being split across a .cpp and an .h file.
In your processor you should store audio parameter members for each of your parameters. In our case we have only one:
The processor should allocate and add the parameters that your plug-in needs in its constructor. In our simple example we have only one parameter to set up:
The parameter ID should be a unique identifier for this parameter. Think of this like a variable name; it can contain alphanumeric characters and underscores, but no spaces. The parameter name is the name that will be displayed on the screen.
In addition to this, the AudioParameterFloat class allows you to specify the range of values that the parameter can represent. The AudioParameterFloat class also has an alternative constructor which allows you to use a NormalisableRange<float> object instead. JUCE stores all of the parameter values in the range [0, 1] as this is a limitation of some of the target plug-in APIs. We could rewrite the code shown above as:
This may seem a little pointless in our example (since the parameter range is already in the range [0, 1]!) but using a NormalisableRange<float> object also allows you to specify a skew-factor. This is especially useful if your plug-in needs to use parameters that represent frequency or time properties, since these are often best represented using a non-linear mapping.
Once the parameters have been created and added, your plug-in can interact with these parameter objects. In our case we simply retrieve the gain value in the TutorialProcessor::processBlock() function:
The AudioSampleBuffer::applyGain() function applies our gain value to all samples across all channels in the buffer.
This illustrates the idiom that you should use when using the audio parameter classes: dereference the pointer to the parameter to obtain the parameter value. In this case, because we are using an AudioParameterFloat, we get a float.
The other AudioParameterXXX classes work in a similar way:
In addition to providing routines for processing audio you also need to provide methods for storing and retrieving the entire state of your plug-in into a block of memory. This should include the current values of all of your parameters, but it can also include other state information if needed (for example, if your plug-in deals with files, it might store the file paths).
Our simple gain plug-in has only one thing to save: the gain value itself. Storing this is as easy as writing the floating point value in a binary format:
The AudioProcessor::getStateInformation() callback is called when plug-in needs to have its state stored. For example, this happens when the user saves their DAW project or saves a preset (in some DAWs). We can put anything we like into the MemoryBlock object that is passed to this function.
The AudioProcessor::setStateInformation() function needs to do the opposite: it should read data from a memory location and restore the state of our plug-in:
There are some improvements that we can make to this gain processor:
Using the AudioSampleBuffer class we can easily perform ramping gain changes over the whole block size of the buffer. In order to do this we need to store the value of the gain parameter from the previous audio callback. First, add a member variable to the TutorialProcessor class [1]:
Then, ensure that this value is initialised in the TutorialProcessor::preparePlay() function:
Finally, modify the TutorialProcessor::processBlock() function to perform the gain ramp:
Here you can see that if the value hasn't changed, then we simply apply a constant gain. If the value has changed, then we apply the gain ramp, then update the previousGain value for next time.
AudioParameterTutorial_02.h file of the demo project.Storing the plug-in state in a binary format results in using less memory and storage space for your plug-in's state. However, it is often more convient to use a format such as XML or JSON. This makes debugging easier and it also simplifies making the stored state information compatible with future versions of your plug-in. In particular, XML makes it easy to:
To store our gain plug-in's state in XML we can do the following:
The AudioProcessor::copyXmlToBinary() function is a convenient helper function to convert XML to a binary blob. To retrieve the state we can do the opposite:
Where the AudioProcessor::getXmlFromBinary() function converts binary data—created with AudioProcessor::copyXmlToBinary() function—back to XML.
Importantly, you can see the error checking going on here. If the information block is not XML then the function will do nothing. It also checks for the tag name "ParamTutorial" and only proceeds if this name is found. The gain value will also default to 1.0 if the gain parameter isn't found. Adding version information is as simple as adding another attribute for this purpose. Then more error checking would allow you to handle different versions of the state information.
AudioParameterTutorial_03.h file of the demo project.Let's add a phase invert parameter to our gain plug-in!
First, add an AudioParameterBool* member to the TutorialProcessor class [2]:
Then we need to allocate and add the parameter in the TutorialProcessor constructor [3]:
Of course a boolean parameter doesn't have a specifiable range, only a default value. We'll need to update our TutorialProcessor::getStateInformation() function [4]:
And the TutorialProcessor::setStateInformation() function [5]:
We need to add the audio processing code:
Notice here that:
invertPhase parameter.gain parameter.Finally, the previousGain value needs to be initialised in the TutorialProcessor::prepareToPlay() function:
In this tutorial we have learned about using audio parameters within the AudioProcessor class. In particular we have explored: