
Loading...
Searching...
No Matches
Learn how to prepare your audio application or plugin for distribution on various marketplaces. Create installers for all plugin types on different OS platforms.
Level: Advanced
Platforms: Windows, macOS
Plugin Format: VST, VST3, AU, AUv3, RTAS, AAX
So you just finished implementing the perfect plugin, bug-free on all wrappers with the best optimisation possible but don't know where to start when it comes to distributing your masterpiece?
Then this tutorial is made for you! Preparing your application for distribution can be quite daunting when it comes to installations on your users' systems across a multitude of platforms. Marketplaces have become increasingly strict on their review process and the slight oversight can cause a resubmission of your binaries.
In this tutorial we will first look at installation locations for plugins, then jump into creating installers for Mac and Windows and finally end with marketplace submission best practices.
Installing a plugin is nothing more than a simple copy step of the plugin into the right folder location on the user's machine.
When distributing a plugin, it's important to understand the installation locations for different plugin wrappers out there. The following table lists the directories in which your installer must copy the files into, depending on the target OS:
| Plugin Type | Directory Type | Mac Installation Directory |
|---|---|---|
| VST | User | ~/Library/Audio/Plug-Ins/VST |
| System | Macintosh HD/Library/Audio/Plug-Ins/VST | |
| VST3 | User | ~/Library/Audio/Plug-Ins/VST3 |
| System | Macintosh HD/Library/Audio/Plug-Ins/VST3 | |
| AU | User | ~/Library/Audio/Plug-Ins/Components |
| System | Macintosh HD/Library/Audio/Plug-Ins/Components | |
| RTAS | System | Macintosh HD/Library/Application Support/Digidesign/Plug-Ins |
| AAX | System | Macintosh HD/Library/Application Support/Avid/Audio/Plug-Ins |
| Plugin Type | Directory Type | Windows Installation Directory |
|---|---|---|
| VST | Shared | C:\Program Files\VstPlugins |
| Shared | C:\Program Files\Steinberg\VstPlugins | |
| Shared | C:\Program Files\Common Files\VST2 | |
| Shared | C:\Program Files\Common Files\Steinberg\VST2 | |
| VST3 | Shared | C:\Program Files\Common Files\VST3 |
| RTAS | Shared | C:\Program Files\Common Files\Digidesign\DAE\Plug-Ins |
| AAX | Shared | C:\Program Files\Common Files\Avid\Audio\Plug-Ins |
It is generally recommended to install the plugins in the system folder or the "Common Files" directory as this is where most plugin manufacturers will install theirs and will have the benefit of making your plugin available to all users on the system. It will however require administrator permissions to perform the installation.
Although manually creating an installer is possible, there are many tools out there that can perform this task easily for you. One such example is the free software Packages which we will use in this section to create the Mac installer.
Install the software from the website and launch the application. You should come across a window prompting you for the type of project to create:
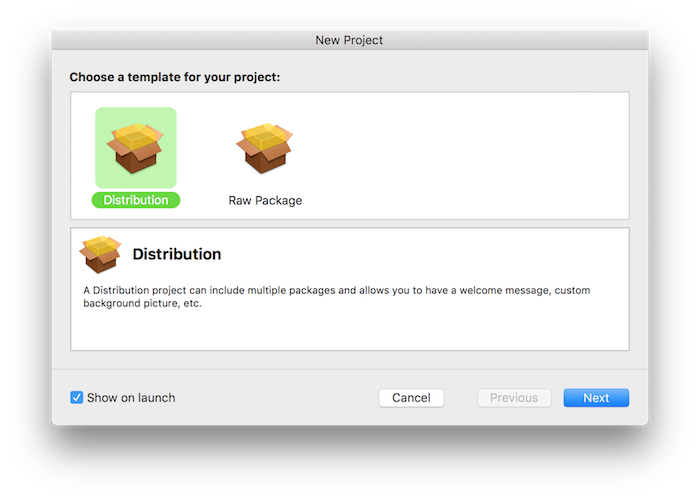
Select "Distribution" and click the next Next button. You may now choose a name and a location to save the project as well as the required resources on the following screen:
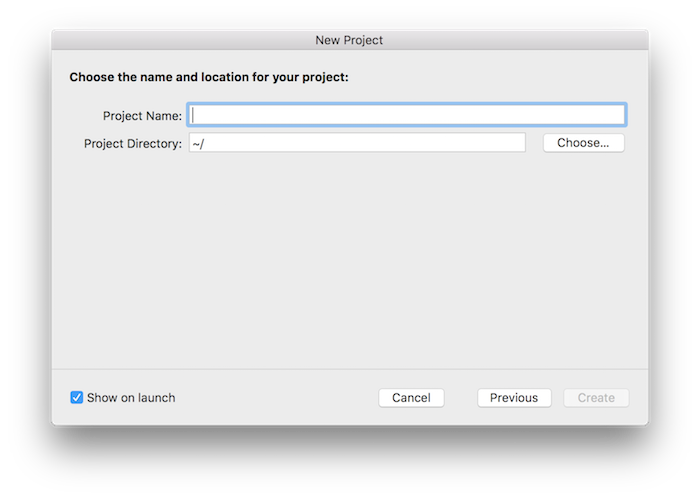
Click on Create to start assembling the installer. The main project window should open now.
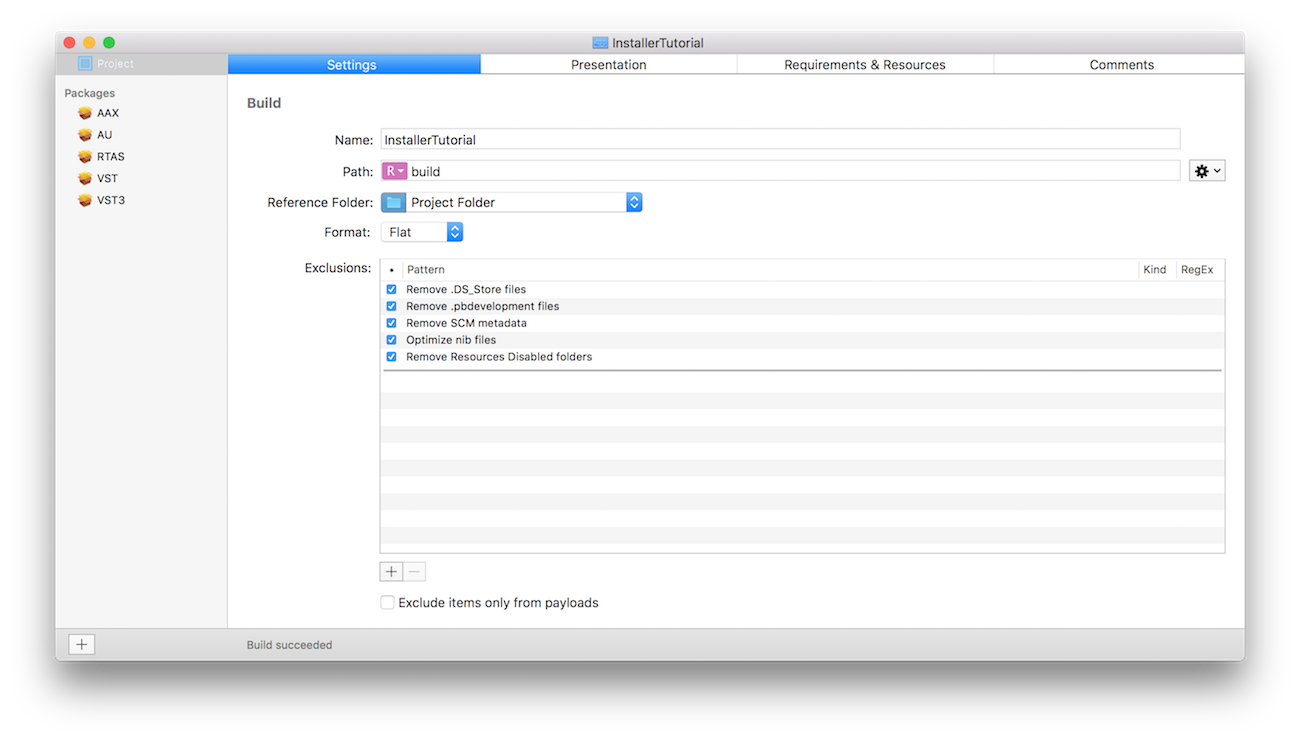
In the main window, start by adding packages by clicking on the + sign on the left panel for the number of plugin formats you want to install on the user's computer. For example to install VST/VST3/AU/RTAS/AAX, add five packages named accordingly with corresponding identifiers as shown in the following screenshot:
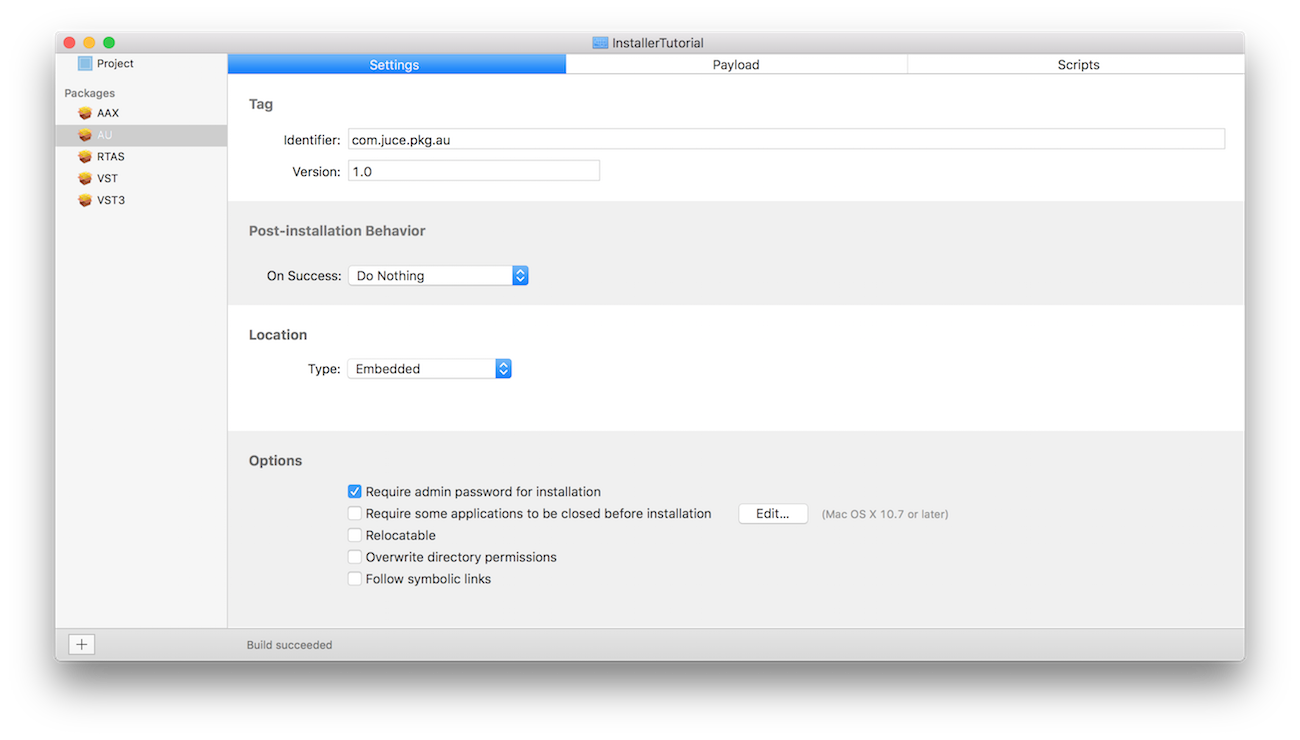
Next, select each package on the left panel and assign a unique identifier such as "com.yourcompany.pkg.format" and make sure that the "Require admin password for installation" checkbox is checked. (This is necessary to install plugins in the system folders as opposed to the user directories.)
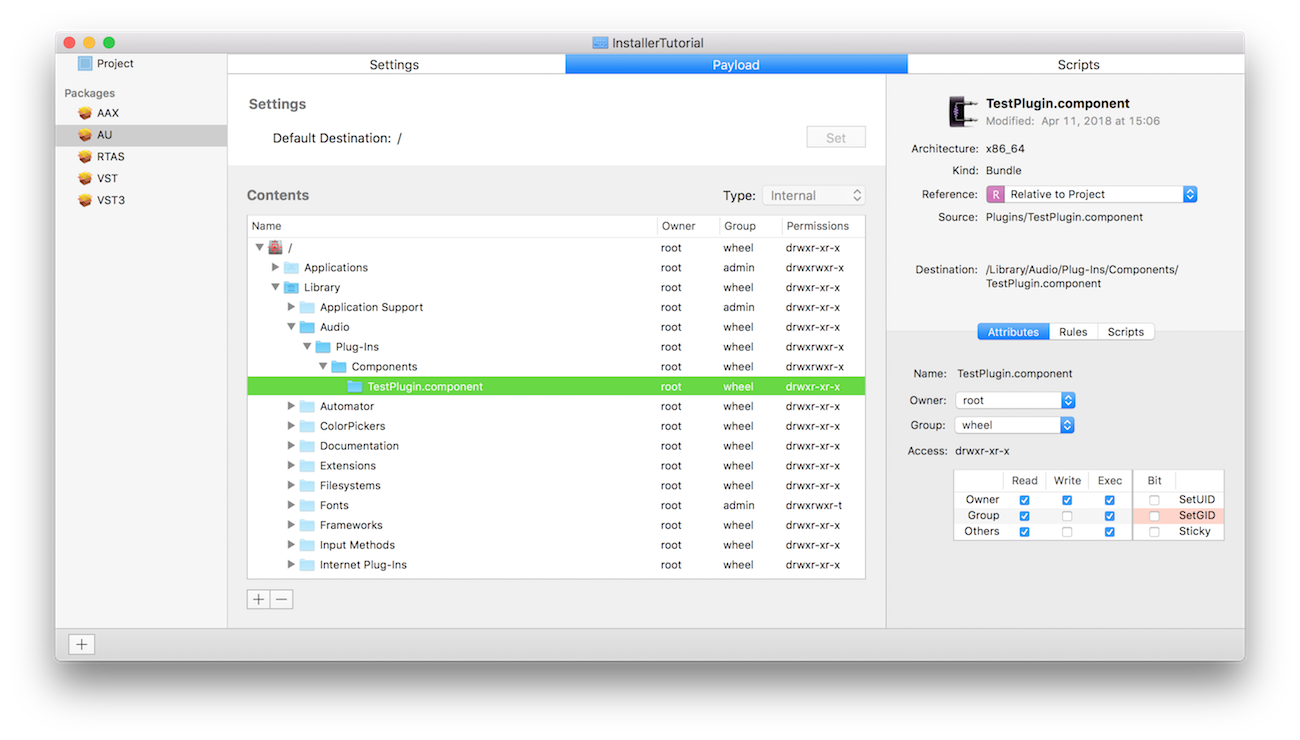
The next step consists in configuring the payload which essentially tells the installer the location to copy the plugins. Make sure that the plugins are copied somewhere in the project directory for easy referencing. Select the Payload tab at the top of the interface and navigate to the installation directories for the corresponding plugin format as described in the previous section of this tutorial. If the necessary folder structure is not appearing in the navigation window, you can add the missing folders using Hierarchy > New Folder and name them accordingly. Then add the plugin to the desired location by clicking on Hierarchy > Add Files... and select the previously-copied plugins from your project folder.
Now let's customise the messages displayed during the installation process by choosing the Project entry from the left panel and selecting the Presentation tab as shown here:
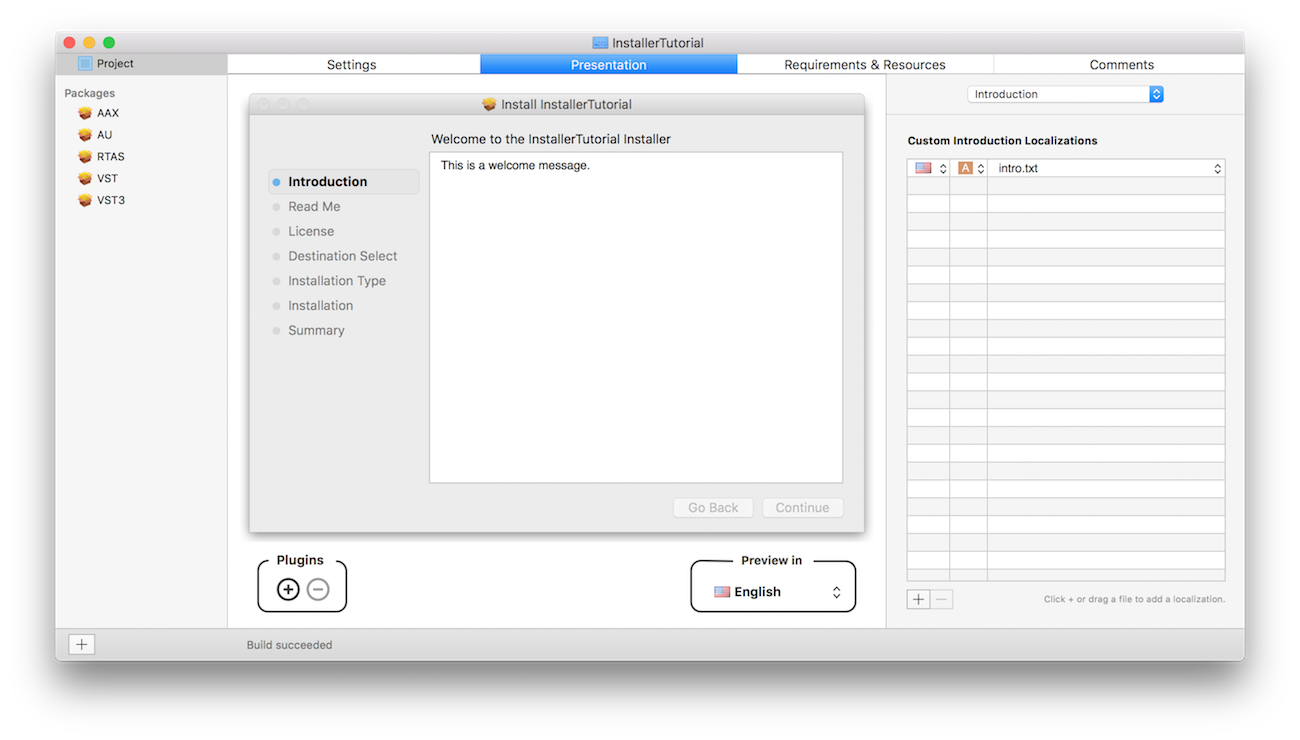
In this screen, you can specify a location for a text file that will be used to show a custom message on the introduction screen of the installer. Click on the + sign to add an entry in the right hand side table and select Choose... to specify the location of the text file. Make sure to copy the text file into the project folder for easy referencing. You can repeat the process for the "Read Me" and "License" steps by clicking on the respective labels on the preview interface.
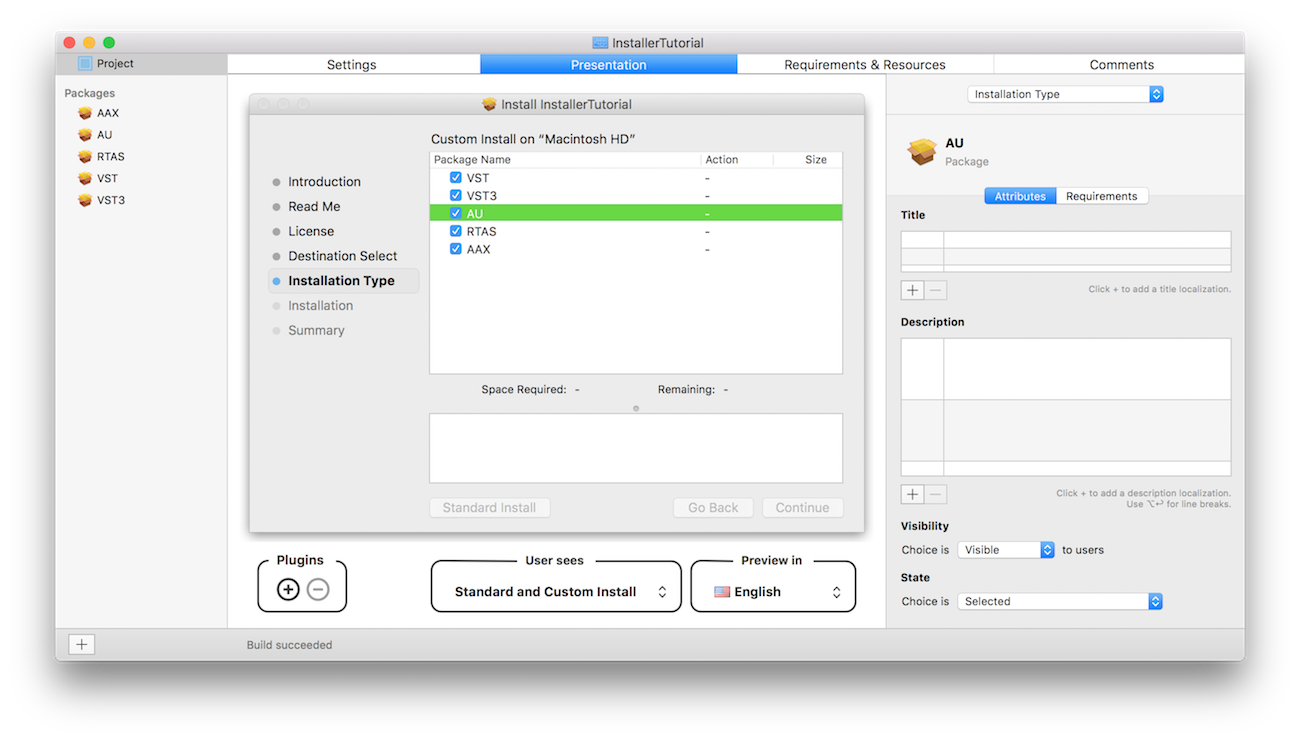
By selecting the "Installation Type" step of the interface we can modify the order of the package names to be installed, add descriptions to them and specify their default states as well as visibility.
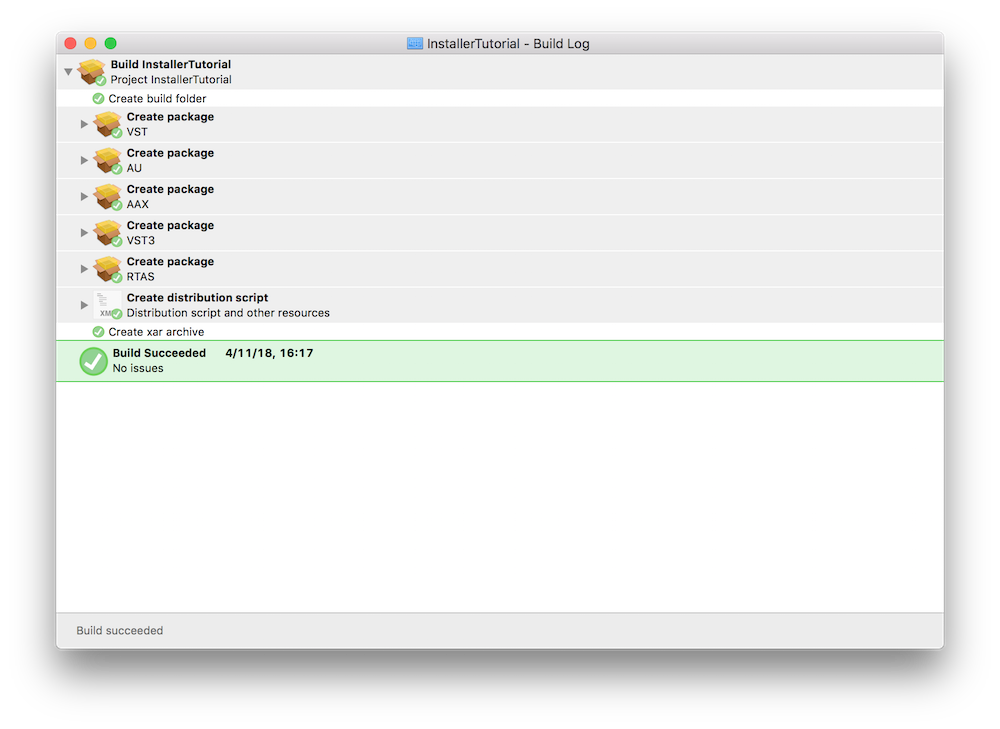
If you are happy with the distribution and package settings, we can proceed to the final stage. Hit File > Save then Build > Build to start building the installer. If the procedure succeeds without error, you should see a screen like the following:
This will create a folder named build in the project folder with a .pkg file with your project name. Double-click on it to test the installation process.
To provide a more comprehensive and customisable package for your users to download, it is generally best practice to create a disk image or .dmg file from the .pkg file we created in the previous step. We can easily do this using the built-in Mac application Disk Utility found in the Applications/Utilities folder.
With your .pkg file ready for use, create a folder with the .pkg file and any additional documents you wish to include such as a "License" or "Read Me" file. This folder will be used to create the disk image and will be the content shown when unpacked.
Launch Disk Utility and navigate to File > New Image > Image from Folder... from the menu items and select the folder you just created.
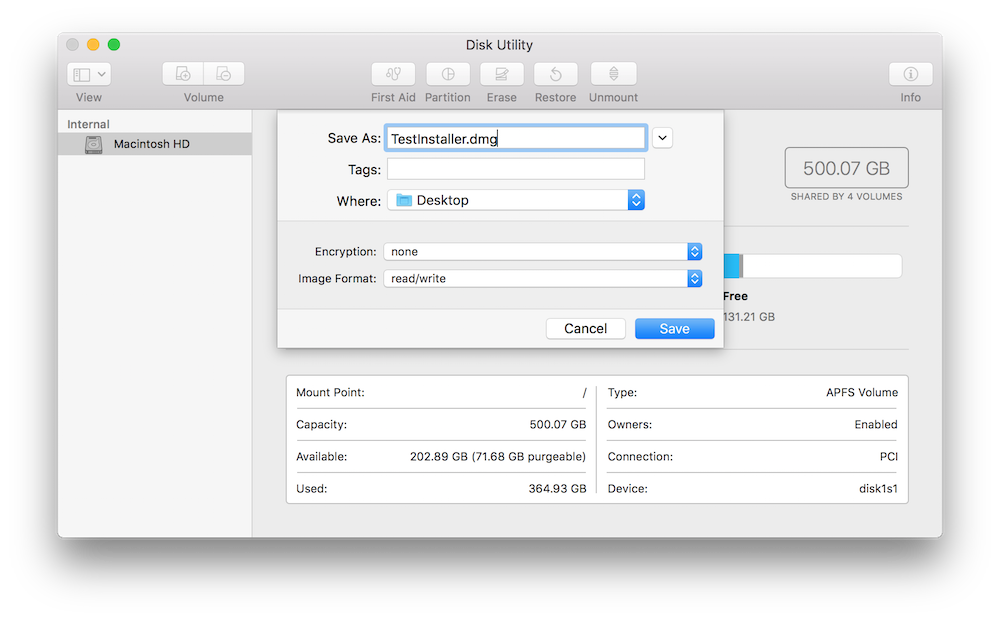
Save the new disk image as a .dmg extension and select the "read/write" option from the Image Format field. When hitting Save, this should generate a modifiable disk image that we can customise in the next step. Open the newly-created disk image and you should see the contents of the folder used for its creation. You can then move the items around and optionally choose a background image by opening the Finder view options by navigating to View > Show View Options from the menu items.

When you are happy with the appearance of your disk image, you can simply eject the image as the changes will be saved automatically. Return to Disk Utility and navigate to Images > Convert... and select the .dmg file. Give it the final name you want your users to see by appending the .dmg extension and select the "read-only" option from the Image Format field.

Hit Convert and you should end up with the final disk image that you can confidently distribute to customers.
Instead of creating a .pkg distribution and letting the installer perform all the copy/paste actions for plugin installation, we can also create a simpler version of the disk image that involves the user a bit more. This method is more error-prone as the installation is essentially done by the user but gives more control for installation locations.
A drag and drop installer functions in a way where it presents folder aliases to installation locations on the user's system and invites the user to drag and drop the plugins into the appropriate folders through these aliases.
To create this type of disk image, follow the same steps described in the previous section to create a disk image with a folder containing all the necessary plugins. Then open the disk image as before in order to customise its appearance.
Now navigate to the desired plugin installation locations on your system for the plugin formats you are supporting (use the table at the beginning of the tutorial as a reference), select the folder and create an alias by navigating to File > Make Alias from the menu item. The newly-created alias can then be moved into the disk image and the folder will still point to the location in the system.
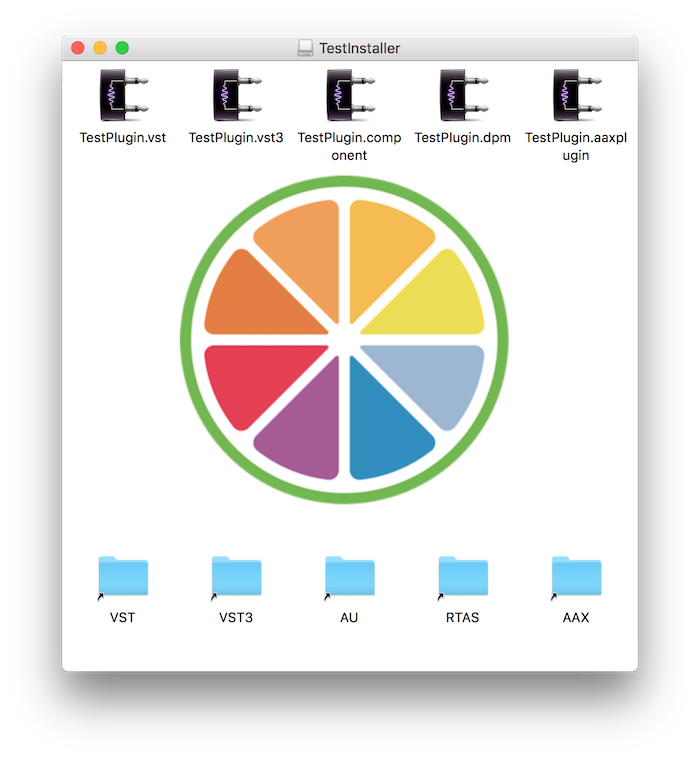
Now all the user has to do is drag and drop the plugins into the aliases in the disk image window to perform the installation.
Manually creating an installer can be tedious but thankfully there are many tools out there that can perform this task easily for you. One such example is the free software Inno Setup which we will use in this section to create the Windows installer.
Install the software from the website and launch the application. You should come across a window with a code editor where we can write our own installer script.
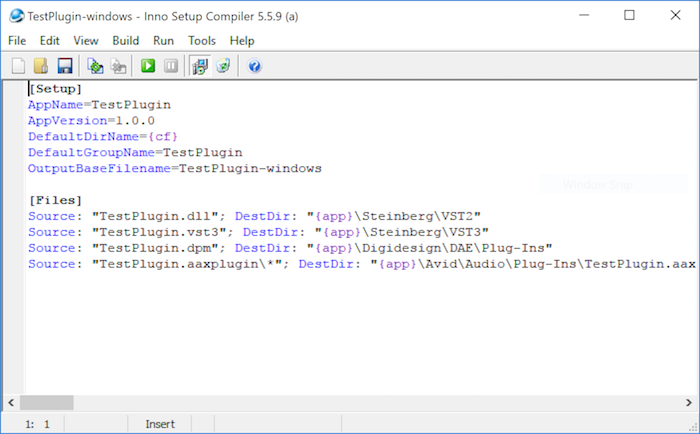
An example Inno Setup Script or .iss file to install VST/VST3/RTAS/AAX plugins on Windows would look something like this:
Here we have general properties that we can set in the [Setup] section of the script and plugins we want to copy in specific folders in the [Files] section.
Certain shotcuts for common Windows path locations are available in this syntax format by enclosing the desired variable with curly brackets.
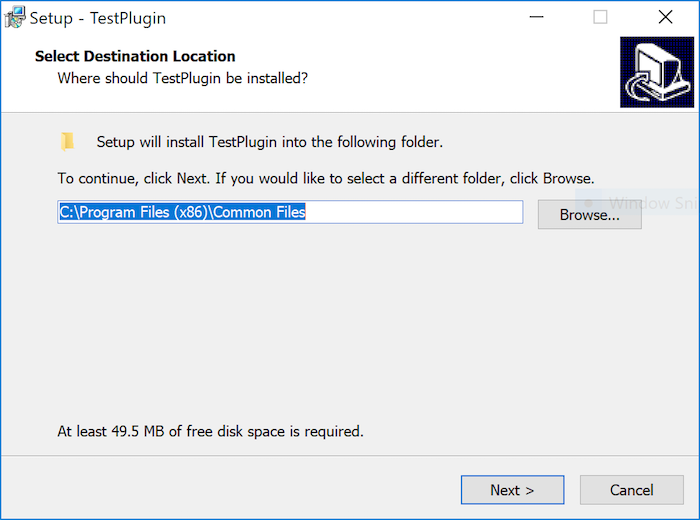
C:\Program Files.C:\Program Files\Common Files.In order to specify the default installation directory, we set the DefaultDirName variable to the "Common Files" directory but the user can still choose to install the plugins elsewhere as seen here when running the setup installer:
To instruct the installer to copy each individual plugin format into the right directory, specify the source file from the working directory as the Source and the desired installation location as the DestDir in the [Files] section as individual lines.
Notice that the AAX plugin is packaged as a folder contrary to other plugin formats and therefore the recursesubdirs flag has to be set to instruct all the directory content to be copied.
When you are happy with the configuration of the script, hit Build > Compile to create the installer. This will generate a Setup application in a directory named Output by default in your working directory. The name of this installer will be chosen from the OutputBaseFilename variable of the [Setup] section of the script.
To test the installer directly within Inno Setup, hit Run > Run after successful compilation to launch the installer just generated.
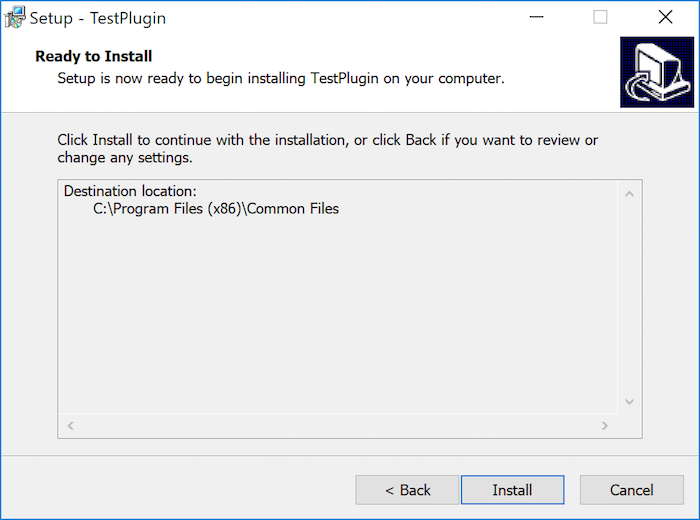
When the user hits the Install button in the final step of the setup installer, the plugins will be copied to the appropriate folders specified in the script:
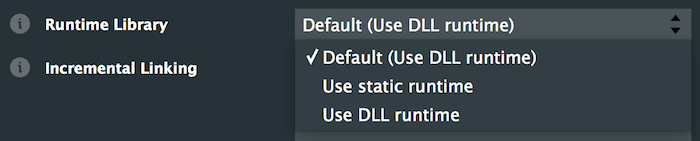
When building a plugin for Windows, JUCE will choose dynamic linking of runtime libraries by default. This universal runtime is now part of the system core from Windows 10 and therefore if your plugin only targets users with Windows 10, you should not encounter any problems. However, for Windows versions between 8.1 and Vista there is a chance that the universal runtime library is not installed on the customer's computer and the plugin will not work properly.
To remedy this problem, you can either prompt users to install the universal runtime through Windows Update themselves or supply an installer that downloads and installs this along with your plugin. Alternatively, you can also decide to build your plugins with static linking however, this is not recommended as Windows will restrict the number of plugins that can be loaded into a DAW to 64.
You can change the way JUCE links the runtime library in the Projucer here:
Depending on the store you want to distribute your app on, different types of requirements exist. However, there are general guidelines that you can follow to accelerate the review process on most of these stores and these include:
You can easily supply a descriptive text when using microphone or camera access from the Projucer exporter settings as shown below:


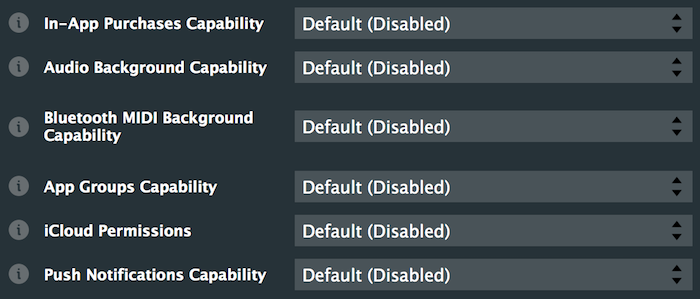
Ensure that you enlist all required Capabilities/Entitlements for macOS/iOS such as "In-App Purchases" or "Push Notifications" capability:
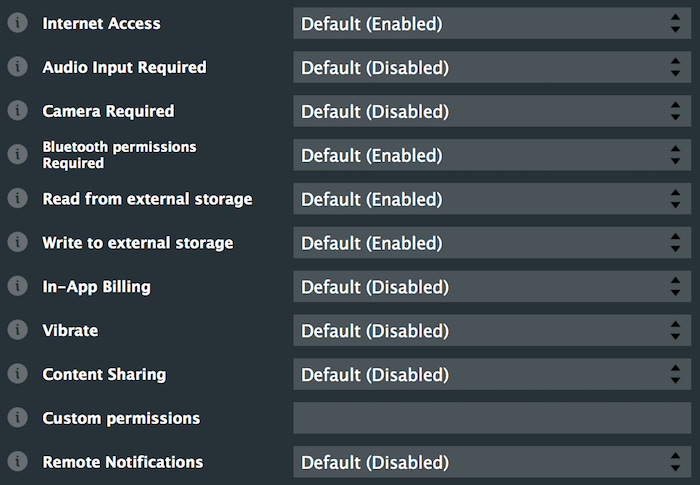
On Android that means listing all required functionalities in the Android manifest by enabling relevant Projucer fields:
Failing to provide correct image sizes for icons is a common reason for rejected apps. Ensure that you have all required resources such as small and large icons included:

In order to provide the best user experience, ensure that you configure the minimum OS version requirements, such as "iOS Deployment Target" for iOS and "Minimum SDK version" on Android.


Finally, since JUCE does not use native UIs for interface design, you also need to be careful with the appearance of your app. Make sure you do not try to mimic native designs as these will be rejected.
In this tutorial, we have learnt how to distribute an application or plugin. In particular, we have: